Recommended resources
The freely available resources this lesson will direct you to.
- How to Make a YouTube Banner (Step-by-Step CANVA TUTORIAL)www.youtube.com
- YouTube Banner Maker With Awesome Layoutswww.canva.com
- The Perfect YouTube Banner Size & Dimensions [2026 Updated]www.cloudanimations.com
- How To Make A YouTube Banner (That Looks GOOD On ALL Devices) STEP-by-STEP Tutorial In Canvawww.youtube.com
- How to Make a YouTube Banner Using Canva (Step-by-Step Tutorial)www.youtube.com
- How To Make A YouTube Banner With Canvatracigurney.com
Introduction
Welcome back! In the last lesson, you successfully set up the core of your YouTube channel by adding a profile picture and writing a compelling description. Your channel now has a clear identity and purpose, which is a fantastic foundation.
Today, we'll add the final, crucial piece of your channel's visual branding: the channel art, also known as the YouTube banner. This is the large graphic at the top of your channel page. A well-designed banner is like a billboard for your brand—it's the first major visual visitors see, instantly communicating your "cheap and cheerful lifestyle" niche and making your channel look polished and professional.
Our goal for this lesson is to create and upload branded YouTube channel art using Canva, ensuring it looks great on every device, from a phone to a TV.
1. Understanding Banner Dimensions and the "Safe Zone"
The biggest challenge with YouTube banners is that they are displayed at different sizes on different devices. A large TV will show the entire banner, while a smartphone will only show a small, narrow slice from the center.
To handle this, you must design your banner with a "safe zone". This is the central area where all your critical information—your channel name, photo, and tagline—must be placed to guarantee it's visible on all devices, especially mobile.
Here are the key dimensions to know:
- Full Banner Size: 2560 x 1440 pixels (for TVs)
- Text & Logo Safe Area: 1546 x 423 pixels (the area visible on mobile and desktop)
This template image clearly shows how these different areas relate to each other. Your entire focus will be on getting your key content inside that central pink rectangle.

2. Setting Up Your Banner in Canva
We'll be using Canva for this task, as it's a powerful and free tool that's perfect for beginners. The process is straightforward, and the video below will guide you through every step.
How To Make A YouTube Banner (That Looks GOOD On ALL Devices) STEP-by-STEP Tutorial In Canva
The video 'How To Make A YouTube Banner' by McKenna Beverly is a perfect step-by-step tutorial. It clearly explains how to use a template to ensure your design fits perfectly on all devices. We'll follow her process closely.
Watch the entire video (0:04 - 4:30) to get a full overview. We will break down the steps and execute them one by one after you've watched it. Pay special attention to how she imports and uses the sizing template at the beginning—this is the most important part!
Now that you have an overview, let's build your banner step-by-step.
3. Action Steps: Creating Your Banner
Open up Canva in another tab and follow along with these steps.
Action Step 1: Set Up Your Canvas and Safe Zone
First, you need to create your canvas and define the safe area, just as shown in the video.
- Log in to Canva and search for the "YouTube Banner" template. Choose a blank one to start from scratch.
- Go to Google Images and search for "YouTube banner template" (or "youtube channel art template").
- Download the template image, like the one we looked at earlier (LINK).
- Upload this template image to Canva and stretch it to fill the entire canvas. This layer will be your temporary guide.
- Lock the template layer so it doesn't move around accidentally.
You now have a perfect guide for your design.
Action Step 2: Design Your Banner
Now for the creative part! Remember to keep all important elements inside the central safe area of your template.
- Add a Background: Choose one of your brand colors for the background. You can keep it a solid color or add a simple, subtle texture. Your goal is "cheerful," so avoid anything too dark or cluttered.
- Add Your Channel Name: Using the text tool, add your channel name. Use the primary brand font you selected in Module 1. Make sure it's large, clear, and centered within the safe zone.
- Add Your Tagline: Below your name, add a short tagline that tells people what your channel is about. Examples for your niche could be:
- Living a Cheerful Life on a Budget
- Frugal Tips & Happy Living
- Save Money, Live Better
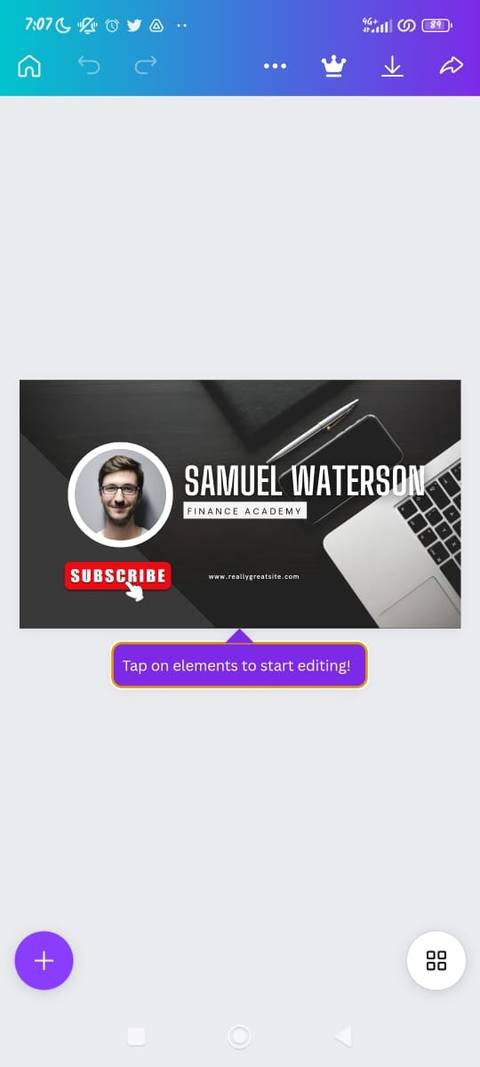
- Add a Photo of Yourself: Upload a high-quality, friendly photo. Using the same photo from your other profiles is a good idea for consistency. You can place it in a circular frame (search "frames" under Elements) or use a version with the background removed for a more professional look.
- (Optional) Add Other Info: You can add small text indicating your posting schedule (e.g., "New Videos Every Week") or list your main content topics ("Budgeting • DIY • Frugal Fun").
- (Optional) Add Social Icons: In the Elements tab, search for the icons of your other platforms (Instagram, TikTok, Pinterest) and place them with your username. This is a great way to cross-promote.
Action Step 3: Finalize and Download
Once your design is complete, you need to do a final check before downloading.
- Temporarily lower the opacity of your design elements or move the template layer to the front to ensure everything important is perfectly aligned within the safe area.
- Delete the template image layer. This is a critical step! Do not leave it in the final design.
- Click the Share button in the top-right corner.
- Select Download.
- Choose PNG as the file type. This will give you the best quality.
- Click Download.
You now have your professional banner file saved and ready for YouTube!
4. Uploading Your Banner to YouTube
The final step is to upload your new creation to your channel.
How to Make a YouTube Banner: A Complete Guide
For a quick text reference on the upload process, this guide from OBSBOT.com outlines the steps clearly.
Read the 5 steps in 'Part 5: How to Add a YouTube Banner'. This will walk you through navigating YouTube Studio to the correct section.
Action Step 4: Upload and Publish
- Go to your YouTube Studio.
- In the left-hand menu, click Customization.
- Select the Branding tab.
- In the "Banner image" section, click UPLOAD and select the PNG file you just downloaded from Canva.
- YouTube will show you a preview of how your banner will appear on TV, desktop, and mobile. Crucially, check the mobile view. It should perfectly frame the safe area of your design.
- If it looks good, click DONE.
- Finally, click the PUBLISH button in the top-right corner of the page.
Go to your channel's homepage to see your new banner live. It should give your channel a complete and professional look!
Conclusion
Excellent work! You have now fully branded your YouTube channel's visual appearance. By creating and uploading a professional banner, you've made your channel more inviting and immediately established what your content is all about.
Key Takeaways:
- YouTube banners display differently across devices, making the central safe zone the most important area of your design.
- Using a template overlay in Canva is the easiest way for a beginner to ensure all key elements are visible on mobile.
- Your banner should be consistent with your brand, using your chosen colors, fonts, and a friendly photo.
- Always download your banner as a PNG file for the highest quality and double-check the mobile preview before publishing on YouTube.
Preview of the Next Lesson:
Your social media profiles are now set up and visually branded. The next step is to make it easy for your future audience to find all of your content. In the next lesson, we will connect a link-in-bio tool (e.g., Linktree, Beacons) to consolidate your platform links, creating a central hub for your entire online presence.