Recommended resources
The freely available resources this lesson will direct you to.
- Best Link in Bio Tool To Make Money Online (Beacons.ai Tutorial)www.youtube.com
- How to Make a Linktree on TikTokwww.youtube.com
- Beacons AI Explained: Features, Pricing, Pros & Cons for Creatorsdigitalsoftwarelabs.com
- Linktree Tutorial 2024 | Full Guide For Beginnerswww.youtube.com
- How To Use Linktree | Promote Your Links in One Place (Linktree Tutorial)www.youtube.com
- What Is Linktree + 8 Steps to Set It Up - HubSpot Blogblog.hubspot.com
Introduction
Hello and welcome back! In our last few lessons, we've been busy building the foundations of your online presence. You've set up and optimized your profiles on Instagram, TikTok, X, Pinterest, and YouTube, culminating in creating a professional-looking banner for your YouTube channel. Each platform is now a distinct outpost for your "cheap and cheerful lifestyle" brand.
The challenge now is that your audience on one platform (like TikTok) might not know how to find you on another (like YouTube). Most social media platforms only give you space for one clickable link in your profile bio. This creates a bottleneck. How do you direct your followers to all your amazing content?
This is where a "link-in-bio" tool comes in. It allows you to create a simple, single landing page that houses all your important links. Think of it as a digital hub or a mini-website for your brand.
Today's learning outcome is to connect a link-in-bio tool to consolidate your platform links. By the end of this lesson, you will have a single, shareable URL that directs your audience to every place you exist online.
1. Why You Need a Link-in-Bio Tool
As a content creator, you want to make it as easy as possible for your audience to follow you everywhere. If someone discovers your money-saving tips on TikTok, you want them to be able to find your in-depth budget videos on YouTube with a single click. A link-in-bio tool solves this problem.
To get a quick overview of what these tools do, let's watch the introduction to this helpful video.
How To Use Linktree | Promote Your Links in One Place (Linktree Tutorial)
The video 'How To Use Linktree' from the Stewart Gauld channel provides a clear and concise explanation of what a link-in-bio tool is and why it's so useful for creators.
Watch from the beginning until 0:39. Focus on how the video describes Linktree as a way to give your audience access to all your important resources from one convenient destination.
As the video explains, this one link becomes the gateway to your entire online world, directing traffic to the places that matter most.
2. Choosing Your Tool: Linktree vs. Beacons
The learning outcome mentioned two popular tools: Linktree and Beacons. Both are excellent and offer free plans that are perfect for getting started. Your choice depends on whether you prefer simplicity or a wider range of features from the get-go.
Linktree
This is the most well-known and widely used link-in-bio tool. It's incredibly straightforward and focuses on one thing: creating a clean list of your important links. For a beginner, its simplicity is a major advantage.
Beacons
This is a more modern, feature-rich alternative. Beacons uses AI to help you build your page and includes more advanced "blocks" for things like embedding videos, email signups, and even setting up a small digital store.
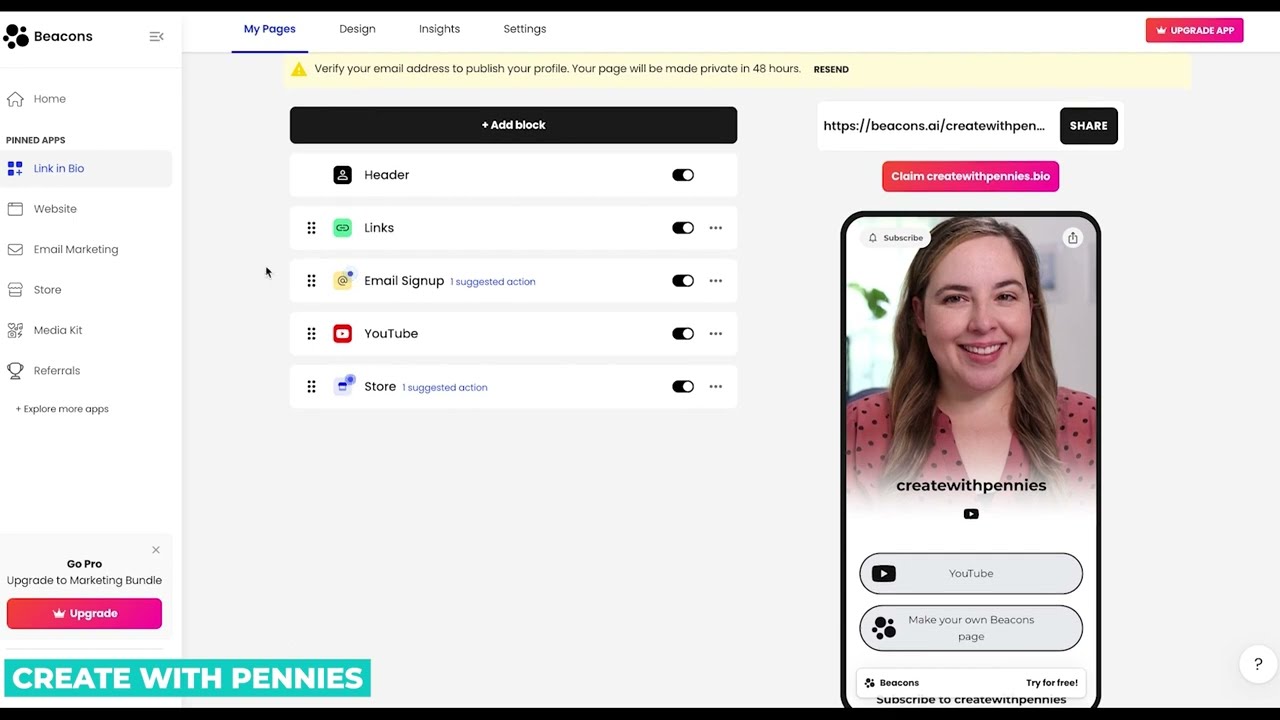
Here’s a quick comparison of their free plans:
| Feature | Linktree (Free) | Beacons (Free) |
|---|---|---|
| Ease of Use | Very simple, minimal learning curve. | Easy, with AI to help with setup. |
| Core Function | Add unlimited links. | Add links and other content "blocks". |
| Customization | Basic themes, limited fonts/colors. | More advanced customization of themes and layouts. |
| Monetization | Collect tips and donations. | Sell digital products (9% fee), collect donations. |
| Branding | Linktree logo is visible. | Beacons logo is visible. |
Recommendation for You:
Given your goal to start from "A to Z" with a practical, step-by-step approach, I recommend starting with Linktree. It is extremely easy to set up and perfectly serves the immediate need of consolidating your links. The skills you learn are transferable, and you can always switch to a more advanced tool like Beacons later as your brand grows.
The rest of this lesson will provide action steps for setting up Linktree.
3. Action Steps: Setting Up Your Linktree
We are now going to build your Linktree page. I encourage you to open Linktree in a new browser tab and follow along. The video tutorial below will be our primary guide, as it walks through the entire process on both desktop and mobile.
How To Use Linktree | Promote Your Links in One Place (Linktree Tutorial)
We'll use the same 'How To Use Linktree' video. It provides a complete, step-by-step walkthrough of creating your account, adding links, and customizing the appearance.
Keep this video open. We will go through it section by section. The most relevant parts for our setup are from 01:00 to 11:35.
Action Step 1: Create Your Free Account
First, let's get you signed up.
- Watch the video segment from 01:00 to 05:52. This covers the entire signup process.
- Go to
linktr.eeand click "Sign up free". - Choose your username. This is important! Use the same username you chose for your social media profiles to maintain brand consistency (e.g.,
linktr.ee/yourbrandname). - Enter your email and create a password.
- When asked for categories, you can select something like "Creative" or "Business," then perhaps "Personal" or "Community & Non-Profit".
- On the pricing page, scroll down and select the Free plan.
- Finally, go to your email inbox and click the verification link.
You now have an active Linktree account!
Action Step 2: Add Your Social Media Links
Now, let's populate your page with links to all your profiles.
- Watch the video segment from 06:01 to 07:34. This demonstrates how to add new links.
- Gather the URLs for your Instagram, TikTok, YouTube, X, and Pinterest profiles.
- Back in your Linktree dashboard, click "Add link".
- Paste the URL for your first profile (e.g., your YouTube channel).
- Click on the pencil icon next to "Title" and give it a clear name, like "My YouTube Channel" or "Watch My Videos on YouTube".
- Repeat this process for all five of your social media profiles. You can reorder them by dragging the three dots on the left of each link box. I suggest putting your primary platform at the top.
Action Step 3: Customize Your Page's Appearance
Let's make this page look like it's part of your brand.
- Watch the video segment from 07:34 to 09:00. This covers the "Appearance" tab.
- Click on the Appearance tab at the top of your Linktree dashboard.
- Profile Image: Click "Pick an image" and upload the same profile picture you're using across all your social accounts for consistency.
- Bio: Write a short bio. You can reuse the one you wrote for your other profiles.
- Themes: Scroll down to the themes and choose one that aligns with the primary and secondary brand colors you selected in Module 1. The free options are limited, but you should be able to find a "cheerful" and clean look.
As you build, remember this advice from the HubSpot article, "What Is Linktree."
This article offers some excellent best practices for using Linktree effectively. It's worth reading these tips to avoid common mistakes.
Read the section titled 'Linktree Tips to Thrive'. Pay close attention to the advice to 'Only include the most important links' to avoid overwhelming your audience.
For now, your five social profiles are the most important links. As your brand grows, you'll add links to blog posts, affiliate products, or your own digital goods.
Action Step 4: Add Social Icons
Linktree also lets you add small, tappable icons for your social profiles at the bottom of your page. This is a cleaner way to present them than having them in your main list of links.
- Watch the video segment from 09:33 to 10:02 which shows where to find this setting.
- Click on the Settings tab.
- Scroll down to Social Icons.
- Add your username for each platform you want to display as an icon.
- You can choose to display the icons at the top or bottom of your page. The bottom is usually less cluttered.
Action Step 5: Get Your Shareable Link
This is the final and most important step. You need to get the single URL that you will share in all your bios.
- Watch the video segment from 10:08 to 11:35.
- In the top right of your Linktree dashboard, you will see your URL (e.g.,
linktr.ee/yourbrandname). - Click the Share button.
- Click Copy to copy your unique Linktree URL to your clipboard.
- Paste this link somewhere safe, like a notes app or a document. This is your new "master link"!
Conclusion
Congratulations! You have successfully created a central hub for your entire online brand. By setting up a link-in-bio tool, you've made it incredibly easy for your audience to find you across all platforms, which is a critical step in growing your community.
Key Takeaways:
- A link-in-bio tool like Linktree solves the "one link" problem on social media.
- Your Linktree username should be consistent with your other social media handles.
- Your page should be populated with your most important links and styled with your brand colors and profile picture.
- You now have a single, shareable "master link" that connects your entire ecosystem.
Preview of the Next Lesson:
Your Linktree page is ready, but it won't do any good until you put it where people can find it. In the next lesson, we will complete this module by taking your new Linktree URL and adding it to the bio section of your Instagram, TikTok, X, Pinterest, and YouTube profiles, officially tying everything together.