Recommended resources
The freely available resources this lesson will direct you to.
Introduction
Hello! In our last lesson, you learned how to compose a visually balanced photo using the Rule of Thirds. You now have a solid foundation for capturing images that are naturally pleasing to the eye.
But taking the photo is just the first half of the process. The second half, and the part that truly makes an image stand out on a social media feed, is editing. A few thoughtful adjustments can transform a good photo into a great one.
In this lesson, you will learn how to use a free photo editing app (Snapseed) to adjust the brightness, contrast, and color of an image. This skill is essential for developing a consistent visual style and making your "cheap and cheerful" content look polished and professional, no matter how simple the subject. We'll focus on practical steps you can apply to every photo you create.
1. Getting Set Up with Snapseed
First things first, you'll need the app. Snapseed is a powerful, professional-level photo editor owned by Google, and it's completely free with no hidden costs.
This brief guide from Serena Lissy provides direct links to download Snapseed for your phone.
Please read the section 'Download The Snapseed Photography App' and install Snapseed on your smartphone.
Once you have the app installed, open it up. You'll see a large plus (+) button to open a photo from your phone's library. For this lesson, please open one of the photos you took for the "Three-Photo Challenge" in our previous lesson. This will give you a direct sense of how editing builds upon good composition.
After opening your photo, you'll see two main options at the bottom: Looks and Tools.
- Looks: These are one-tap filters, similar to what you see on Instagram. They can be a fun starting point, but they don't offer much control.
- Tools: This is where the real power is. Here you can make precise, manual adjustments to your image. We will be spending our time in the Tools section.
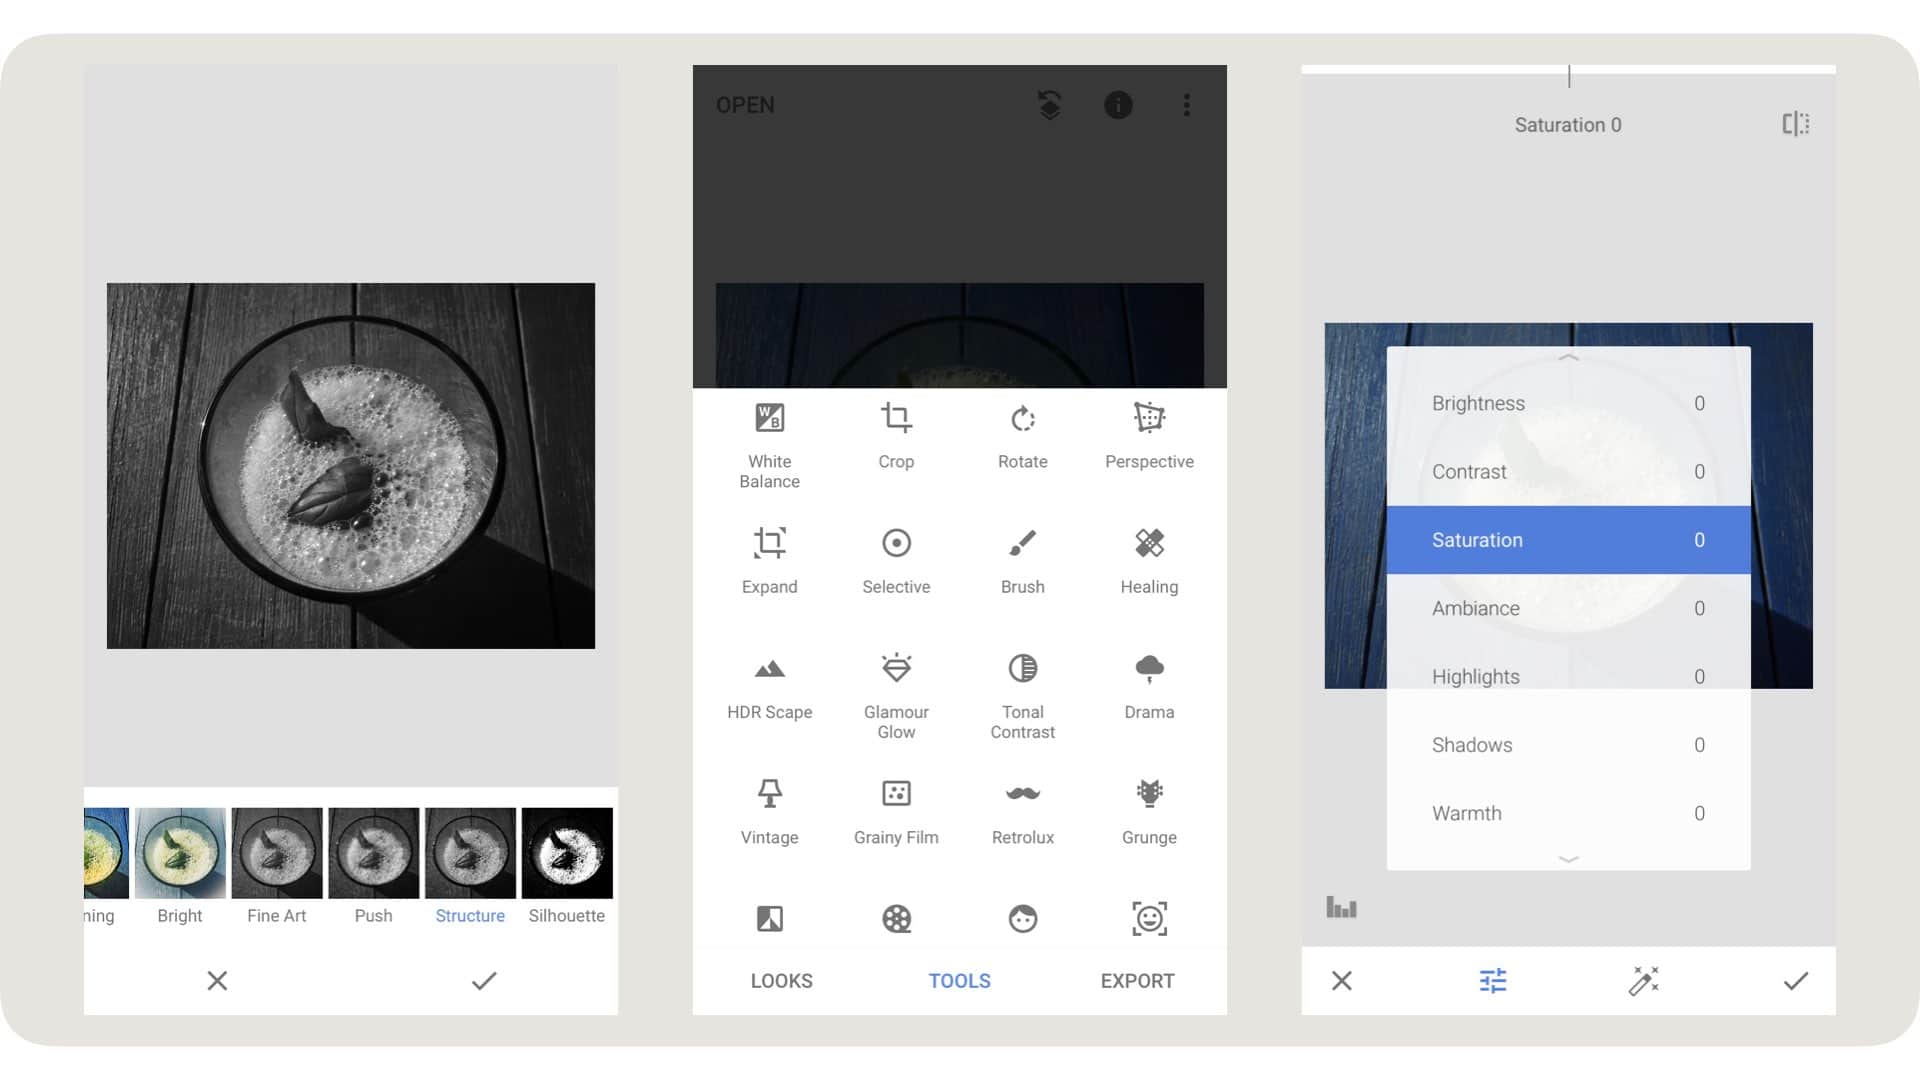
2. The Core Adjustments: The "Tune Image" Tool
The most important tool in Snapseed for basic enhancements is Tune Image. This single tool allows you to control brightness, contrast, and color—the exact skills for this lesson.
Tap Tools, then select Tune Image (it's usually the first one). The video below provides a fantastic walkthrough of how this tool works and how to navigate its menu.
How to Use Snapseed on iPhone - Snapseed Tutorial for Beginners
The 'How to Use Snapseed on iPhone' video by TechZG Guides gives a very clear, step-by-step demonstration of the Tune Image tool.
Watch from 03:28 to 07:50. This is the core of our lesson. Pay close attention to how you can: Press and hold the screen, then slide your finger up and down to select an adjustment (like Brightness or Contrast). Slide your finger left and right to change the strength of that adjustment. Tap the icon in the top-right corner to see a before-and-after comparison.
Let's break down the key adjustments from that video that you'll use most often:
- Brightness: This makes the whole image lighter or darker. Use this if your photo is a bit too dark (underexposed) or too bright (overexposed).
- Contrast: This adjusts the difference between the light and dark parts of your image. Increasing contrast makes an image "pop" by making whites brighter and blacks darker. This is one of the most effective ways to add impact to a photo.
- Saturation: This controls the intensity of the colors. A little boost can make colors more vibrant and appealing, which is great for your "cheerful" theme.
- Warmth: This adjusts the overall color tone. Sliding right makes the photo warmer (more orange/yellow), creating a cozy or golden-hour feel. Sliding left makes it cooler (more blue), which can feel clean, modern, or a bit moody. This is also called adjusting the "white balance."
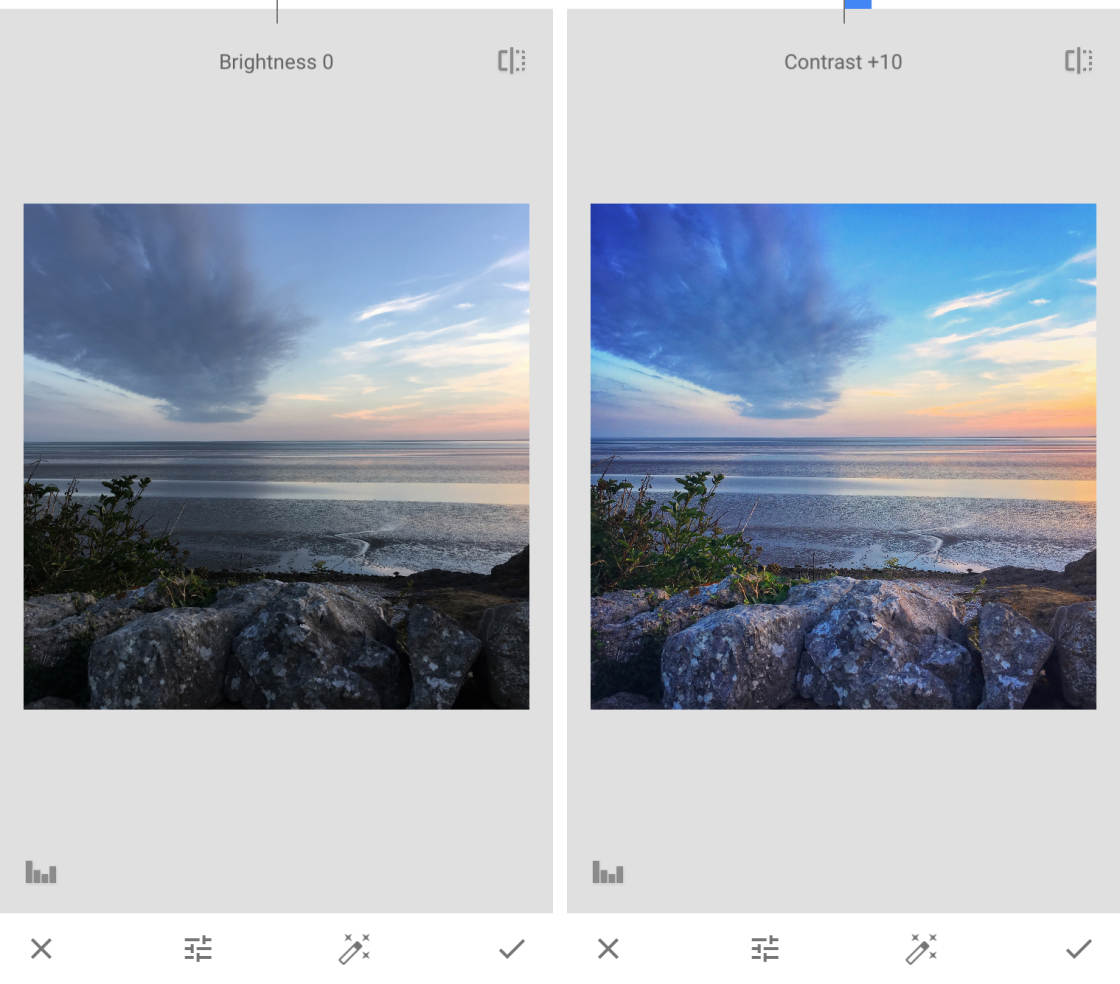
For a quick summary you can reference later, the article "Complete Guide To Using Snapseed" provides an excellent text-based overview of these same tools.
Complete Guide To Using Snapseed To Edit Your iPhone Photos
This article from iPhone Photography School is a great written guide to the Tune Image tool that you can refer back to anytime.
Read section '2.1 Tune Image'. It lists and explains each of the main adjustments we just covered, serving as a helpful cheat sheet.
3. Taking Control of Color: The "Selective" Tool
Sometimes, you don't want to make the entire photo more colorful. Maybe you just want the red of a strawberry to pop, or the green of a houseplant to look more lively. This is where selective editing comes in.
The Selective tool lets you pinpoint a specific color in your photo and adjust only that color.
Snapseed Beginner Tutorial | Android and iPhone
The 'Snapseed Beginner Tutorial' by Dee Nimmin has an excellent, quick demonstration of the Selective tool using food, which is perfect for your lifestyle niche.
Watch from 06:03 to 07:42. Notice how he taps on a specific color (like the red tomato or green broccoli) and then increases the saturation for just that area. This is a pro-level technique that's surprisingly easy to do.
Using the Selective tool is a fantastic way to guide your viewer's eye and make specific parts of your "cheap and cheerful" finds look extra appealing without making the whole photo look unnatural.
4. The Golden Rule of Editing: Don't Overdo It
With all these powerful tools, it's easy to get carried away. The goal of editing is to enhance reality, not create something that looks fake or "photoshopped." A subtle touch goes a long way.
Snapseed Beginner Tutorial | Android and iPhone
Dee Nimmin gives a crucial piece of advice at the end of his tutorial that every beginner needs to hear.
Watch this short clip from 07:58 to 08:32. His warning about overusing saturation and ambiance is incredibly important. You want your photos to look alive and eye-catching, not bizarre and fake.
5. Your Action Step: Edit Your Photo
Now it's your turn to put it all together. Using the photo you opened earlier, follow these steps to create your first edited image.
- Open the Tune Image Tool: Tap
Tools > Tune Image. - Adjust Brightness & Contrast:
- Slightly increase Brightness if the photo is dark.
- Increase Contrast a little to make the image pop. Try a value between +10 and +25 to start.
- Adjust Color:
- Increase Saturation to make the colors more vibrant. Be careful not to overdo it! A little goes a long way (+5 to +20 is often enough).
- Adjust Warmth. Does the photo feel better a little warmer or a little cooler? Trust your eye.
- (Optional) Use the Selective Tool:
- Go back to the main menu and select
Tools > Selective. - Tap on a key color in your image that you want to highlight.
- Pinch with two fingers to change the size of the selected area.
- Slide up to select 'Saturation' and slide right to give that one color a little extra boost.
- Go back to the main menu and select
- Save Your Work: Once you're happy, it's time to save. Tap Export in the bottom-right corner.
- You will see a few options. The best practice is to choose Save a Copy (on iOS) or Export (on Android). This creates a new, edited version of your photo and leaves your original, unedited photo untouched.
Conclusion
Congratulations! You have now completed the entire basic workflow for creating a stunning static image: you know how to find good light, compose a balanced shot, and now, edit it for maximum impact. These foundational skills will serve you every single day as a content creator.
Key Takeaways:
- Snapseed is a powerful, free app for photo editing.
- The Tune Image tool is your go-to for adjusting Brightness, Contrast, Saturation (color vibrancy), and Warmth (color tone).
- The Selective tool gives you precise control to enhance specific colors within your photo.
- The most professional edits are often subtle. Don't overdo it!
- Always Save a Copy or Export your edits to keep your original photo safe.
Preview of the Next Lesson:
You've mastered editing photos. But what about posts that are more text-based, like a list of money-saving tips or an inspiring quote? In our next lesson, we will move from photography to graphic design and learn how to create a branded graphic post using Canva with consistent fonts and colors.