
Hello. In the previous lesson, you learned that balance is an active process of combining visual, vestibular, and somatosensory information. This lesson turns that model into a deliberately modest practice: maintaining a stable stance, then moving your weight in a controlled way while keeping reliable support available.
The aim is not to see how little support you can use, or how long you can balance. It is to learn what a well-controlled weight shift feels like within your current rehabilitation restrictions: no impact, no pivots or knee twisting, and no pushing through pain or instability. A 10–15 minute practice segment is included below.
Balance practice is a quality task, not a repetition task
A weight shift is the controlled movement of your body mass from one foot toward the other while your feet stay planted. It is a basic ingredient of walking, stepping around an obstacle, climbing stairs, and, eventually, many judo movements. Before one foot can move freely, the other leg must accept more of your weight.
The important phrase is more of your weight, not necessarily all of it. Some balance resources demonstrate a complete transfer and lifting the other foot. That may be a useful later version, especially because you are already cleared for single-leg standing, but it is not required for today’s drill. Your existing physiotherapy instructions set the acceptable range.
A stance variation changes the shape of your base of support: the area under and between the parts of your feet in contact with the floor. It changes the directions in which sway is easier or harder to control.
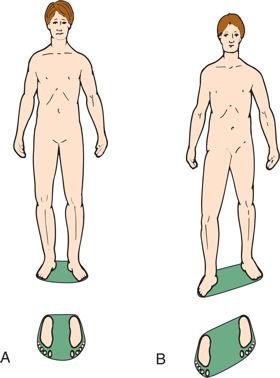
A wider stance usually offers more room for side-to-side corrections. A narrower or staggered stance asks for more precise control. Neither is morally “better”: the appropriate stance is the one in which you can practise with good form and enough attention to learn from the movement.
The NHS Tayside guidance provides the central principle for this lesson: practise near a secure support, choose a safe version, and prioritise movement quality over quantity.
Read the relevant guidance from NHS Tayside before practising. It gives concise safety principles, shows how hand support and foot position can be modified, and describes the side-to-side hip sway used in the drill.
In “Maintain your safety” and “General exercise advice,” read the safety and quality guidance. Notice the emphasis on stable support, short practice, rest, and avoiding fatigue. Then read “Static balance exercises,” beginning the supported stance instructions. For this lesson, treat reducing hand support as information about a possible future progression, not an instruction to do so now. Finally, under “Dynamic Balance Exercises,” read the controlled movement examples. Focus especially on the hip-sway description; do not add the walking, heel-to-toe walking, or head-turn tasks to today’s practice.
Agree on one movement-quality criterion
For balance practice to teach your nervous system something useful, you need a definition of a successful repetition. Otherwise it is easy to count repetitions while gradually compensating through gripping, rushing, twisting, or tolerating symptoms.
For this lesson, use the following criterion:
Controlled and recoverable: I can shift, pause, and return to the centre without a sudden grab for support, a foot adjustment, knee twist, or an increase in pain or instability.
If your physiotherapist has given you a more specific criterion, use theirs in preference to this one.
This is deliberately not a criterion about holding for a certain number of seconds or using minimal hand support. Both hands on a counter can still provide excellent balance practice. Support allows you to explore the movement more completely while retaining a safe recovery option.
Use this short observational checklist while practising:
| What to notice | A controlled, recoverable version |
|---|---|
| Feet | Both remain planted and pointing in their chosen direction. |
| Knee and hip | The knee follows the line of the foot; there is no pivoting or twisting through the knee. |
| Body movement | The pelvis and trunk travel smoothly over the weight-bearing foot rather than the upper body simply leaning sideways. |
| Hands | They remain available for safety. They may assist as much as needed, but you are not suddenly hauling yourself upright. |
| Symptoms | No sharp pain, giving way, catching, or escalating discomfort. Mild ordinary effort is different from a warning signal. |
A little sway is not failure. Even in a quiet stance, your body makes small corrections continuously. The question is whether the correction remains calm and manageable.
If you find yourself gripping hard, shifting abruptly, moving faster to “get it over with,” or repeatedly needing to reposition a foot, that is useful feedback. The task is currently too difficult in that form. Return to a wider stance, more hand contact, a smaller shift, or a rest.
Set up a safe practice environment
Use the same stable, predictable conditions described in the previous lesson:
- Stand at a firm kitchen counter or similarly solid support, not beside a rolling chair or an unstable table.
- Use the footwear, orthotic support, or barefoot setup that your physiotherapist has approved for rehabilitation work.
- Keep the floor dry and clear, with no rugs, pets, bags, or furniture edges in the movement area.
- Look at a stable point ahead at approximately eye height.
- Keep both hands on the support unless your physiotherapist has specifically approved a lighter-contact version.
- Do not close your eyes, turn your head, stand on a soft or uneven surface, jump, or pivot.
The balance-exercise booklet from the Community Falls Team describes a graded hand-support scale, from two hands to no hands. This is a sensible way clinicians sometimes organise progression, but it does not mean you need to work through those levels now. For the present lesson, your hand support is a safety feature, not a challenge variable.
A brief demonstration may help you see the overall direction of the shift. The instructor shows a complete transfer and also demonstrates less hand contact; regard those as demonstrations, not as instructions to reduce your support.
Seniors: 30 Miniute Balance Training Class
Watch “Seniors: 30 Minute Balance Training Class” by Balance Builders with Doug Weiss for a visual demonstration of a slow, supported side-to-side weight shift.
Watch the weight shift demonstration. Notice the slow pacing, the transfer of the pelvis over each leg, and the reminder to rest rather than practising through fatigue. The video includes a hands-free option and a fuller weight transfer; retain both hands on support and stay within your clinician-approved range.
Your 10–15 minute supported practice
Do this segment only on a day when your knee feels consistent with the parameters of your rehabilitation plan. If your physiotherapist has already prescribed a weight-shifting drill, use their dosage and range rather than the suggested amounts below.
Part 1: Find your centred stance
Stand facing the counter with feet about hip width apart and both hands resting on the support. Take a few calm breaths while looking at your fixed point.
Notice the pressure under both feet. There is no need to make it perfectly equal; simply recognise your ordinary starting position. Ask yourself:
- Can I feel heel and forefoot contact on both sides?
- Are my knees and toes facing comfortably in the same general direction?
- Could I pause here without needing to move a foot?
This is your home position. Return to it whenever you need to reset.
Part 2: Controlled side-to-side weight shifts
Keeping both feet planted, slowly allow the pelvis and trunk to travel a small distance toward the right foot. Think of bringing your body over the right foot, not merely tipping your shoulders rightward.
Pause briefly in a comfortable position, then return to the middle. Repeat toward the left. Move slowly enough that you could stop at any point.
Begin with roughly four unhurried shifts toward each side. Rest. If every repetition meets the “controlled and recoverable” criterion, complete one or two more short rounds. Stop well before fatigue changes the quality of movement.
A few important details:
- Stay in a comfortable range. The shift can be small at first.
- Keep both feet down. Do not lift the opposite foot merely to prove that the transfer was complete.
- Do not force the knee straight or bend it more deeply than your rehabilitation programme permits.
- Do not rotate the pelvis or pivot through the knee when you change sides.
- Let your hands help. The drill remains valuable with firm hand contact.
You may quietly label the sensory information you noticed in the previous lesson: pressure increasing under one foot, a change in ankle or hip muscle tension, or the visual impression of your body moving relative to the counter. This is not an extra performance requirement; it simply connects the sensory model to the movement.
Part 3: Supported stance variation
After resting, choose one static stance variation that is clinician-approved. Hold it for about 5–10 seconds while maintaining normal breathing and your quality criterion.
Reasonable options, in order of increasing side-to-side challenge, may include:
- Comfortable hip-width stance with both hands on support.
- Slightly narrower stance, while leaving a clear gap between the feet.
- A gentle staggered stance, with one foot slightly in front of the other and a comfortable side-to-side gap.
Set each foot down deliberately rather than twisting into position. Once you are in the stance, remain still; do not combine it with large weight shifts in this lesson. You are changing one aspect of the task—foot position—while preserving reliable hand support and a stable visual environment.
A full heel-to-toe tandem stance is considerably more demanding sideways. It may become useful later, but it is not necessary for this outcome and should be attempted only if it is explicitly appropriate within your rehabilitation plan.
Part 4: Finish with a reset
Return to your usual hip-width stance and take a moment to notice whether you can identify your centred position more easily than at the beginning. Finish there rather than ending on a difficult repetition.
A simple practice note can make progress visible without turning the session into a test:
- Date and knee status: for example, “comfortable,” “stiff,” or “more sore than usual.”
- Support used: both hands, one hand, or another clinician-approved arrangement.
- Stance used: hip width, narrower, or staggered.
- Quality observation: for example, “smooth to the right; rushed when returning left.”
- Modification made: for example, “reduced shift range after four repetitions.”
This is useful information for you and for your physiotherapist. It also starts building the observational baseline you will formalise in the next module.
When to continue, modify, or stop
The objective is skilful practice, not persistence at all costs.
Continue when the movement feels controlled, symptoms remain within your agreed rehabilitation limits, and you can still pause and return to centre calmly.
Modify when the drill is becoming rushed or wobbly. Use more hand support, make the shift smaller, return to hip-width stance, or take a seated or standing rest. A modification is a well-judged training decision, not a setback.
Stop the drill for the day if you experience sharp or increasing pain, a feeling that the knee may give way, catching or locking, sudden marked swelling, dizziness, visual disturbance, or any warning sign identified in your rehabilitation plan. If symptoms are new, persistent, or concerning, follow up with your physiotherapist or another appropriate clinician.
Key takeaways
Supported weight shifts practise a foundational coordination skill: moving your body mass over one foot while retaining the ability to recover safely. A change in stance changes the shape of your base of support and therefore changes the balance problem, particularly in the side-to-side direction.
For now, the standard of success is controlled and recoverable movement, not reduced hand support, long holds, or maximum weight transfer. Keep your environment stable, avoid pivots and knee twisting, use your approved support, and stop before fatigue degrades quality.
Next, you will learn how to progress or regress a balance task systematically by changing only one variable at a time—for example, stance width, hand support, or movement range—while remaining within your physiotherapy restrictions.
Can't find a good explanation? Sign up and we'll make it for you
Sign up