
Hello again. In the last lesson, you separated the artifact Google Play receives, the Android App Bundle, from the APK set ultimately installed on a particular device. This lesson establishes the local environment used to create and inspect those artifacts: Android Studio, an Android SDK installation, and an Android Virtual Device (AVD) running the emulator.
By the end, you will have a repeatable Kotlin development baseline: a stable IDE, a known SDK location with the essential packages installed, and one practical phone emulator. That is enough to create and run the minimal game app in the next lesson.
The three parts of a local Android environment
It helps to keep three related but separate things in view:
| Part | Responsibility | Where you work with it |
|---|---|---|
| Android Studio | IDE for editing Kotlin, managing Gradle projects, debugging, and deploying | The Android Studio application |
| Android SDK | Android platform APIs, build tools, device tools, emulator software, and system images | SDK Manager |
| AVD and Emulator | A configured virtual phone and the software that runs it | Device Manager |
An AVD is a saved device definition: for example, a particular Pixel-style phone, an Android API level, a screen configuration, and storage settings. The Android Emulator is the program that boots and runs that virtual device.
The distinction matters when troubleshooting. If Android Studio opens but you cannot select a deployment device, the issue may be the AVD or emulator package rather than the IDE. If Gradle says that a platform is missing, the IDE can be fine while the SDK installation is incomplete.
For Kotlin specifically, you normally do not install a separate machine-wide Kotlin SDK. Android Studio includes Kotlin support, and the Kotlin compiler and libraries used by a project are managed through its Gradle configuration. In the next lesson, you will select a Kotlin-based project template; for now, ensure the IDE is current and its bundled Kotlin plugin has not been disabled under Settings/Preferences > Plugins.
Install Android Studio with an emulator-capable baseline
Use the stable release of Android Studio for this course. Preview channels are valuable for evaluating upcoming platform behavior, but a stable environment makes it easier to distinguish an app issue from a toolchain issue.
Before downloading, check that the computer has sufficient RAM, disk space, and virtualization capability. The emulator is substantially more demanding than the editor alone. In particular, common Windows and Linux hosts need CPU virtualization support enabled; this is often labeled Intel VT-x or AMD-V in firmware settings. A physical Android device is a viable fallback when a host cannot run the emulator well, but an emulator will be useful for rapid, repeatable testing throughout this course.
Install Android Studio | Android Developers
Read the official Android Developers installation guide to choose an installation path appropriate to your operating system and to check whether your machine is suitable for an emulator.
Begin with the overview explaining why the emulator is useful. Then read the hardware guidance beginning with the minimum use case. Finally, use the installation subsection matching your OS: “Windows,” “Mac,” or “Linux.” Follow its Setup Wizard instructions and allow it to install the recommended Android SDK components.
During first launch:
- Choose Standard setup unless you already have a deliberate SDK layout maintained by your organization.
- Note the displayed Android SDK Location. This directory is the local source of truth for installed platforms, build tools, emulator images, and accepted licenses.
- Let the wizard finish all downloads before creating a project or AVD.
- If Android Studio was already installed, open it and use its update mechanism rather than installing a second unrelated copy.
Avoid placing the SDK in a temporary directory or a location aggressively cleaned by enterprise tooling. Gradle projects depend on it across builds, and emulator system images consume meaningful disk space.
Configure the Android SDK deliberately
Open Tools > SDK Manager from a project window. From the welcome screen, the same option is commonly under More Actions. The exact menu placement can vary slightly by Android Studio release, but the two core tabs remain SDK Platforms and SDK Tools.
The SDK has two jobs in your workflow:
- It supplies the Android API definitions against which an app is compiled.
- It supplies the tooling used to build, install, inspect, and emulate that app.
For a new Kotlin project, install the latest stable Android platform as your initial build platform. This does not mean the resulting app can run only on that Android version. Later, the project’s minSdk setting will define the oldest version the app supports; the current choice simply provides the API surface used to compile the project.
The SDK Platforms tab contains platform versions and, when package details are visible, their optional components and system images.
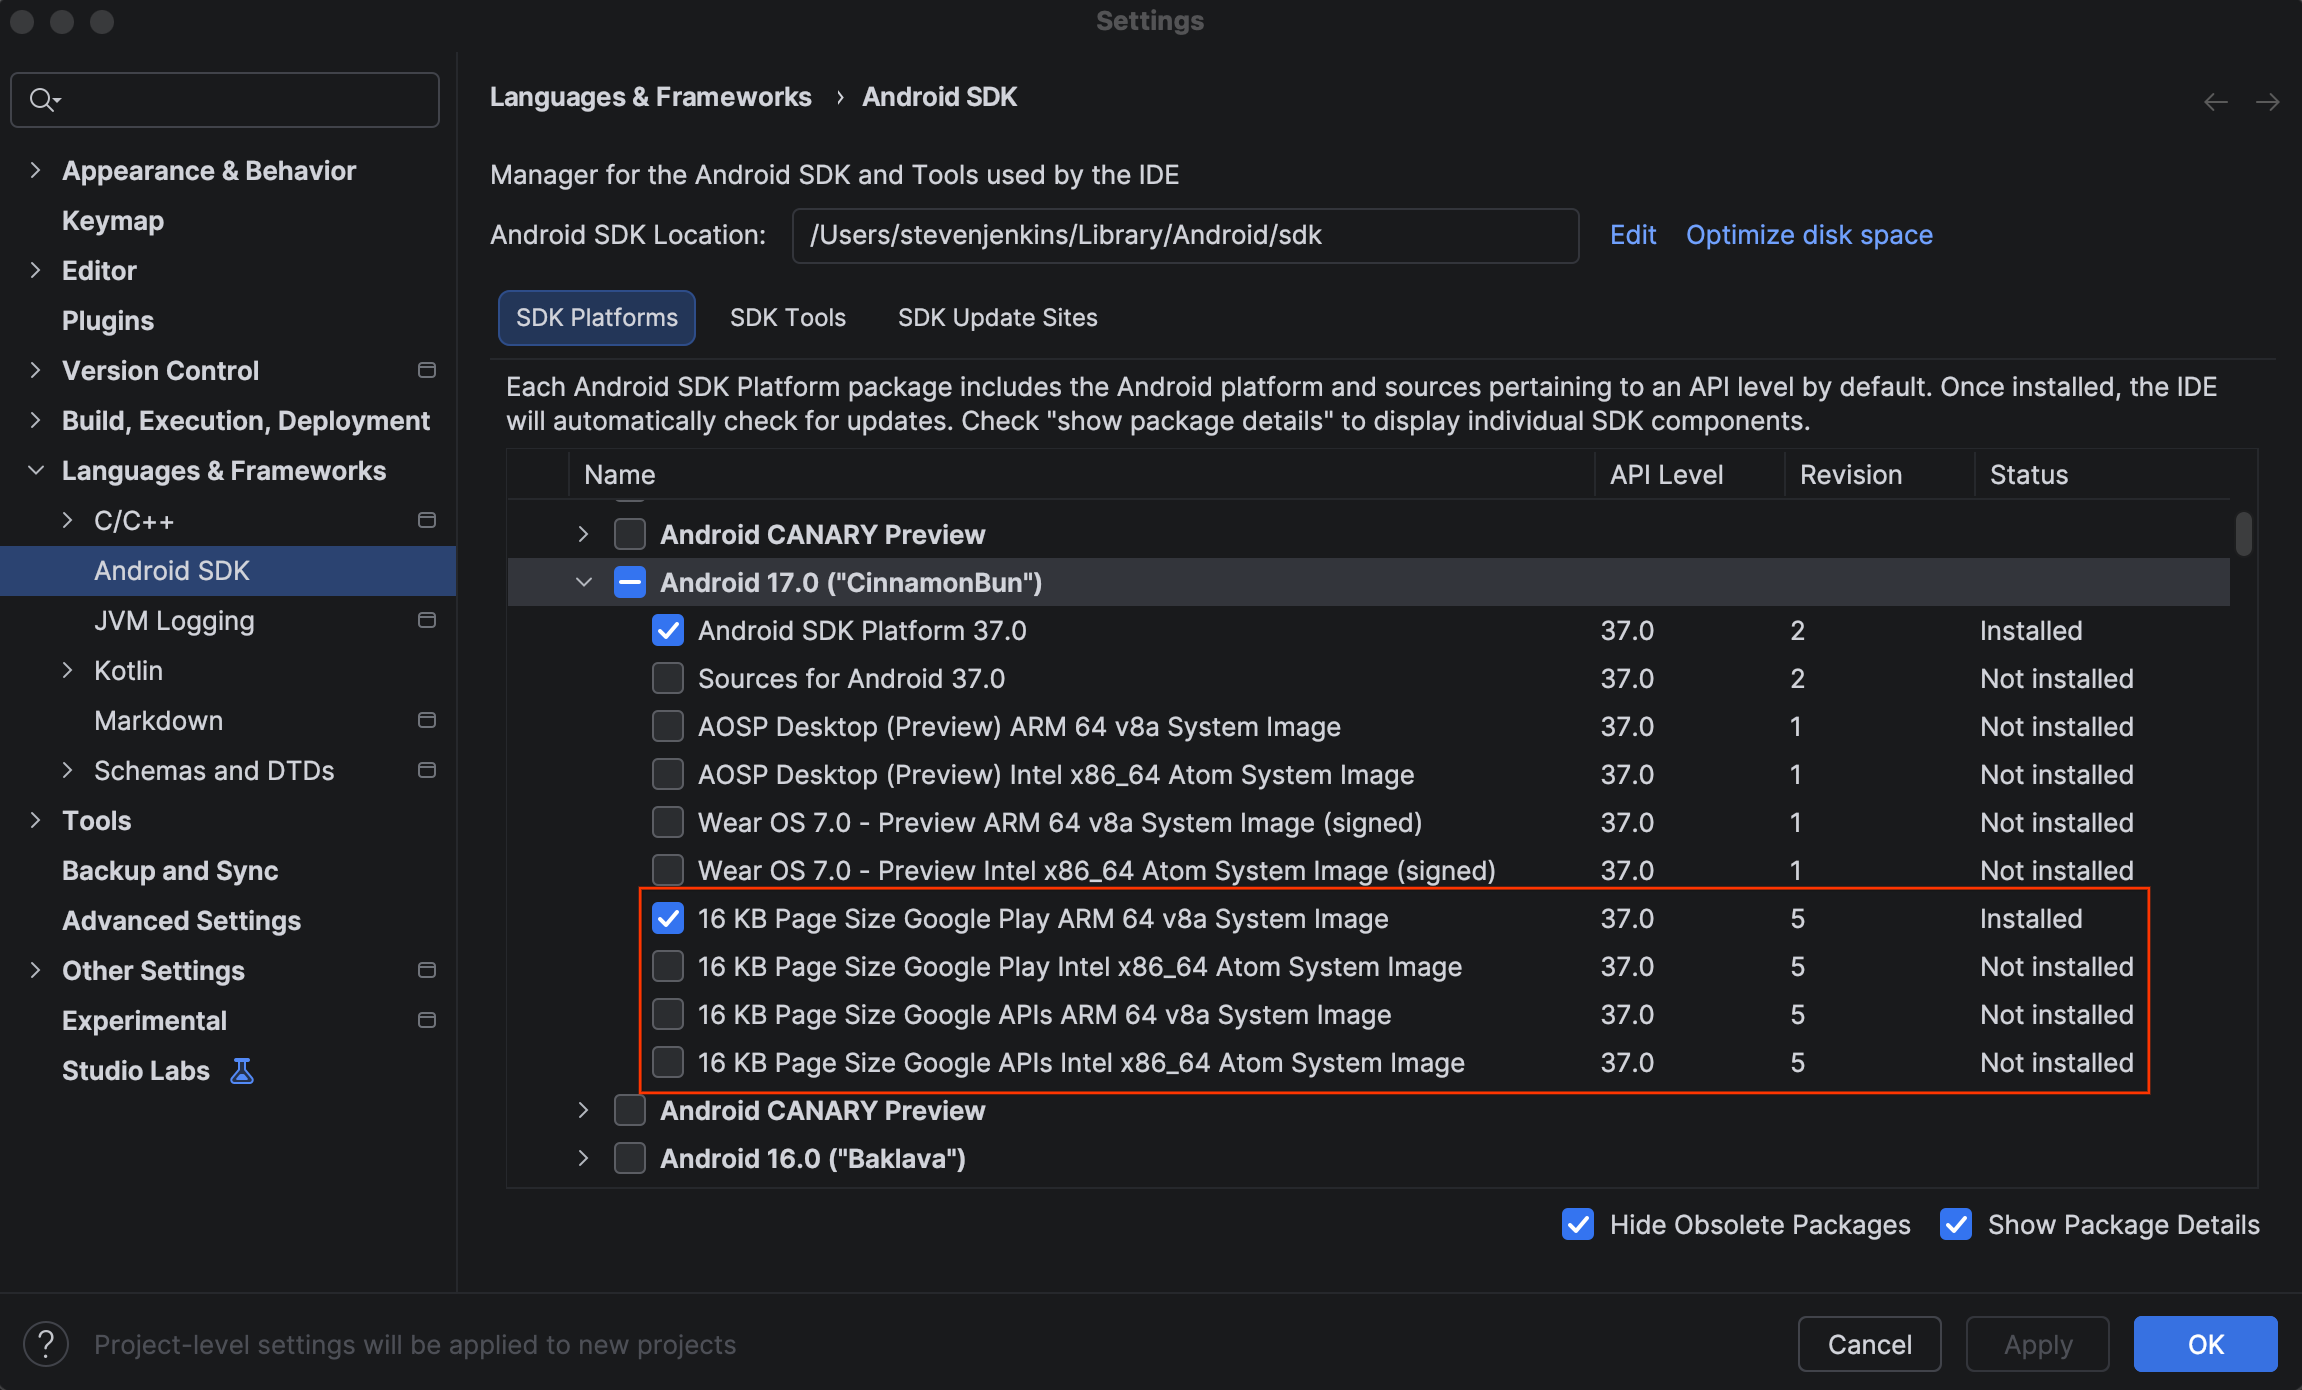
The screenshot is a useful orientation point, not a version recommendation. Do not select a preview platform merely because it appears in a list. Prefer one current, stable platform and a stable system image for your first AVD.
Update the IDE and SDK tools | Android Studio
Read the Android Developers guide to understand what SDK Manager installs, where packages live, and why accepting SDK licenses matters to Gradle builds.
In the “Update your tools with the SDK Manager” section, read the SDK Manager overview, then continue through “Required packages.” Focus on the distinction between the SDK Platforms and SDK Tools tabs. Next, in “Auto-download missing packages with Gradle,” read the license explanation. This will help when a future project requests an SDK component that is not yet installed locally.
In SDK Tools, confirm this practical baseline:
| SDK package | Why it belongs in the baseline |
|---|---|
| Android SDK Build-Tools | Packages and prepares Android app artifacts during builds |
| Android SDK Platform-Tools | Includes adb, the Android Debug Bridge used for device communication, installation, logs, and debugging |
| Android Emulator | Runs AVDs |
| Android SDK Command-line Tools (latest) | Useful for SDK inspection and automation outside the IDE |
| Android SDK Platform | The stable platform selected in the SDK Platforms tab |
Select packages, choose Apply or OK, and accept the licenses. Android Studio can download missing components while you work, but making the baseline explicit now prevents an avoidable failure during the next lesson.
A few packages are intentionally not part of the initial setup:
- The NDK is for C and C++ native development; the Kotlin/Compose game does not require it.
- A Google USB Driver is relevant only for certain Windows physical-device setups, not for an emulator.
- Multiple old platform versions and several high-resolution AVDs consume disk space without improving your first iteration.
Build one representative virtual phone
Now open Tools > Device Manager, then choose Create device or the plus button. Older tutorials may call this screen AVD Manager; the concept is the same.
The first screen asks for a hardware profile. It defines characteristics such as screen size, resolution, density, cameras, memory, and form factor. For the course, choose a recent, conventional Pixel phone profile in the Phone category. A medium-sized phone is a better starting point than a foldable, tablet, TV, or Wear OS device because it gives a representative portrait screen while keeping the test environment uncomplicated.
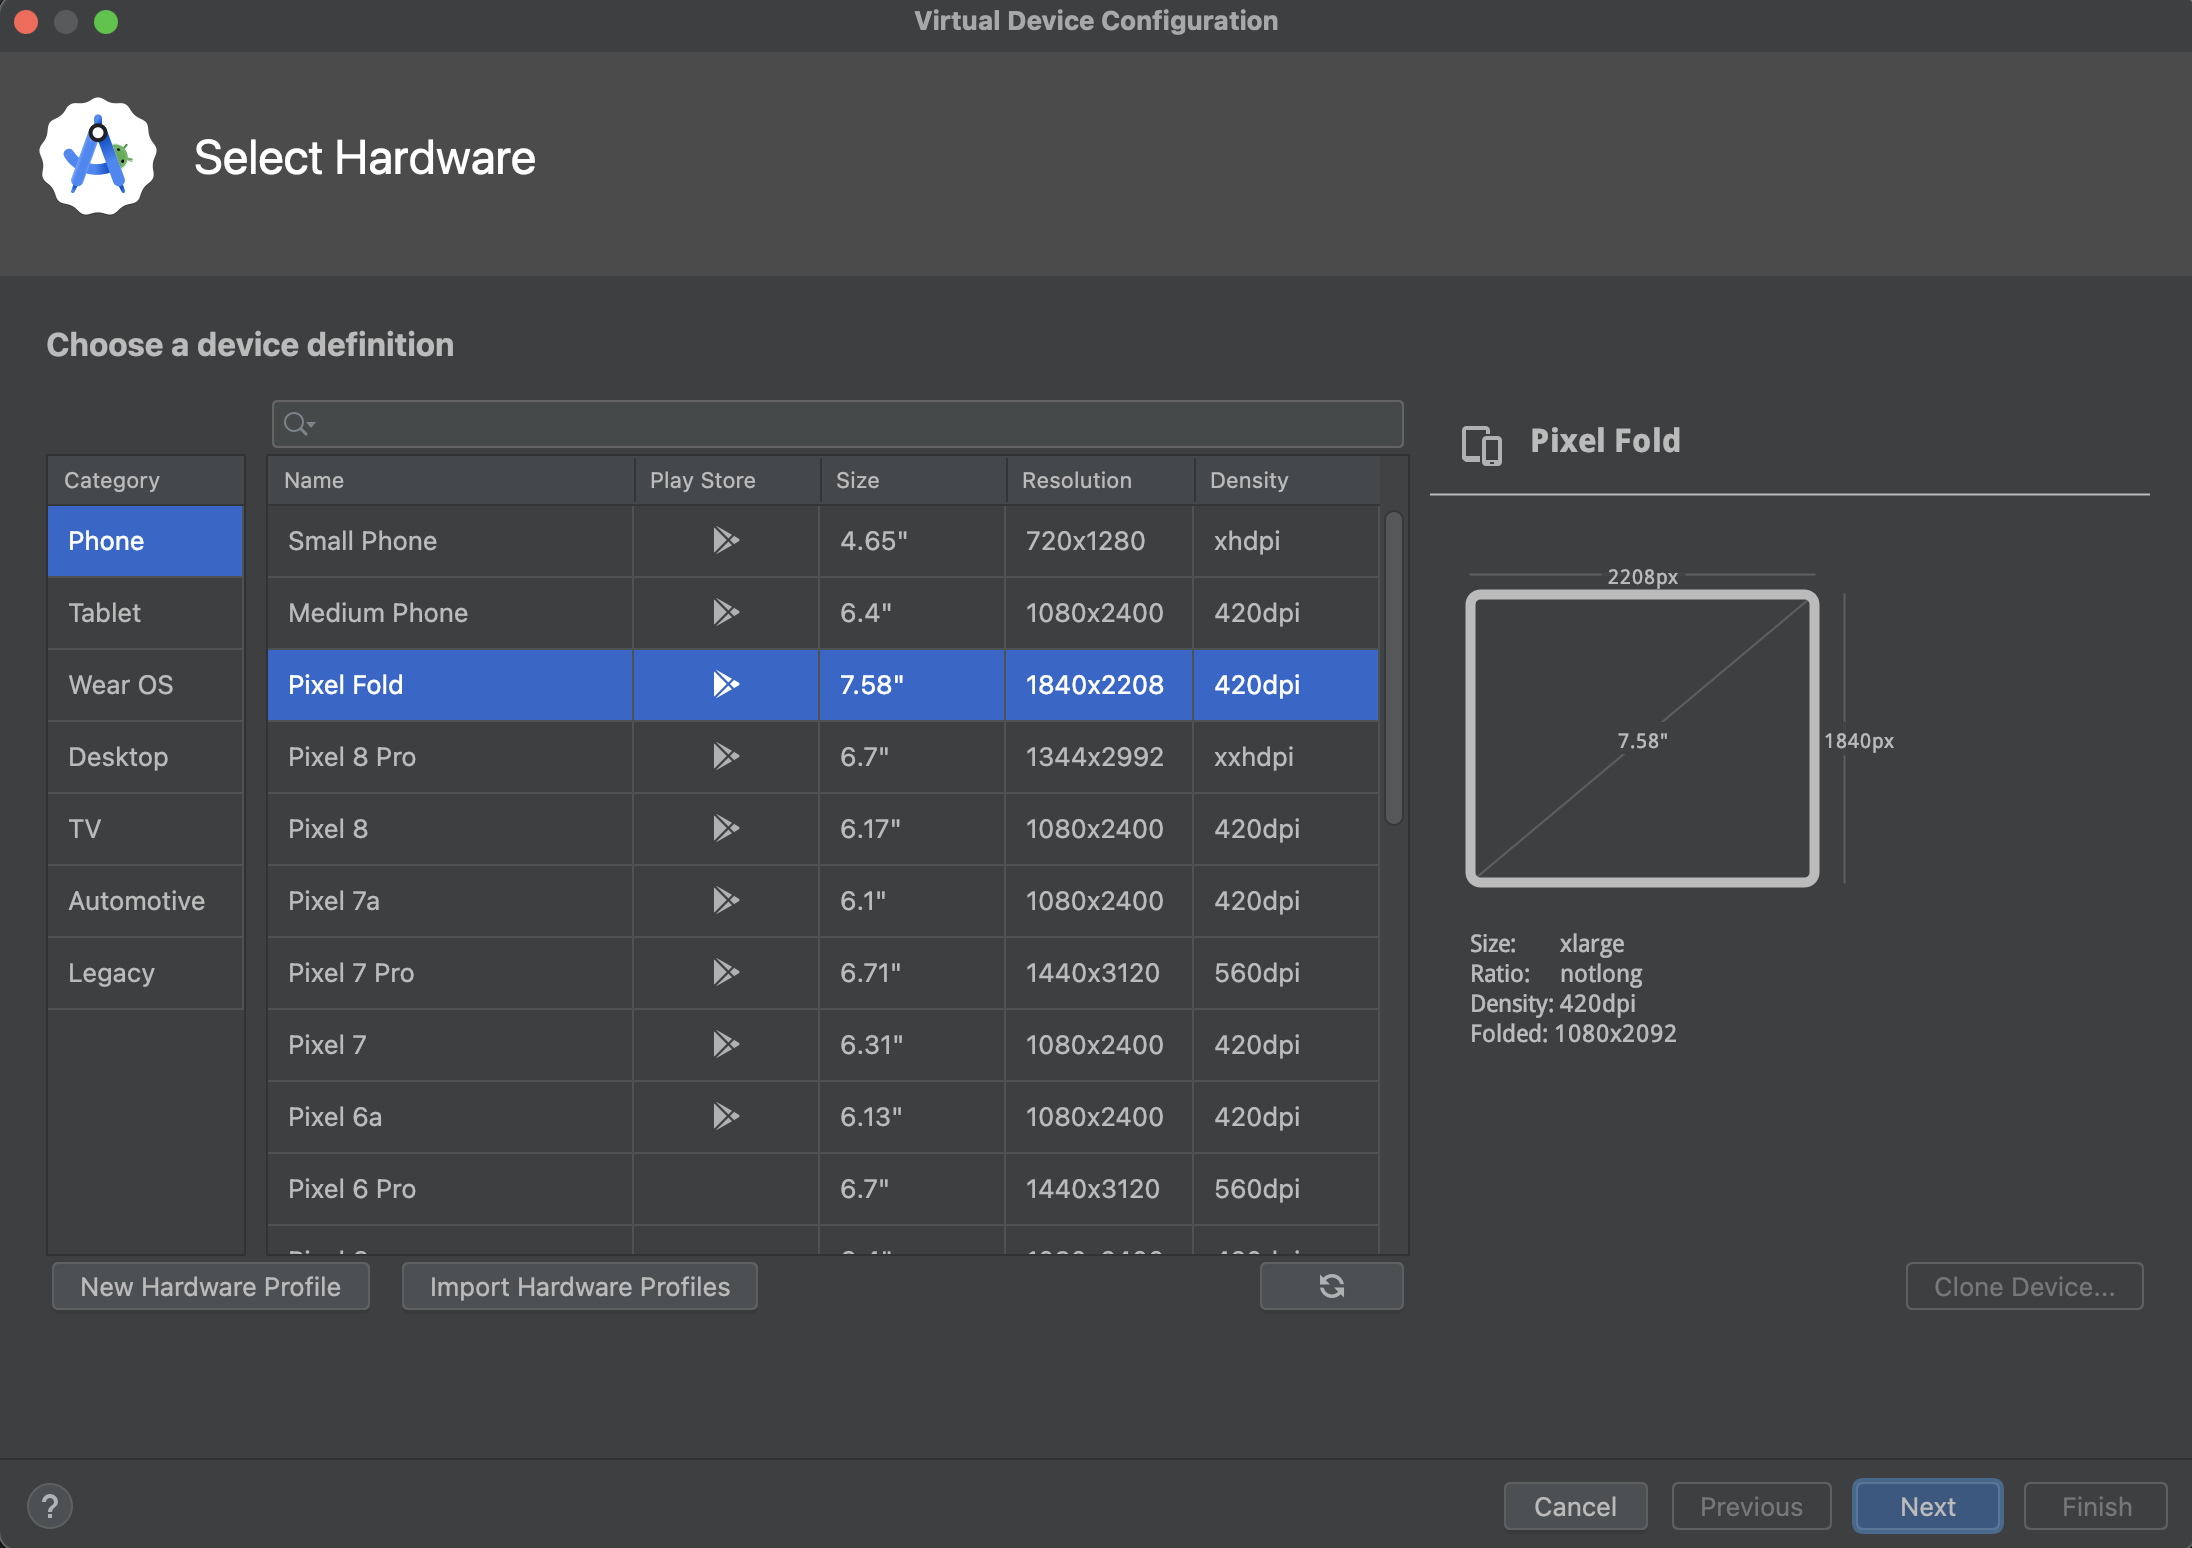
Selecting a phone definition does not declare that your app supports only that phone. It gives you one reproducible test target. The Play delivery model from the previous lesson remains broader: real players will have different densities, locales, Android versions, and hardware capabilities.
Next, select a system image. This is the guest Android operating system installed inside the emulator.
For this course, make these choices:
- Choose a stable API level, preferably matching the current stable SDK platform you just installed. Matching them is convenient at the beginning, although a compile platform and an emulator image are independent choices.
- Choose the recommended architecture for your host. On Apple Silicon, that is normally an ARM 64-bit image. On typical Intel or AMD development machines, it is commonly an x86_64 image. Choosing an image suited to the host enables hardware-assisted virtualization and avoids needlessly slow emulation.
- Prefer a Google Play system image when it is available and you have enough disk space. It includes the Play Store environment and is a useful baseline before the later Play Games Services lessons. It does not substitute for testing a signed Play Console release, but it better resembles an ordinary player device than a bare system image.
- If the desired image says Download, select it and wait for the download to complete. The Android platform package alone is not necessarily an installed emulator image.
Then retain the default graphics and memory settings initially, give the AVD a clear name such as Pixel_API_stable_GooglePlay, and finish the wizard. Clear names become valuable once you have more than one test configuration.
Android x Kotlin Beginner Tutorial [2021] #1 - Project Setup
Watch “Android x Kotlin Beginner Tutorial: Project Setup” by The Zone for a short visual walkthrough of the hardware-profile and system-image decisions. Its interface is older, so translate “AVD Manager” in the video to today’s Device Manager.
Watch AVD setup. Focus on the conceptual sequence: choose a device definition, download and select a system image, set a recognizable virtual-device name, and finish creation. Do not copy the video’s specific Pixel model or older Android version; use the stable options currently offered by Android Studio.
After creation, Device Manager should show the AVD in its device list. Press its Run button and wait for the Android lock screen or launcher to appear. The first boot is often slower because the image is being initialized; later boots can use a snapshot.
Verify the environment before moving on
At this point, perform this short completion check:
- Android Studio starts without an SDK-location warning.
- SDK Manager > SDK Platforms shows at least one stable Android platform installed.
- SDK Manager > SDK Tools shows Android Emulator and Android SDK Platform-Tools installed.
- Device Manager lists your named AVD.
- Starting that AVD reaches the Android launcher.
If something fails, diagnose the layer before changing random settings:
| Symptom | First check |
|---|---|
| No Android versions or tools appear installed | Confirm the Android SDK Location in SDK Manager and complete pending package downloads |
| No system image is selectable | Select a stable platform, enable package details if necessary, and download a compatible image |
| Emulator reports an acceleration or virtualization problem | Confirm CPU virtualization is enabled and that the selected image architecture matches the host recommendation |
| Emulator is extremely slow | Close memory-intensive applications, avoid an unsuitable image architecture, and keep the default phone profile before increasing resources |
| AVD no longer boots after experimentation | In Device Manager, try a cold boot; wipe AVD data only if no test state needs preserving |
Treat an emulator as disposable test infrastructure. Wiping its data is safe for a new setup, but later it can remove locally stored game state and test-account settings, so do it deliberately.
Key takeaways
Android Studio is the development environment; the Android SDK supplies APIs and build/device tools; and an AVD is a saved configuration that the emulator boots as a virtual Android device.
For a sound Kotlin baseline, install a stable Android Studio release, record its SDK location, install one current stable platform plus the essential SDK tools, accept the associated licenses, and create one conventional Pixel-style AVD with a host-appropriate stable system image. A Google Play image is a sensible choice for the later Play Games Services work, while still not replacing Play Console release testing.
Next, you will create a minimal Kotlin Android app in Android Studio and deploy it to the emulator you configured here.
Can't find a good explanation? Sign up and we'll make it for you
Sign up