Recommended resources
The freely available resources this lesson will direct you to.
- LEARN CAPCUT IN 15 MINUTES // COMPLETE MOBILE VIDEO EDITING TUTORIAL FOR BEGINNERS!www.youtube.com
- CapCut App Video Editing Tutorial - COMPLETE Guide (2025)www.youtube.com
- How to Use CapCut – The Complete Guide for Beginnerswww.videoproc.com
- CapCut Video Editing Tutorial: Beginner to Advanced ...www.wikihow.com
Introduction
Welcome back! In our last lesson, you successfully recorded your first short-form video clip. You now have the raw material, which is a huge accomplishment. The next step is to transform that raw footage into a polished, engaging video ready for social media.
This lesson directly addresses the learning outcome: Use a free video editing app (e.g., CapCut) to trim clips, add text overlays, and apply transitions. We'll use the free and popular app CapCut, which is perfect for creating content for TikTok, Instagram Reels, and YouTube Shorts. By the end of this lesson, you will have edited the video you recorded previously, making it shorter, clearer, and more dynamic.
1. Getting Started with CapCut
First things first, you'll need to install CapCut on your smartphone from your device's app store. It's free to use.
Once installed, your first task is to create a project and get familiar with the workspace. The editing process always starts by importing your footage.
How to Use CapCut – The Complete Guide for Beginners
This article from VideoProc gives a quick, text-based overview of installing the app and understanding the main parts of the editing interface. It's a good reference to have as you begin.
Read the sections 'How to Use CapCut App' and 'Introducing the CapCut Interface'. This will show you how to start a new project and introduce you to the Preview Window, Timeline, and Toolbars.
Your first action:
- Open CapCut.
- Tap "New Project".
- Select the video clip you recorded in the last lesson and tap "Add".
You should now see your video in the CapCut editor. Let's start shaping it.
2. Trimming and Splitting Clips
Editing is all about removing what isn't essential to make your message stronger. Trimming is the most fundamental editing skill. You'll use it to:
- Remove the empty space at the beginning before you start talking.
- Cut out the moment at the end after you've finished your point.
- Remove any mistakes or long pauses in the middle.
There are two main ways to do this in CapCut:
- Trimming: Dragging the start or end point of a clip to shorten it.
- Splitting: Placing a cut in a clip to break it into two separate pieces. You can then delete the unwanted piece.
CapCut App Video Editing Tutorial - COMPLETE Guide (2025)
This video from Justin Brown at Primal Video provides a clear, step-by-step demonstration of how to trim and split clips. It's the best place to start learning the mechanics.
Watch from 00:45 to 05:51. Pay close attention to how he trims the start and end of the clip by dragging the white handles, and how he uses the 'Split' tool to remove a section from the middle. He also shows how to delete the default CapCut outro at the end, which is a crucial step!
Your task now:
- Trim the start: Tap on your video clip in the timeline and drag the white handle on the left to cut out the silence before you start speaking.
- Trim the end: Drag the white handle on the right to cut out the pause after you finish your sentence.
- Delete the outro: Scroll to the very end of your timeline, select the black "CapCut" clip, and tap "Delete".
3. Adding Text Overlays
Text overlays are incredibly important for social media video. They grab attention, highlight key information, and make your video accessible to people watching with the sound off. For your "cheap and cheerful" niche, you can use text to emphasize your money-saving tips.
When adding text, think about the brand identity you started building in Module 1. Try to use your brand fonts and colors if they are available in the app to maintain consistency.
CapCut App Video Editing Tutorial - COMPLETE Guide (2025)
Let's return to the Primal Video tutorial to see how to add and customize text.
Watch from 08:54 to 12:28. The video shows how to add a basic text box, change the font and style, and apply simple animations to make the text appear and disappear smoothly. It also demonstrates how to adjust where the text appears on the timeline.
Your task now:
- Move the playhead (the white vertical line) to the part of the video where you state your money-saving tip.
- From the main toolbar, tap Text > Add text.
- Type out the tip (e.g., "Always shop with a list!").
- Use the Style and Font menus to customize the look.
- In the timeline, you'll see a new orange bar for your text. Drag its ends to control how long it stays on screen.
4. Applying Simple Transitions
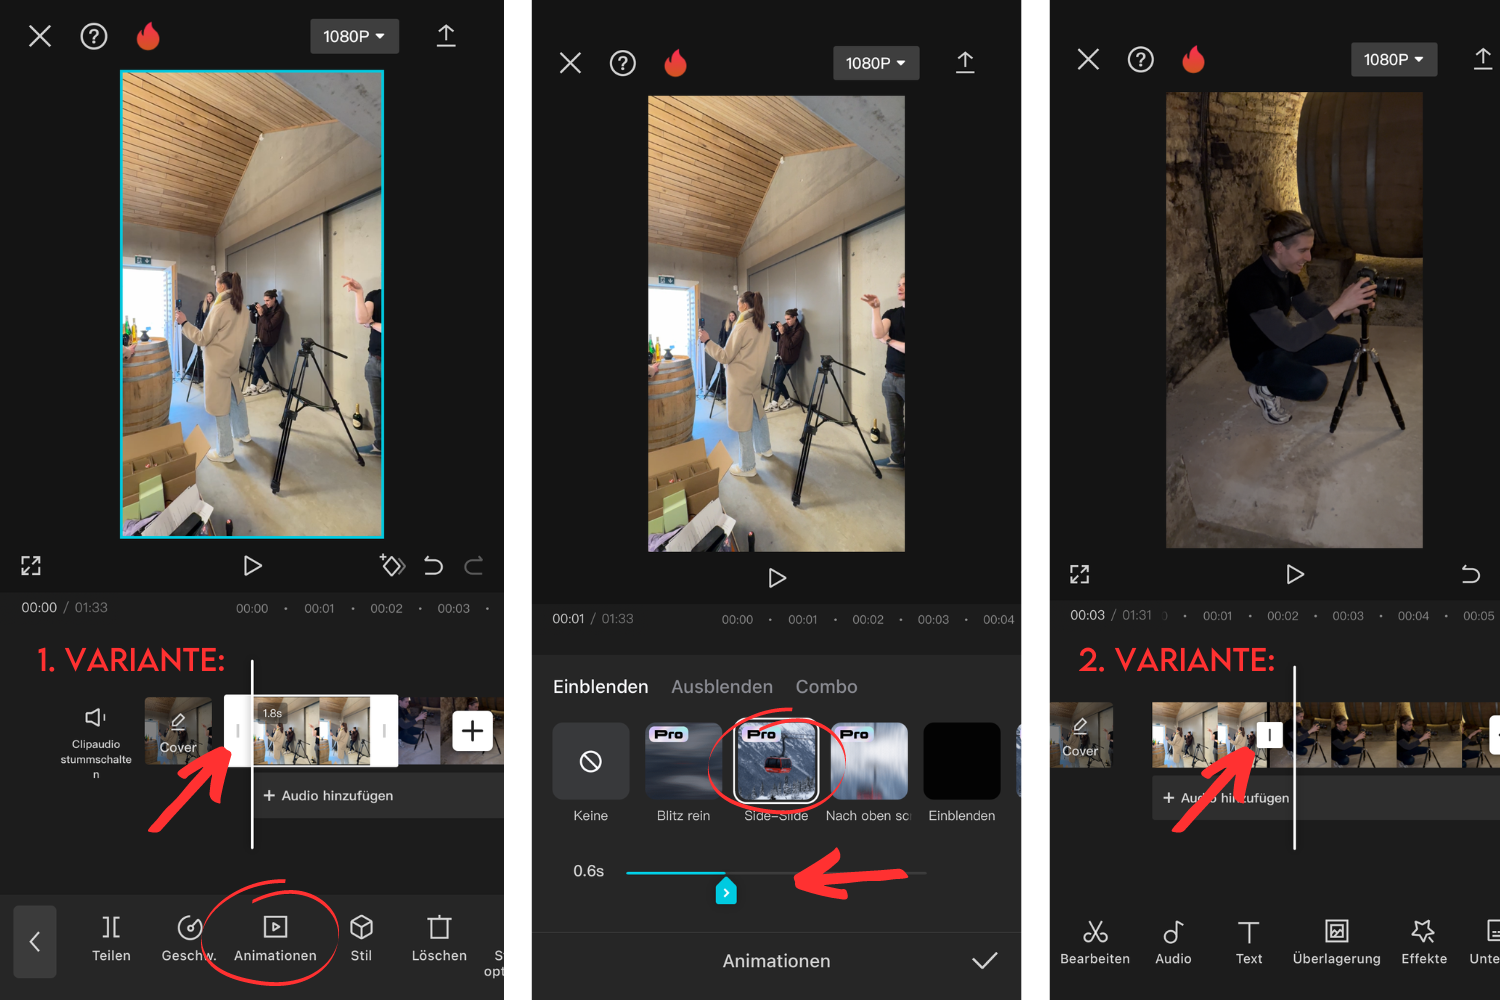
A transition is the effect used to move from one clip to another. When you only have one continuous shot, you might not need a transition. However, learning how to add them is a core skill you'll use constantly when you start combining different shots.
A great way to practice is to split your current clip and add a transition to create a subtle visual effect. For example, you can create a cut right before you reveal your main tip to add emphasis.
A key principle for influencers: Less is more. Stick to simple, clean transitions like a fade, dissolve, or a subtle zoom. Overly complex or flashy transitions can look amateurish.
CapCut App Video Editing Tutorial - COMPLETE Guide (2025)
The final part of the Primal Video tutorial demonstrates how to add transitions.
Watch from 12:47 to 14:23. Notice how you can add a transition by tapping the small white box between two clips. The video also gives excellent advice that for a jump cut in the same shot, a simple zoom-in (a 'punch-in') is often more effective than a fancy transition.
Your task now:
- Move the playhead to a point in your video where you want to add a little emphasis (e.g., right before you say "My number one tip...").
- With the clip selected, tap Split. You now have two separate clips.
- Tap the small white square that has appeared between the two clips.
- This will open the transitions menu. Select a simple one, like Fade or Mix.
- You can adjust the duration of the transition. Start with a short duration, like 0.5 seconds.
5. Action Step: Finalize and Export Your Video
You've learned the three core skills. Now it's time to put it all together and finish your first edited video.
Your Final Checklist:
- Import: Your raw video is loaded into a new CapCut project.
- Trim: The start and end of the video are tightened up, with no dead air.
- Remove Outro: The default CapCut outro clip is deleted.
- Add Text: A text overlay highlights your key money-saving tip.
- Add Transition: You've split the clip and added a simple transition for practice.
- Export:
- Look at the top of the screen. Make sure the resolution is set to 1080p. This is the best balance of quality and file size for social media.
- Tap the export icon (usually an arrow pointing up) in the top-right corner.
- Your video will save to your phone's camera roll, ready to be uploaded!
Conclusion
Fantastic work! You have officially moved from just recording content to editing it. This is a critical step in taking control of your creative vision and producing content that looks polished and professional.
Key Takeaways:
- Editing starts with subtraction: The first and most important step is trimming away anything that doesn't add value.
- Text enhances your message: Use text overlays to highlight key points and make your videos more engaging, especially for viewers with the sound off.
- Transitions guide the viewer: Simple transitions can smooth out cuts or add emphasis, but should be used thoughtfully. "Less is more" is a great rule to follow.
Preview of the Next Lesson:
Your video now looks clean and professional, but it's missing a key element of short-form video: sound. In the next lesson, we will focus on the learning outcome: Add trending audio or music to a short-form video using TikTok's or Instagram's native editor. This will bring energy to your content and help it get discovered.