
Hello! Welcome to your next lesson in the "Working with Databases" module.
In our last session, we successfully established a connection between n8n and your SQL database. You learned how to securely store credentials and verify that n8n can communicate with your database server. This was the critical first step.
Today, we'll build on that foundation to perform the two most fundamental database interactions: Create and Read operations. For a developer, this is the 'C' and 'R' in CRUD. By the end of this lesson, you'll be able to design workflows that can add new information to your database and retrieve specific data for use in downstream tasks. This is where your automations start to become truly data-driven.
1. Creating New Records with the Insert Operation
The first operation we'll cover is creating data, which in SQL terms is the INSERT statement. In n8n, this is most easily done using the dedicated Insert operation available on all database nodes. This operation allows you to take incoming data from a previous node (like a Set node or a webhook) and map it to the columns of your database table.
Let's walk through a complete example of generating and inserting data into a PostgreSQL database. The process is virtually identical for MySQL.
Database Monitoring and Alerting with n8n
The n8n blog post 'Database Monitoring and Alerting with n8n' contains an excellent, self-contained guide for this. We will focus on the first part, which sets up a workflow to insert simulated sensor data into a Postgres table.
Please read the section 'Workflow 1: Ingesting data in the database'. Follow the three steps described: Create the table: Use the provided CREATE TABLE SQL statement in your database to prepare it. You can do this using any SQL client or by using a database node in n8n with the 'Execute Query' operation. Set up the nodes: Follow the guide to add and configure the Cron, Set, and Postgres nodes. Focus on the Postgres node: Pay close attention to how the Operation is set to Insert, and the Columns field is used to map the data generated by the Set node into the database table.
As you can see from the article, the workflow is straightforward:
- A trigger starts the workflow.
- A
Setnode creates a JSON object with the data to be inserted. - The
Postgresnode, with its operation set toInsert, receives this JSON object and writes it as a new row in the specified table.
This pattern is fundamental for any workflow that needs to log events, save form submissions, or store results from an API call.
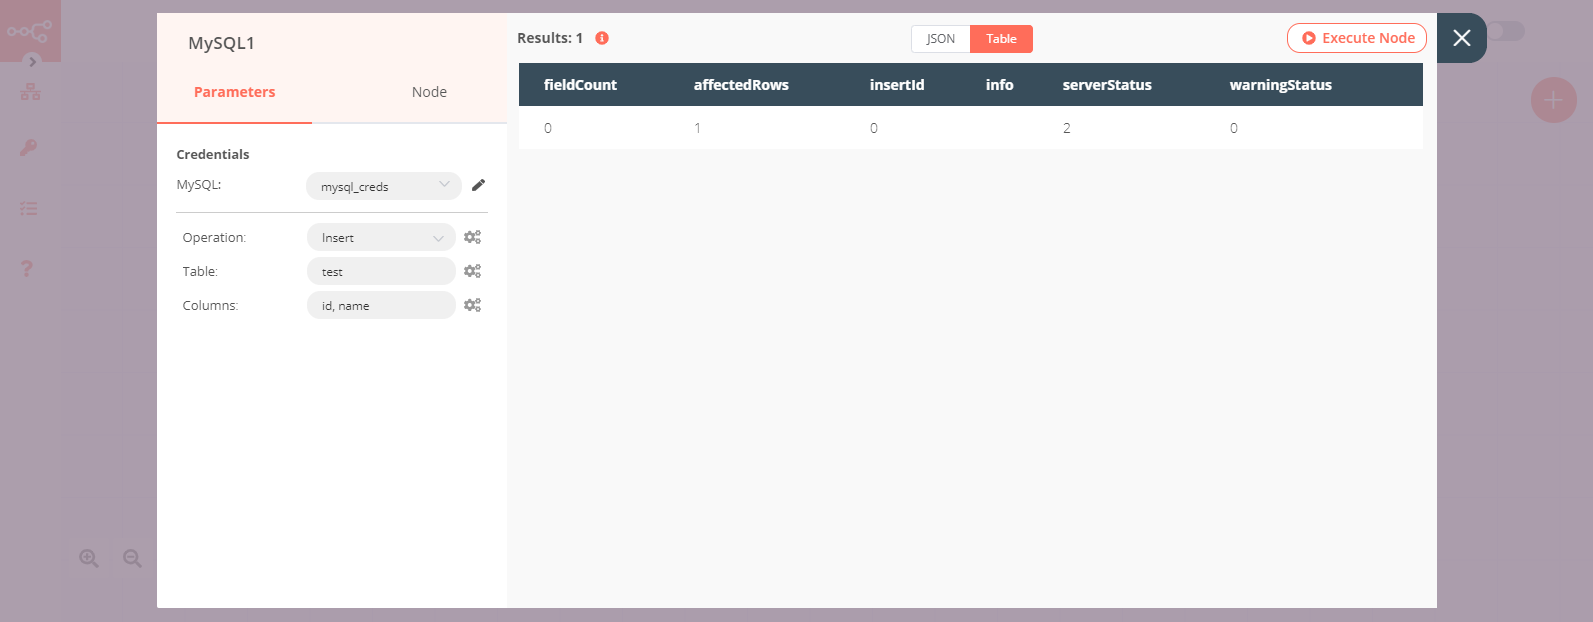
Here is a visual example of how the MySQL node is configured for an Insert operation. Notice the same key parameters: Operation, Table, and Columns.
2. Reading Data from Your Database
Now that we can add data, let's learn how to retrieve it. n8n offers two primary methods for reading from a SQL database, each suited for different scenarios.
Method 1: The Select Operation (Simple Queries)
The Select operation provides a user-friendly interface for building simple queries without writing any SQL. You can specify the table, which columns to return, and add filters. This is perfect for straightforward lookups.
The following video shows how to configure a MySQL node to read data using the Select operation.
Google Sheets and MySQL integration – Powerful workflow
In this clip from an n8n tutorial, you'll see the 'Select' operation being configured to pull data from a MySQL table.
Watch from 03:59 to 04:25. Observe how the node is configured with the Operation set to 'Select' and how the table is chosen from a dropdown list. This demonstrates the UI-driven approach to reading data.
This method is fast and easy, but it's generally limited to querying a single table. For more complex scenarios, you'll want more power.
Method 2: The Execute Query Operation (Full SQL Control)
As a developer, you'll appreciate the Execute Query operation. It gives you a text box where you can write any SQL SELECT statement you need. This is the method you'll use for:
- Joining multiple tables.
- Performing aggregations (
COUNT,SUM,AVG, etc.). - Using complex
WHEREclauses. - Leveraging database-specific functions.
Let's return to our monitoring example to see this in action. The second part of the workflow involves reading only the records that meet a specific condition.
Database Monitoring and Alerting with n8n
The same 'Database Monitoring and Alerting' article demonstrates how to use Execute Query to fetch specific records.
Read the subsection '2. Postgres node: Get all the records with the outlier values'. Note how the Operation is set to 'Execute Query' and a raw SQL statement is provided to select rows where value > 70 and notification = false. This is a perfect example of a targeted read operation.
This approach combines the simplicity of n8n's data flow with the full expressive power of SQL that you're already familiar with.
Test your understanding!
You need to create a report that lists customers and their total order values. This requires data from two tables: customers and orders. You need to join them on customer_id and use SUM() to calculate the total.
Which n8n database node operation (Select or Execute Query) would you use and why?
Show answer
You would use the Execute Query operation. The Select operation is designed for simple queries on a single table. Since this task requires a JOIN between two tables and an aggregate function (SUM()), you need the full control of a raw SQL statement provided by Execute Query.
3. Hands-On Practice: A Simple CRM Entry
Let's put this together. We'll build a workflow that adds a new contact to a contacts table and then immediately reads back all contacts from that table.
Prerequisites:
- An active connection to a PostgreSQL or MySQL database (as configured in the previous lesson).
- A table named
contacts. You can create it by running the following SQL command in your database:
(For MySQL, you might preferCREATE TABLE contacts ( id SERIAL PRIMARY KEY, name VARCHAR(255), email VARCHAR(255) UNIQUE, created_at TIMESTAMP WITH TIME ZONE DEFAULT CURRENT_TIMESTAMP );INT AUTO_INCREMENTfor theidandDATETIMEforcreated_at).
Workflow Steps:
- Start Node: Begin with the default
Startnode. - Set Node (Add New Contact Data):
- Add a
Setnode. - Create two string values:
name:Aliceemail:alice@example.com
- Add a
- Database Node (Insert Contact):
- Add your database node (e.g.,
Postgres). - Select your credentials.
- Set Operation to
Insert. - Set Table to
contacts. - In the Columns field, add
name,email. n8n will automatically map the incoming fields with these names to the corresponding columns. - Execute this node to insert the data. You should see a result indicating 1 affected row.
- Add your database node (e.g.,
- Database Node (Read All Contacts):
- Add another database node after the
Insertnode. - Select the same credentials.
- Set Operation to
Execute Query. - In the Query field, enter:
SELECT name, email FROM contacts; - Execute the entire workflow from the
Startnode.
- Add another database node after the
When you inspect the output of the final node, you should see a list of all contacts in your table, including the one you just added. This simple workflow demonstrates the fundamental Create-then-Read pattern.
Conclusion
You've now mastered the core operations for getting data in and out of a SQL database with n8n. These building blocks are essential for almost any complex automation you'll create.
Key Takeaways:
- Use the
Insertoperation to add new rows to a table, mapping incoming JSON data to table columns. - Use the
Selectoperation for simple, single-table lookups with an easy-to-use interface. - Use the
Execute Queryoperation for full control, allowing you to write any SQL command, including complex joins and aggregations. - The standard pattern for adding data is
Source of data -> Set Node (to format) -> Database Node (Insert).
In the next lesson, we will complete the set of basic database operations by learning how to perform Update and Delete operations. With those skills, you'll have full CRUD capabilities within your n8n workflows.