
Welcome to the next lesson in our module on paid acquisition.
In our last lesson, you successfully installed and configured the Meta Pixel. That was a crucial step, as the pixel is now actively collecting data about user behavior on your website. Today, we're going to put that data to work.
Our learning outcome for this lesson is to create a custom audience based on website visitors for retargeting. This is where you transform raw visitor data into a strategic asset, allowing you to re-engage with the people most likely to become customers for your SaaS.
The Retargeting Funnel: From Visitor to Customer
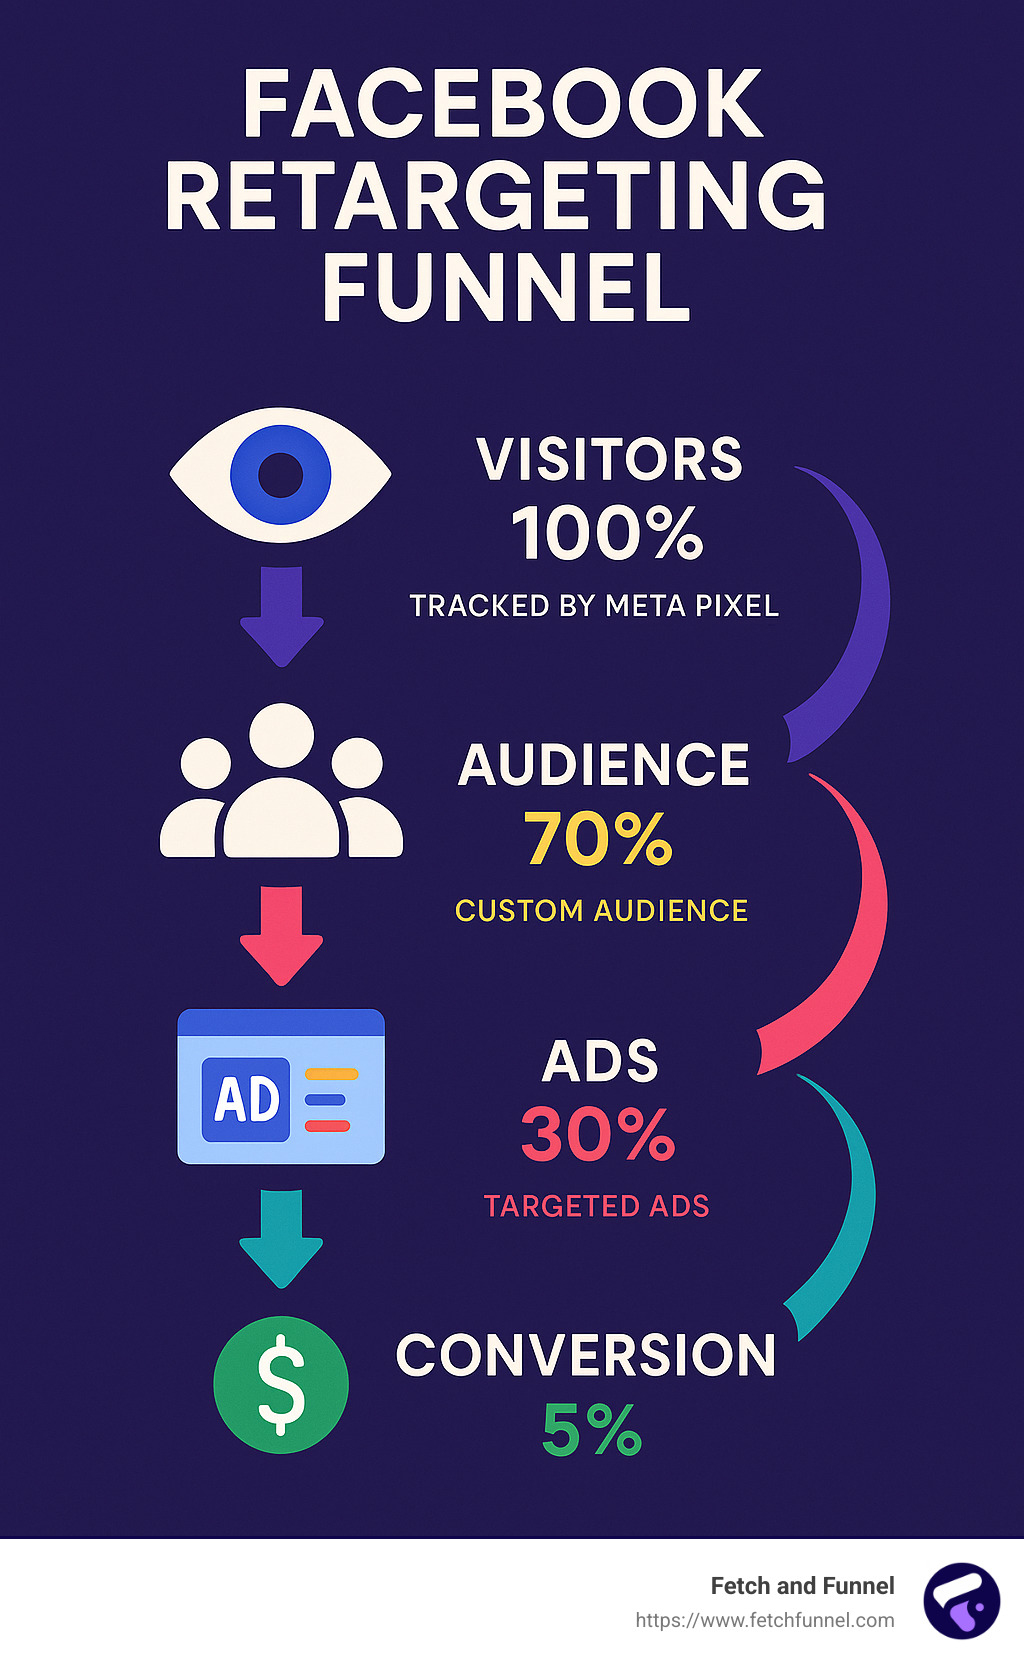
Before we jump into the Meta Ads Manager, let's visualize what we're trying to achieve. Retargeting is the process of showing ads specifically to people who have already visited your website but haven't converted (e.g., signed up). It's a highly effective strategy because you're marketing to a "warm" audience that already knows who you are.
The diagram below illustrates this process perfectly. Your Meta Pixel tracks all visitors, we then segment them into a "Custom Audience," and finally, we target that audience with specific ads to drive conversions.
What Are Custom Audiences?
A Custom Audience is a targeting option that lets you find and connect with people who have already shown an interest in your business. This can include people from a customer list, those who've engaged with your app, or, as we'll focus on today, people who have visited your website.
Strategically, it's helpful to think of your audiences in two main buckets, a concept well-explained in the article "How To Actually Setup Custom Audiences On Facebook Ads".
How To Actually Setup Custom Audiences On Facebook Ads ...
This article from Chipper.be provides an excellent strategic framework for thinking about audiences. It simplifies the concept into two main types.
Read the sections 'Why Custom Audiences Matter (And Why You Should Care)' and 'The Two Main Types of Meta Audiences You Need'. Focus on understanding the distinction between 'Engaged audiences (non-buyers)' and 'Existing customers'. We will be creating an 'Engaged audience' today.
As the article highlights, creating a custom audience of website visitors allows you to "spell it out for the algorithm," telling Meta precisely which group of warm leads you want to re-engage. The foundation for this is the Meta Pixel you installed in the previous lesson. Without it, Meta has no way of knowing who has visited your site.
Step-by-Step: Creating a Website Custom Audience
Now for the hands-on part. We'll walk through the process of creating your first and most essential custom audience: people who have visited your website.
This video from Blake Bauer provides a clear, up-to-date walkthrough of the Meta Ads Manager interface. We'll use it to guide our steps.
Facebook Ads Custom Audiences for Beginners (2025 Tutorial)
This video gives a practical tour of the 'Audiences' section in Meta Ads Manager. We will use it to create our first audience.
Watch from the beginning to 06:35. This covers: 00:00 - 01:04: How to navigate to the 'Audiences' dashboard. 01:04 - 03:46: An overview of the different audience sources. Pay attention to 'Website' as our primary source. 03:46 - 06:35: A detailed walkthrough of creating an 'All website visitors' audience and an audience for excluding converted users.
Let's break down the key actions from the video.
1. Navigate to Audiences and Select 'Website' Source
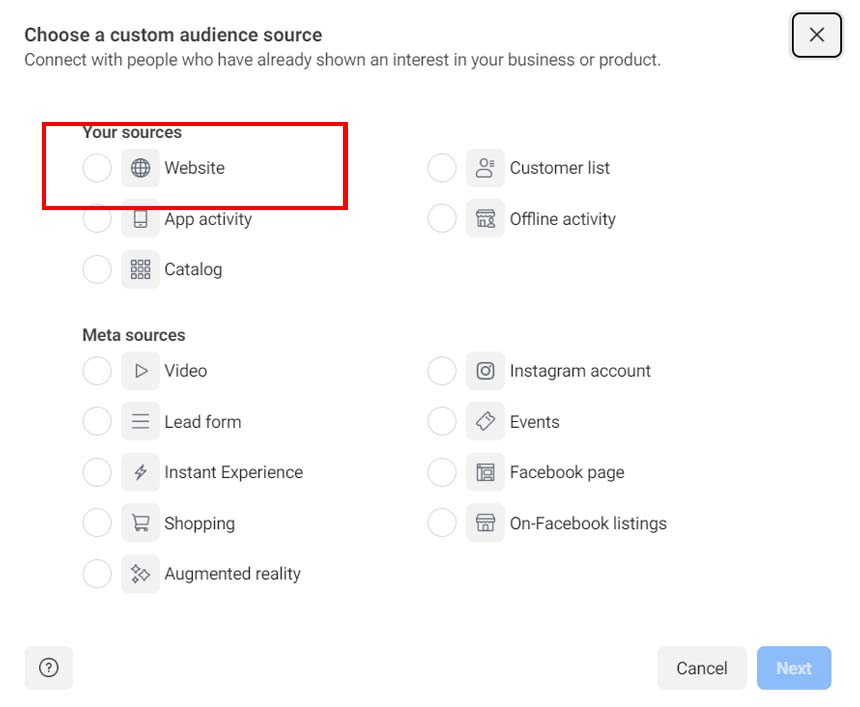
First, from your Meta Ads Manager, go to the All Tools menu (the "hamburger" icon) and select Audiences. Here, you'll click Create Audience and then choose Custom Audience.
You'll be presented with a menu of sources. For our purpose, the most important one is Website.
2. Create a Broad "All Visitors" Audience
For your first retargeting campaign, it's best to start with the broadest possible audience of warm leads. This is typically "All website visitors" with the maximum retention period.
- Source: Make sure your Meta Pixel is selected.
- Events: Choose All website visitors.
- Retention: Set this to 180 days. This is the maximum duration Meta allows for website audiences. It gives you the largest possible group of people who have shown interest in your SaaS in the last six months.
- Audience Name: Use a clear naming convention. A good practice is
WV - All - 180d(Website Visitors - All - 180 days).
This audience is your workhorse for general retargeting.
3. Create a Specific "Converted Users" Audience for Exclusion
One of the biggest mistakes in paid advertising is showing ads to people who have already converted. For a SaaS, this means showing sign-up ads to users who are already customers. It's a waste of money and can be annoying for your users.
To prevent this, we create a specific audience of people who have completed the desired action.
- Source: Your Meta Pixel.
- Events: Instead of "All website visitors," choose the conversion event you set up in the last lesson. For example, if your sign-up confirmation page is
your-saas.com/dashboard, you would select People who visited specific web pages and set the URL to contain/dashboard. Alternatively, if you are using a standard event likeLeadorCompleteRegistration, you would select that from the events list. - Retention: 180 days.
- Audience Name:
Converted - Signups - 180d.
You won't target this audience directly. Instead, you will exclude them from your campaigns to ensure your ads only reach people who haven't signed up yet.
Test your understanding!
Imagine you run a SaaS business and want to create a highly motivated audience segment. How would you configure a custom audience to target only people who have visited your /pricing page in the last 30 days but have NOT signed up (assuming a sign-up leads to a page containing /welcome)?
Show answer
You would create a new custom audience with the following rules:
- Include people who meet ANY of the following criteria:
- Events: People who visited specific web pages
- Retention: 30 days
- URL contains:
pricing
- Exclude people who meet the following criteria:
- Events: People who visited specific web pages
- Retention: 180 days (it's good practice to use a long exclusion window)
- URL contains:
welcome
This creates a powerful audience of users who have shown strong buying intent (visiting the pricing page) but haven't yet converted.
For a concise, text-based summary of these steps, you can refer to the official Meta documentation.
Create a website custom audience
This is the official help document from Meta. It's a great quick reference for the steps involved in creating a website custom audience.
Review the steps under the 'Create a website custom audience' section. Also, read the 'Notes' at the bottom, which explain that it can take some time for your audience to populate.
Conclusion
You have now learned how to transform raw website traffic into a targeted, strategic asset. By creating custom audiences, you've taken a massive step toward running efficient and profitable ad campaigns. You can now segment users based on their exact behavior, allowing you to deliver the right message to the right person at the right time.
Key Takeaways:
- Custom Audiences are created from data collected by your Meta Pixel. They are the foundation of effective retargeting.
- A great starting point is creating a broad "All website visitors - 180 days" audience to capture the largest possible group of warm leads.
- Always create an audience of converted users (e.g., those who reached the
/dashboardor/thank-youpage) so you can exclude them from your campaigns and avoid wasted ad spend. - Using rules for specific page visits allows you to create highly targeted segments, such as "pricing page visitors who haven't signed up."
Preview of the Next Lesson:
With your first custom audience created and populating, what's next? In our next lesson, we will launch a basic Facebook Ads retargeting campaign that uses the very audience you just built to re-engage your landing page visitors and drive them toward conversion.