
Hello again. Last lesson established the execution model: the JDK supplies development tools such as javac; the compiler produces JVM bytecode in .class files; and the JVM runs that bytecode. This lesson makes that model operational.
By the end, you will be able to create a small Java application, run it in IntelliJ IDEA, compile it yourself with javac, and launch it with java. IDEs will be your normal working environment for Spring Boot, but command-line fluency is essential when a build, CI job, Docker image, or deployment behaves differently from your machine.
One small program, two ways to run it
Create a folder called java-runner anywhere convenient, then create a file named exactly HelloBackend.java with this code:
public class HelloBackend {
    public static void main(String[] args) {
        System.out.println("Hello from Java!");
    }
}
For now, treat main as the application’s entry point: when Java launches this class, it begins execution inside this method.
Two naming rules matter immediately:
- A Java source file ends in
.java. - When a file contains a
publicclass, the filename must match the public class name exactly, including capitalization.
So public class HelloBackend belongs in HelloBackend.java, not hellobackend.java or Hello.java. This case sensitivity matters even if your operating system is forgiving about filenames.
The program has two distinct stages:
| Stage | Tool | Input | Result |
|---|---|---|---|
| Compile | javac | HelloBackend.java | HelloBackend.class bytecode |
| Run | java | class named HelloBackend | Program output in the terminal |
The fact that these are separate commands is not incidental. Compilation checks whether Java can translate your source into bytecode; execution starts the JVM and performs the program’s behavior.
Read the official Dev.java guide to reinforce the compile/run cycle and see the most common command-line mistakes before you encounter them yourself.
In “The Compilation and Execution Cycle in Java,” read the compilation cycle. Focus on the distinction between readable source code and compiler-produced bytecode. Then go to “Compiling and Running Your First Java Program.” Read the command-line setup, following the guide’s commands in its embedded code examples. Finally, skim “Common Problems and Their Solutions,” especially the compiler and runtime sections. Read the compiler-error guidance and the later explanation that the java launcher takes a class name rather than a .class filename.
Run it in IntelliJ IDEA
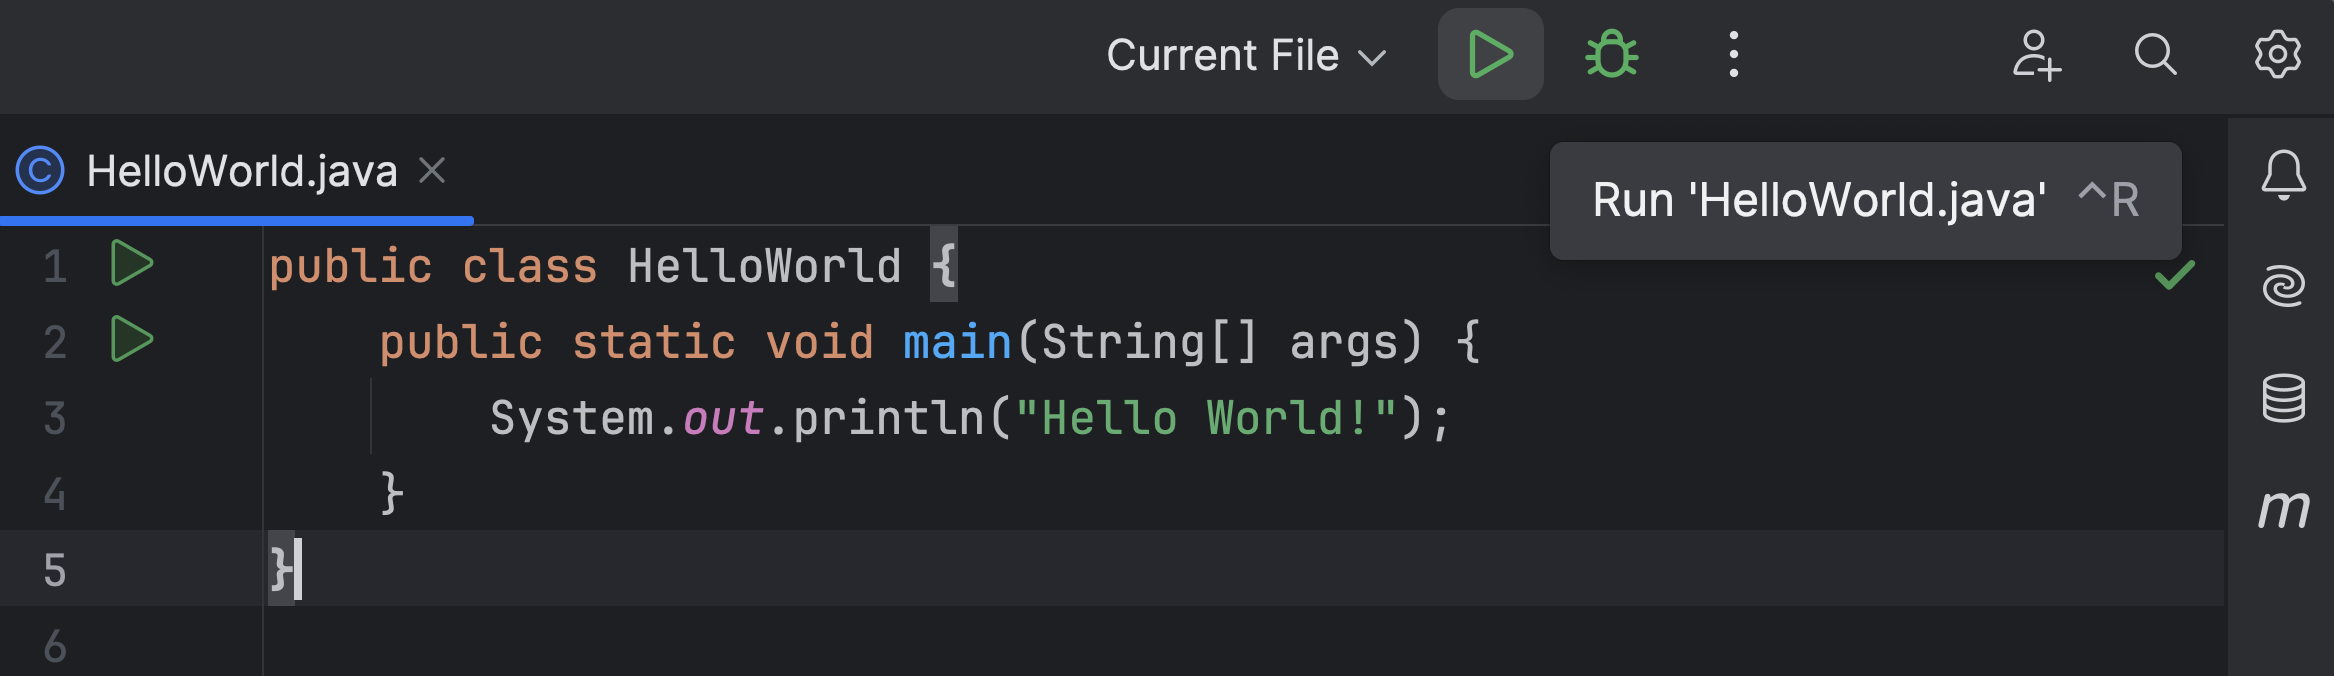
An IDE does not eliminate compilation and execution. It automates the steps, chooses the configured JDK, manages output folders and dependencies, and presents diagnostics in one interface. This is similar to pressing Play in Unity: a significant amount of setup happens behind the button, but being able to inspect the underlying process makes failures far easier to diagnose.
Create a minimal project
In IntelliJ IDEA:
- From the Welcome screen, choose New Project. If a project is already open, use File | New | Project.
- Choose Java as the language.
- Select an installed JDK. This is the same kind of JDK you verified in the previous lesson. If IntelliJ offers Download JDK, it can install one for you.
- For a small learning program, either the IntelliJ build system or Maven will work. Choose Maven if available; it is the standard build tool you will use later for Spring Boot projects.
- Create the project.
- In the Project tool window, locate
src/main/java. - Right-click
src/main/java, select New | Java Class, and name itHelloBackend. - Replace any generated content with the program above.
Current Java documentation may show compact source files, a newer style available only in very recent Java versions. Use the classic public class and main form above for now. You will see this structure constantly in existing Java codebases and in interview examples.
Building a Java application in IntelliJ IDEA - Dev.java
Use this Dev.java walkthrough as the reference for IntelliJ project setup and the IDE run workflow. The article uses a newer JDK in its screenshots, but the project and run concepts apply to a current LTS JDK as well.
In “Installing IntelliJ IDEA,” read the initial setup guidance to understand why IntelliJ needs a configured JDK. In “Creating a new project,” follow the project wizard steps. Select Java, configure a JDK, and choose Maven if you are offered that choice. Then read “Running your application,” beginning with the run controls. Locate the green run icon beside your class or main method.
Build versus run in the IDE
Click the green triangle beside the main method, or right-click HelloBackend and choose Run. The Run tool window should display:
Hello from Java!
A run action generally compiles changed code first and then executes it. A Build Project action, by contrast, compiles and checks the project but does not start the program. That distinction becomes useful later:
- Build when you want to verify that your code compiles.
- Run when you want to execute the application.
- Debug, which you will use later, runs the same application with extra inspection controls.
IntelliJ creates a run configuration when it knows how to launch the class. That configuration holds practical execution settings: the main class, JDK, working directory, program arguments, and JVM options. You do not need to alter it for this example, but knowing it exists prevents the common misconception that an IDE is “just running the current file.”
Checkpoint: Change the printed message, save, and run again. Confirm that the Run tool window shows your new message. This verifies that the IDE compiled the updated source rather than displaying earlier output.
Compile and run from the command line
Now perform the same workflow transparently. Open a terminal:
- Windows: Command Prompt or PowerShell
- macOS/Linux: Terminal
First, navigate to the directory that contains HelloBackend.java.
cd path-to-your-java-runner-folder
Useful navigation commands differ slightly by platform:
| Purpose | Windows Command Prompt | macOS/Linux shell |
|---|---|---|
| Show current directory | cd | pwd |
| List files | dir | ls |
| Change directory | cd folder-name | cd folder-name |
Before compiling, verify that your terminal can find the JDK tools:
java -version
javac -version
The first command verifies that a Java launcher is available. The second is especially important: javac is the compiler and confirms that the terminal can access a JDK, not merely a runtime.
From the folder containing your source file, compile it:
javac HelloBackend.java
A successful compilation is normally silent. Check the folder contents with dir or ls; you should now see:
HelloBackend.java
HelloBackend.class
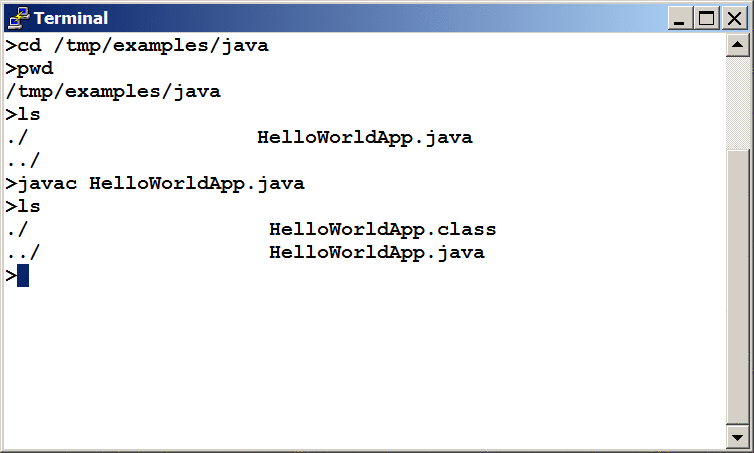
The .class file is the bytecode artifact from the previous lesson. It is what the JVM can execute. Start it with:
java HelloBackend
Notice the intentional difference:
javac HelloBackend.java
java HelloBackend
javac receives a source filename, including .java. The java launcher receives a class name, without .class. In this simple no-package example, the class name is simply HelloBackend.
You should see:
Hello from Java!
Make the source–compile–run loop habitual
Change the source code:
public class HelloBackend {
    public static void main(String[] args) {
        System.out.println("Ready to build Spring Boot services.");
    }
}
Then repeat both commands:
javac HelloBackend.java
java HelloBackend
Do not skip recompilation after changing source. java HelloBackend executes HelloBackend.class, not the .java file you just edited.
Modern Java also supports source-file mode:
java HelloBackend.java
Since Java 11, this can compile and run a single source file in one command. It is handy for a quick experiment, but use the explicit javac and java workflow today: it exposes the artifacts and failure boundaries that build tools and backend projects still rely on.
Diagnose failures by locating the stage
When something goes wrong, first identify whether it is a tool setup, compilation, or runtime problem. The exact wording varies by operating system and JDK version, but this classification is dependable.
| Symptom | Stage | Likely cause and response |
|---|---|---|
javac is not recognized, found, or available | Tool setup | Install/configure a JDK, ensure its bin folder is on PATH, then open a fresh terminal. |
class HelloBackend is public, should be declared in a file named HelloBackend.java | Compilation | Rename either the file or the public class so both names match exactly. |
| A semicolon, brace, or quote error with a line number | Compilation | Read the indicated line and nearby lines, correct the source, save, and compile again. |
Could not find or load main class HelloBackend | Runtime | Confirm that you are in the folder containing HelloBackend.class; compile successfully first; run java HelloBackend, not java HelloBackend.class. |
Main method not found | Runtime | Check that the class contains the required public static void main(String[] args) method. |
| IntelliJ reports no SDK/JDK configured | IDE setup | Set the project JDK in IntelliJ settings or choose a JDK in the project wizard. |
There is one subtle failure mode worth remembering. Suppose you compiled successfully, then introduced a syntax error and compiled again. The compiler will fail to create an updated class file, but the old .class file might still be present. If you then run java HelloBackend, you may accidentally execute old bytecode and think your new edit “did nothing.”
The reliable loop is:
- Save the source file.
- Compile and confirm there are no compiler errors.
- Run the class.
- Read the output alongside the source version you intended to execute.
This is also why a backend build in CI should start from a clean state: it avoids accidental dependence on artifacts left over from earlier builds.
What you should now be able to do
You can now execute the same Java program through two complementary workflows:
- In IntelliJ IDEA, configure a JDK, create a class under
src/main/java, and use the green run control. The IDE compiles and launches the program through a run configuration. - At the command line, use
javac HelloBackend.javato create bytecode andjava HelloBackendto start the class on the JVM. - Treat a silent
javacresult as success, but always verify the resulting behavior by running the class. - Diagnose problems by determining whether they occur before compilation, during compilation, or while the JVM tries to launch the compiled class.
Keep the java-runner folder as a small reference project. Next, you will start making programs do useful work by writing methods with variables, operators, control flow, and type conversions.
Can't find a good explanation? Sign up and we'll make it for you
Sign up