
Welcome to the final technical lesson of our 6-day intensive course. In our last session, we formally captured the risks from the BIW bracket's Engineering Change Order (ECO) by updating the DFMEA. We identified specific "Recommended Actions" to mitigate the high-priority risks of springback and weld gun interference. Today, we close the loop on that risk management process.
Our objective is to create a Design Verification Plan and Report (DVP&R) using APQP principles informed by the updated DFMEA. The DVP&R is the master document that translates our FMEA action items into a tangible, scheduled, and measurable test plan. This is how we prove, with data, that our design is robust and meets all requirements before we commit to mass production. It is a cornerstone of the Advanced Product Quality Planning (APQP) process.
1. From Risk to Validation: The Role of the DVP&R
A design is just a set of assumptions until it's been physically or virtually tested. The DVP&R is the tool we use to manage and document this validation process. It's not just a checklist; it's a comprehensive plan that details every verification activity required to sign off on a design.
DVP&R | Design Verification Plan and Report | Quality-One
This article from Quality-One provides an excellent introduction to the Design Verification Plan and Report (DVP&R). It explains why this document is critical for preventing costly product failures.
Read the introduction and the section "What is Design Verification Plan and Report (DVP&R)". Focus on how the DVP&R serves to organize and document verification activities, moving beyond scattered data folders. Pay close attention to the statement: "The DFMEA determines 'What' and the DVP&R defines 'How'."
The article you just read highlights the core purpose of the DVP&R. It answers two fundamental questions:
- Plan (DVP): What are we going to test? How will we test it? What does success look like (acceptance criteria)?
- Report (R): What were the actual results? Did the part pass or fail?
This structured approach ensures that no requirement is missed and provides a single source of truth for the validation status of a product, which is essential for management reviews and APQP gate approvals.
2. The Direct Link: How DFMEA Feeds the DVP&R
The DVP&R is a direct output of the FMEA process. Every "Recommended Action" we defined in the DFMEA to reduce risk, as well as the existing "Detection Controls," must be represented by one or more test items in the DVP.
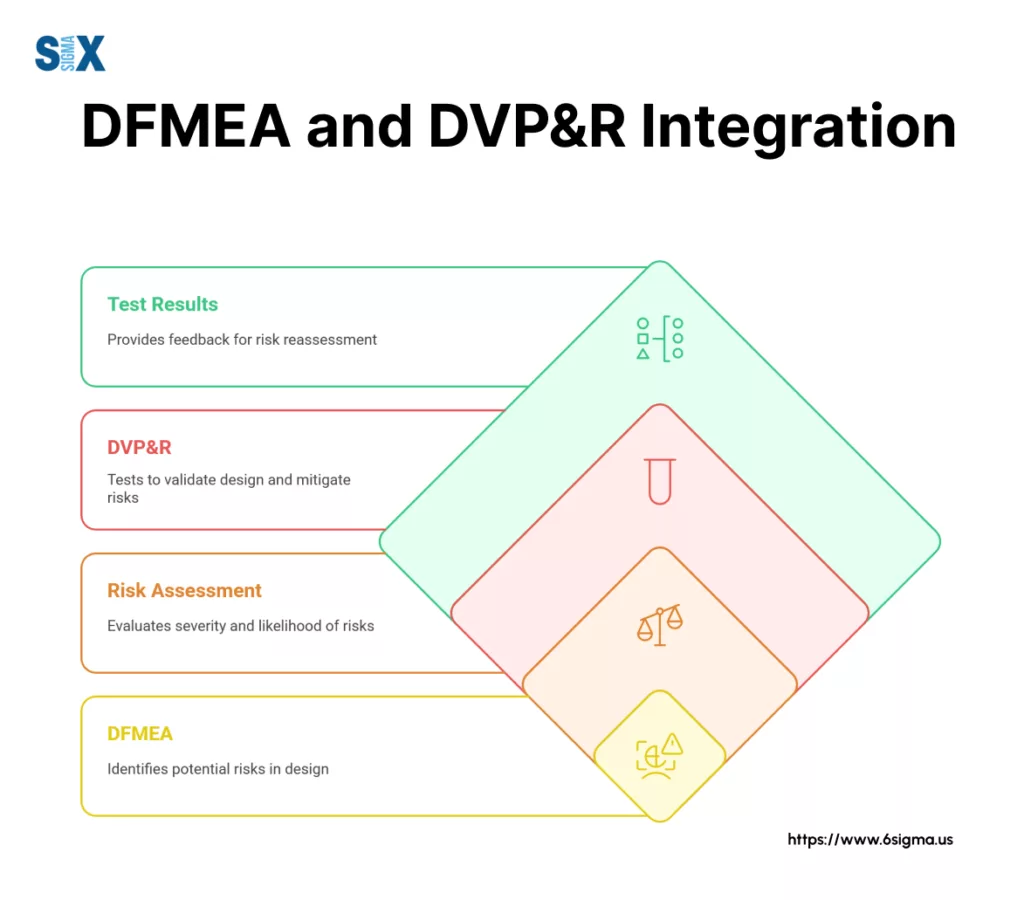
This connection is not just good practice; it's a mandatory part of the automotive product development process. Let's look at a resource that makes this link explicit.
DESIGN FMEA TRAINING FOR LITENS AUTOMOTIVE - Slideshare
This presentation from Litens Automotive, a Tier 1 supplier, shows the real-world application of these principles.
Review slides 8, 13, 29, and 40 (you can navigate using the slide thumbnails). Notice how on slides 8 and 40, "DVP Verification Plan (Conditions, Acceptance Criteria)" is listed as a mandatory output of the DFMEA. Slide 29 provides a powerful visual showing the "Test description input to the DVP&R."
The slides confirm a critical workflow:
- High-risk failure modes in the DFMEA lead to recommended actions.
- These actions are often verification or validation tests.
- The description of these tests, including the conditions and criteria for passing, becomes the input for the DVP&R.
3. Anatomy of a DVP&R Form
The format of a DVP&R can vary between companies, but the core information is standardized. We'll use a typical automotive template to understand the key components.
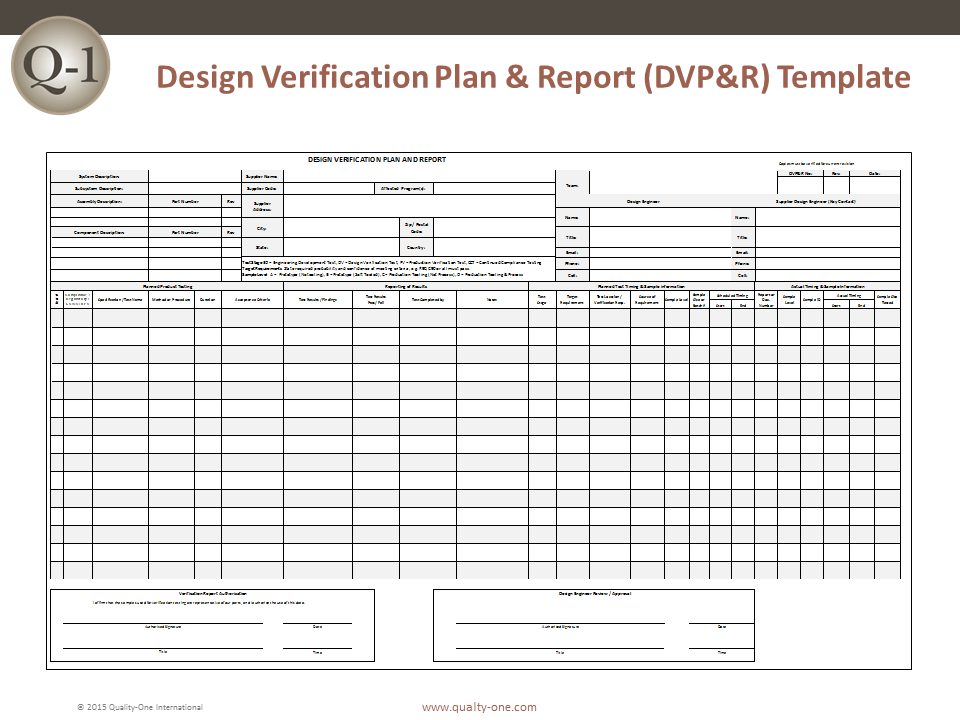
Let's break down the most important columns in the "Planned Product Testing" section, using our bracket as an example.
- Test Number: A unique ID for each test (e.g.,
BIW-BRKT-T01). - Specification / Test Name: A clear, concise name for the test. Example: "Weld Access Simulation Study."
- Method or Procedure: The "how." This must be specific enough for someone in a test lab to execute. It often references a corporate or industry standard (e.g., SAE, ASTM). Example: "Perform digital simulation in Process Simulate using GM-standard weld gun model XYZ. Verify clearance to all 8 specified weld locations on the flange."
- Acceptance Criteria: The unambiguous pass/fail condition. This is non-negotiable. Example: ">10mm clearance between weld gun shanks/body and all surrounding part geometry at each weld point."
- Test Stage: When in the development process the test occurs. Common stages are:
- DV (Design Verification): Testing on prototypes to verify the design itself.
- PV (Production Validation): Testing on parts made from the final production tooling and process to validate both the design and the process.
- Sample Size: How many parts will be tested. This is often driven by statistical requirements. Example: 1 simulation, or 30 physical parts for a dimensional study.
- Source of Requirement: Why is this test being done? This column directly links back to the source document. Example: "DFMEA AP-High Item #5" or "Drawing Spec 2.3.1".
4. Your Task: Populate the Bracket DVP&R
In the last lesson, we updated the DFMEA for our bracket ECO, resulting in two "High" Action Priority items requiring mitigation.
- Springback Risk (AP: High): Caused by the new gusset geometry affecting the DP600 material's forming behavior. The recommended action was to run a new simulation and update the die. The verification test is to measure the physical parts from the updated tool.
- Weld Access Risk (AP: High): Caused by the gusset potentially blocking the robotic weld gun. The recommended action was to run a new weld access simulation. The verification is the successful completion of that simulation report.
Your task is to translate these two risk-mitigation actions into formal entries in a DVP. Fill in the empty cells in the table below. Think like a lead engineer: be concise, specific, and unambiguous.
| Test No. | Specification / Test Name | Method or Procedure | Acceptance Criteria | Test Stage | Sample Size | Source of Req. |
|---|---|---|---|---|---|---|
BRKT-DV-01 | DV | DFMEA Item #6 | ||||
BRKT-PV-01 | PV | DFMEA Item #5 |
Click here to see my proposed DVP&R entries.
Here is how I would populate the DVP&R. Your wording might differ, but the technical intent and level of detail should be similar.
| Test No. | Specification / Test Name | Method or Procedure | Acceptance Criteria | Test Stage | Sample Size | Source of Req. |
|---|---|---|---|---|---|---|
BRKT-DV-01 | Weld Access Simulation | Perform robotic simulation in Process Simulate using plant-specified weld gun model (e.g., Fanuc R-2000iC). Document access path and clearance for all 8 weld spots. | All 8 weld spots must be reachable with >10mm clearance between gun and part geometry. Report must be approved by Manufacturing Eng. | DV | 1 Simulation | DFMEA Item #6 |
BRKT-PV-01 | Dimensional Capability (Springback) | CMM layout measurement of bracket flange angle (Ref dimension Y). Measure parts from first production run. | Flange angle must be 90° ± 0.5°. Process capability must meet Cpk > 1.33. | PV | 30 Parts | DFMEA Item #5 |
Rationale:
- Weld Access (
BRKT-DV-01): This is a Design Verification (DV) test because it's a digital simulation that happens early, before any tools are made. Its purpose is to verify the design is manufacturable. The acceptance criteria are clear and measurable (>10mm clearance). - Dimensional Capability (
BRKT-PV-01): This is a Production Validation (PV) test. It can only happen after the production stamping die is built and parts are run. Its purpose is to validate that the physical parts, made with the production process, meet the drawing specification. We use a statistical measure (Cpk > 1.33) as the acceptance criteria, which is a standard automotive requirement for process capability.
Conclusion
You have now successfully bridged the gap from risk analysis to validation planning. By creating DVP&R entries from DFMEA action items, you have ensured that our engineering due diligence is not just a paper exercise but a concrete plan of action. This is the essence of robust product development in the automotive industry.
Key Takeaways:
- The DVP&R is the master test plan that documents all activities required to verify and validate a design against its requirements.
- There is a direct and mandatory link between the DFMEA and the DVP&R; "Recommended Actions" and "Detection Controls" from the FMEA become test line items in the plan.
- A DVP&R entry must contain specific, unambiguous information, including the test method, acceptance criteria, test stage (DV/PV), and sample size.
- The completed DVP&R is a critical APQP deliverable required for phase gate approval and, ultimately, for the Production Part Approval Process (PPAP).
This lesson concludes the core technical activities for our BIW bracket project. We have taken an ECO from interpretation through DFM/DFA analysis, updated the formal risk documentation (DFMEA), and created a validation plan (DVP&R). Your final task for this project will be to create the formal engineering documentation that captures all of these decisions for release into the PLM system.
Can't find a good explanation? Sign up and we'll make it for you
Sign up