
Good to continue from the hierarchy work in the previous lesson. You have already identified what should be primary, supporting, ambient, and deliberately quiet. The next design decision is how light should travel through space to produce that hierarchy—and how the equipment can be integrated so that the architecture, rather than the luminaire, remains visually in charge.
This lesson distinguishes lighting distribution from integration method, then uses both to select a suitable lighting approach from architectural intent. By the end, you should be able to say, for example: “This is a textured stone wall that should feel tactile but not uniformly bright; use a concealed near-wall grazing distribution,” rather than, “Let’s use these fixtures because they look minimal.”
Start with the effect, not the fixture
A luminaire is an object with an appearance, mounting method, optical system, thermal requirements, wiring needs, and maintenance implications. But the lighting designer’s first question is not whether that object looks elegant in a catalogue or rendering. It is:
What must the light reveal, support, or allow to recede?
Two related decisions follow.
Lighting distribution: where and how the light is delivered
A distribution describes the spatial pattern of emitted light: its beam width, direction, spread, edge softness, and shielding. It determines whether light creates a pool on a floor, an even luminous wall, a sharp highlight on an object, or a long raking shadow across texture.
Integration method: how the source belongs to the architecture
An integration method describes how the light source is located and coordinated with the built environment. It may be recessed into a ceiling, mounted on a track, concealed in a joinery detail, placed in a cove, mounted to a wall, or set into the ground.
These are independent variables. A wallwashing distribution, for instance, could be delivered by:
- a recessed ceiling luminaire for a visually quiet, fixed composition;
- an adjustable track-mounted luminaire for a gallery with changing displays;
- a concealed linear source in an architectural slot;
- an exterior in-ground fitting for a façade.
The same visual intention can therefore lead to different integration choices depending on flexibility, construction, cost, access, and desired visibility of the equipment.
A useful sequence is:
- Define the architectural target: surface, volume, object, path, threshold, or people.
- Define the desired visual effect: evenness, texture, emphasis, depth, orientation, or low-level guidance.
- Select the appropriate distribution.
- Select an integration method that protects the effect and works with the architecture.
- Check glare, shadows, maintenance, adjustment, and coordination before committing.
This preserves the logic established in the previous lesson: hierarchy leads the design; luminaires serve it.
The principal distributions and what they are for
The table below is a practical vocabulary rather than a product list. Real luminaires may combine or modify these distributions, but the underlying visual questions remain the same.
| Distribution | Primary visual effect | Appropriate architectural intent | Common risk when misapplied |
|---|---|---|---|
| Narrow spot | Concentrated, high-contrast emphasis | Artwork, a sculpture, a column capital, a retail object, a distant façade detail | Hard-edged pools, visible glare, excessive contrast, spill onto adjacent elements |
| Spot / medium beam | Controlled emphasis with more forgiving coverage | A dining table, reception point, display, reading zone, architectural bay | Becomes a generic ceiling pattern if repeated without hierarchy |
| Flood / wide flood | Broad directed coverage | Large artwork, broad feature wall, collaborative table, tree canopy, façade zone | Flattens a feature if it is intended to be crisp or tactile |
| Downlight distribution | Direct light principally below the luminaire | Local activity, circulation, task support, general light where a quiet ceiling is useful | Bright floor with dark walls; repetitive pools that make the ceiling layout dominant |
| Wallwashing distribution | Even vertical illumination from ceiling to lower wall | Spatial legibility, orientation, art-wall background, broad façade planes | Scalloping, dark lower walls, bright source visibility, or washing every surface indiscriminately |
| Grazing distribution | Light travels nearly parallel to a surface, producing relief and shadow | Stone, brick, timber grain, ribbed concrete, perforated screens, tactile detail | Reveals construction defects and surface unevenness; can be visually harsh |
| Indirect or reflected distribution | Light first illuminates a ceiling or upper surface, which becomes a soft secondary source | Calm ambient volume, low-glare social spaces, sculptural ceilings | Ineffective on dark or poorly reflective surfaces; can make a volume visually flat |
| Asymmetric linear distribution | Directed wash from a concealed edge or slot | Ceiling planes, vertical reveals, shelving, long walls, façade bands | A visible bright line can become the subject instead of the intended surface |
The point is not that a room needs one of each. Most successful schemes use a limited family of distributions, each assigned a clear role.
For example, a library reading room might use a soft indirect ambient layer, wallwashing to make book-lined walls legible, and carefully shielded task distributions over tables. A narrow spot on every desk would overstate individual pools; uniform downlights everywhere would make the ceiling geometry more conspicuous than the reading room’s material and rhythm.
Wallwashing and grazing: similar targets, opposite intentions
Both wallwashing and grazing direct light toward a vertical surface. They should never be treated as interchangeable.
A wallwash makes the wall itself read as a relatively continuous field of brightness. It can enlarge the apparent width of a room, establish orientation, or create a calm background for art and people. Its success depends on uniformity and source concealment.
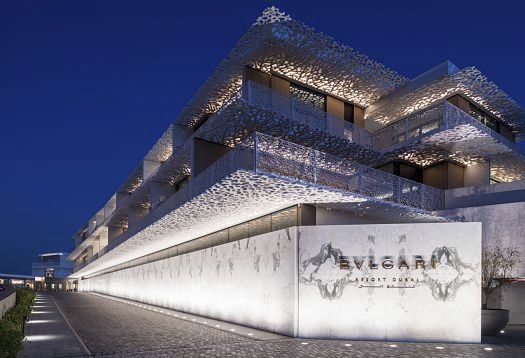
A graze makes the wall’s surface relief visible through the shadows cast by texture. It is appropriate when the surface is the subject: rough stone, brick, fluting, timber slats, or a perforated screen. Its success depends on the angle being shallow enough to reveal relief but controlled enough not to become visually noisy.
The difference can be framed as a design question:
| Ask this question | If the answer is “yes” | Likely direction |
|---|---|---|
| Should the viewer primarily perceive the wall as a broad, bright boundary? | The wall supports orientation, spaciousness, or a quiet art background. | Wallwashing |
| Should the viewer notice the wall’s depth, relief, joints, or irregular texture? | Material expression is central to the architectural idea. | Grazing |
| Is the wall visually secondary? | It should contribute to volume without becoming a feature. | Soft reflected light or restrained spill light |
| Is only one portion of the wall important? | A sign, artwork, niche, entry, or detail is the focus. | Accent distribution rather than a full wash |
The ERCO wallwashing guidance is useful because it connects wall light to architectural purpose rather than treating it as a decorative add-on.
7 tips for your perfect wallwashing - Photometrics & practice | ERCO
Read ERCO’s “7 Tips for Your Perfect Wallwashing” as a practical study of how a vertical-lighting intention leads to distribution, mounting, and spacing decisions. Treat its named products as examples of lighting-tool categories, not as product recommendations.
Begin with “The versatile use of wallwashing in architecture.” Read the discussion of orientation and note that an illuminated wall can direct attention and clarify spatial transitions. Then read “Creating distance” and “Refining surfaces.” Compare uniform wall brightness with near wall grazing. The essential distinction is whether the wall is intended as a luminous plane or as a tactile material subject. In “Finding the right wallwasher,” read the introduction and then Scenarios 1, 3, 6, and 7. Focus on recessed integration, then compare it with track based flexibility. Finish with “Distinguishing the quality of wallwashers,” especially uniformity and visual comfort. These technical criteria matter only when the intent is an even luminous wall; they are not the standard for grazing.
Integration is an architectural decision
Once the distribution is appropriate, decide how visibly and permanently the equipment should enter the building. Each method expresses a relationship between the light source and architecture.
Recessed integration: light appears to come from the architecture
A recessed luminaire can make the ceiling look quiet and allow the illuminated surface to take visual priority. It is especially useful when the architectural concept calls for restraint, continuity, or a source that recedes from view.
Use recessed integration when:
- ceiling geometry is stable and coordinated early;
- furniture, artwork, or circulation routes are unlikely to shift significantly;
- a calm, minimal visual field is more important than easy repositioning;
- ceiling depth, access, fire requirements, structure, and services can accommodate it.
However, recessed does not automatically mean integrated. A random grid of recessed downlights may be physically flush yet visually unrelated to the architecture. True integration requires intentional alignment with spatial axes, wall planes, furniture, structural bays, or material joints.
Track-mounted integration: the architecture needs adaptability
Track is often visually more present than a recessed fitting, but that is not necessarily a weakness. In galleries, retail, exhibition spaces, studios, or evolving workplaces, it can be the honest expression of a flexible lighting infrastructure.
Use track when:
- displays, partitions, furniture, or merchandising will change;
- aiming and beam selection may need adjustment after occupancy;
- maintenance access must be straightforward;
- the ceiling can accept a visible technical layer;
- the project benefits from a system that can change without cutting new ceiling openings.
The design challenge is to position track as part of the architecture: aligned with a gallery wall, structural rhythm, display zone, or service spine. A track that ignores the room’s geometry can look improvised even if the individual luminaires are well selected.
Concealed linear integration: the surface becomes the source
A cove, reveal, slot, handrail, joinery edge, or ceiling coffer can conceal a linear source. This can produce indirect ceiling light, a continuous wall wash, low-level navigation light, or a luminous architectural seam.
Use this approach when the concept calls for:
- a ceiling or wall plane that glows rather than a visible fitting;
- long spatial continuity;
- soft ambient light with limited glare;
- an architectural detail that can properly conceal, cool, power, and access the source.
The trap is treating a glowing slot as a universal sign of sophistication. If the line becomes brighter than the art, face, view, or material it was meant to support, it has reversed the hierarchy. Concealment also demands real design coordination: available depth, diffuser position, heat management, driver access, light leakage, and finishing tolerances all matter.
Surface-mounted, pendant, and decorative integration: the luminaire is intentionally visible
Some spaces need a visible luminous object. A pendant over a dining table, a decorative cluster in a lobby, or wall-mounted fixtures in a heritage interior may establish scale, identity, or social focus.
Use visible luminaires when the fixture itself has a justified role:
- it marks a table, counter, or gathering point;
- it provides light at a suitable height for faces and tasks;
- it contributes to the intended period, craft, or atmosphere;
- it brings a human scale to a large volume.
The visible object should still be judged by what it does to the space. A decorative pendant that emits uncontrolled glare or casts deep shadows on faces is not rescued by its form.
Remote, in-ground, and façade-integrated methods: protect the view of the building
For façades, landscape edges, and tall spaces, the best source location may be separate from the visual target. A luminaire might be set into paving, concealed behind a parapet, mounted on a neighbouring structure, or integrated into mullions, fins, or façade recesses.
This can preserve the architecture’s daytime appearance and direct light precisely onto the intended surface. It also introduces operational responsibilities: water management, drainage, cleaning, access, corrosion resistance, aiming stability, and avoidance of direct view into occupied windows.
Pair intent, distribution, and integration
The following matrix offers a way to make early selections defensible. It is deliberately phrased around architectural outcomes rather than brands or fixture shapes.
| Architectural intention | Distribution to investigate first | Integration method to investigate first | Critical check |
|---|---|---|---|
| Make a deep lobby feel open and easy to navigate | Even wallwashing on selected boundaries | Recessed wallwashers or carefully aligned track wallwashers | Can people see the wall as a continuous plane without seeing glaring sources? |
| Reveal hand-worked stone in an entry | Grazing distribution | Concealed close-to-wall ceiling detail or in-ground / low-level exterior placement | Does grazing reveal desirable texture rather than every defect, conduit, and stain? |
| Keep a gallery adaptable while maintaining art as the focus | Adjustable spot and wallwash distributions | Track, coordinated parallel to display walls | Can curators re-aim and reposition without visual clutter or source glare? |
| Give a vaulted timber ceiling a gentle presence | Wide, controlled upward or indirect distribution | Adjustable concealed uplight or remote directional fittings | Does the ceiling become luminous without producing glare or flattening the room? |
| Mark a dining table as the social centre | Local medium-beam accent plus soft face light | Pendant, decorative luminaire, or integrated directional fittings | Is the table legible and are faces comfortable from seated viewpoints? |
| Extend a residence visually toward an exterior terrace | Low-level, limited pools of directional light | Recessed deck, step, or wall-mounted fittings | Does the exterior remain visible without overlighting it or disturbing the night setting? |
| Reveal a repeated façade rhythm | Precise accents or narrow washes on the repeating elements | Concealed façade recesses, parapets, or discreet remote mounting | Does the pattern clarify the building’s structure rather than fragment it? |
| Make a broad façade read as a single calm surface | Wide, even vertical wash | Concealed integrated façade lighting or remote asymmetric projectors | Is the surface even enough, with controlled spill, glare, and uplight? |
There is no universal “best” integration method. A recessed fitting may be ideal for a fixed museum wall but inappropriate in a changing showroom. Track may be exactly right in the showroom but visually inconsistent with a minimal residential ceiling. The decision must follow the operating reality as well as the aesthetic concept.
Draw sections before finalizing the plan
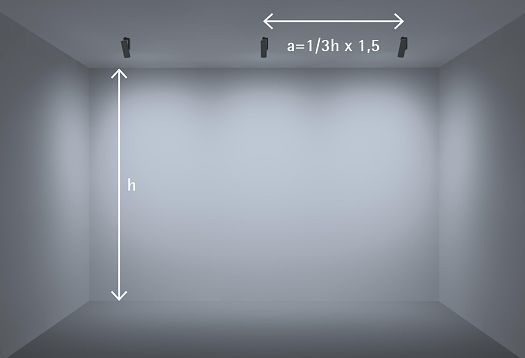
Plans are necessary, but distributions are experienced in three dimensions. A plan can show that a spotlight is aligned with an artwork; only a section can show whether its beam angle, source position, cut-off, and viewing direction are plausible.
When reviewing a lighting section, test five relationships:
-
Source to target
Is the luminaire far enough from the wall, object, ceiling, or floor to produce the intended distribution? -
Source to eye
From normal standing and seated positions, is the bright aperture shielded or likely to cause glare? -
Light to material
Will the direction reveal or flatten the intended surface? Grazing emphasizes relief; more frontal light generally reduces it. -
Light to body
Will occupants cast shadows where they work, view art, read, prepare food, or interact? -
Luminaire to building systems
Is there sufficient room for structure, insulation, ducts, sprinklers, access panels, electrical equipment, and adjustment?
The practical planning workflow in the following video demonstrates why ceiling geometry, furniture, section studies, and early structural coordination matter. The examples are residential, but the logic applies to any architectural lighting plan.
How I Design + Draw Architectural Lighting Plans
Watch selected excerpts from “How I Design + Draw Architectural Lighting Plans” by 30X40 Design Workshop. The video is useful here not as a fixture specification guide, but as a demonstration of working from spatial use and section geometry before finalizing a lighting layout.
Watch layers and spacing to see the distinction among ambient, task, and accent roles, and why a uniform ceiling grid is not an automatic solution. Notice that ceiling height and luminaire distribution must be considered together. Then watch ceiling as surface. Focus on how the vaulted ceiling is treated as an architectural plane to be illuminated, while the dining and reading areas receive more local, purpose-specific light. Continue with early coordination, which explains why lighting locations must be checked against structure before the design is fixed. Finally, watch concealed details for examples of a recessed trough and furniture-integrated light. In each case, ask what surface or activity the integration method is intended to support.
A disciplined selection method
When presented with a fixture option, resist making the decision from the product photograph. Instead, make a short intent-to-tool record for each major lighting move:
| Item | Example entry |
|---|---|
| Architectural target | Rough limestone entry wall |
| Hierarchy role | Supporting identity element, visible on arrival |
| Desired perception | Tactile, warm, and deep; not uniformly bright |
| Distribution | Controlled grazing |
| Integration | Concealed linear detail near the wall head |
| Why this integration | Keeps the source out of the arrival view and preserves the wall as the subject |
| Risks to test | Surface imperfections, bright source at approach angle, cleaning access, water or dust in reveal |
| Flexibility needed | Low; wall and effect are permanent |
This record is short, but it exposes weak decisions. If the chosen fixture cannot be linked to a target, visual role, distribution, and integration logic, it may be driven by appearance rather than intent.
It also helps when a product changes later. If a specified luminaire becomes unavailable, you do not need to defend a particular housing shape. You can protect the real requirement: “a concealed, low-glare grazing distribution that reveals this stone wall from this viewing zone, with accessible maintenance.”
Review through four failure modes
Before treating a selection as resolved, look for these frequent failures.
1. Correct fixture type, wrong distribution
A downlight may be compact and visually discreet, but its distribution may light the floor while leaving the wall dark. Conversely, an intense grazing light may be technically capable of lighting a wall but inappropriate if the wall should read as calm and uniform.
Correction: Restate the target and visual effect. Change the distribution before changing the finish or styling of the luminaire.
2. Correct distribution, wrong integration
A track-mounted wallwasher can produce an excellent wall effect, but may contradict a fixed, highly minimal interior where a calm ceiling plane is central to the architecture. A recessed wallwasher may look ideal, but be operationally unsuitable for a changing exhibition wall.
Correction: Ask whether the source should be permanent, adjustable, visible, concealed, or serviceable—and coordinate the answer with the project’s operating model.
3. Good rendering, poor eye-level comfort
A render viewed from above can hide source glare, reflections in glazing, scallops on walls, and the visual noise of repeated apertures.
Correction: Review from realistic seated and standing viewpoints, including the direction of approach. In particular, look toward bright fittings and reflective surfaces, not only at the illuminated target.
4. Architectural detail without maintenance logic
A concealed slot may create a refined effect at handover but fail when drivers cannot be reached, dust collects, water enters, fittings cannot be re-aimed, or a damaged source requires opening finished construction.
Correction: Draw the section at a scale that allows the installer and maintenance team to understand access, mounting, adjustment, drainage where relevant, and replacement.
Key takeaways
Selecting lighting distributions and integration methods is the point where a visual hierarchy becomes physically credible.
- A distribution defines how light reaches its target; an integration method defines how the source belongs to the architecture.
- Begin with the intended perception of a surface, object, volume, route, or activity—not the visual appeal of a fixture.
- Use wallwashing for legible, relatively even luminous planes; use grazing when texture and relief are the architectural subject.
- Choose recessed integration for a quiet, stable composition; choose track when adaptability and aiming matter; choose concealed linear details when a surface should appear luminous; use visible decorative fittings only when they have a spatial and experiential role.
- Resolve significant lighting moves in section as well as plan, checking target geometry, viewing angles, glare, shadows, structure, and maintenance.
- Protect the design intent in a short record that connects each choice to its target, hierarchy role, desired effect, risks, and operational needs.
In the next lesson, you will examine how reflectance, texture, gloss, and source spectrum change the perceived character of materials—so that the distribution you select supports not only spatial hierarchy, but also the intended reading of stone, timber, metal, fabric, paint, and glass.
Can't find a good explanation? Sign up and we'll make it for you
Sign up