
Hello! Welcome to your next lesson in the "Privilege Escalation & Post-Exploitation" module.
In our last session, you learned how to harvest credentials from memory, configuration files, and the registry. Gaining SYSTEM or root access and collecting passwords gives you powerful, but often temporary, control over a system. If the machine reboots, your session disconnects, or a vigilant administrator changes a password you're using, you could lose all your hard-earned access.
This lesson focuses on solving that problem by establishing persistence. Persistence is the set of techniques used to maintain a foothold on a compromised system across restarts, disconnections, and other disruptive events. By the end of this lesson, you will be able to establish persistence on a compromised host using various techniques appropriate for both Windows and Linux operating systems.
1. Windows Persistence: Beyond the Initial Foothold
Once you have administrative privileges on a Windows machine, there are numerous ways to ensure you can always get back in. Attackers often use built-in Windows features to blend in and avoid detection.
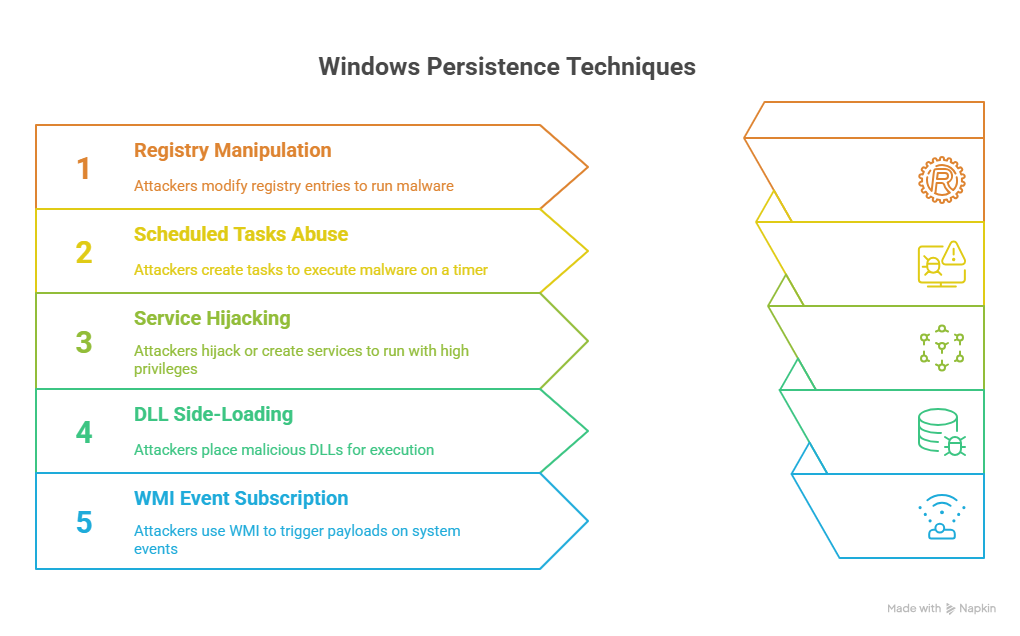
Let's look at some of the most reliable and frequently used methods. The GitHub repository "Advanced Windows persistence techniques" is an excellent cheat sheet for the commands we'll be discussing.
Advanced Windows persistence techniques and backdoor ...
To start, let's review a collection of command-line examples for common Windows persistence techniques. This will serve as a practical reference for the methods we'll be discussing.
Please quickly review the section '1. Registry-Based Persistence' and the command examples for 'Scheduled Task Persistence', 'Windows Service Persistence', and 'Startup Folder Persistence'. You don't need to memorize the commands, but familiarize yourself with the tools being used (reg, schtasks, sc, copy).
Here's a breakdown of the key techniques from that resource:
- Registry Run Keys: The most classic method. By adding an entry to
HKLM\Software\Microsoft\Windows\CurrentVersion\Run, you can command Windows to execute your payload every time the system boots. Theregcommand is used for this.- Example:
reg add "HKLM\Software\Microsoft\Windows\CurrentVersion\Run" /v "Update" /t REG_SZ /d "C:\temp\backdoor.exe"
- Example:
- Scheduled Tasks: The Windows equivalent of a cron job. You can use the
schtaskscommand to create a task that runs your payload on a schedule (e.g., every hour) or in response to an event (e.g., a user logging on). This is very powerful and can be made to look legitimate. - Windows Services: Creating a custom Windows service that runs your payload with
SYSTEMprivileges is a highly effective and stealthy method. Thesc(Service Control) utility is used to create and manage services. - Startup Folder: A simple but effective technique. Placing an executable or script in the system-wide or user-specific Startup folder will cause it to run automatically upon logon.
While these methods focus on running a payload, another powerful persistence strategy is to create or manipulate user accounts to guarantee remote access.
Deep Dive: Account-Based Persistence
Creating a "backdoor" user account is a direct way to maintain access. A more advanced technique involves manipulating existing accounts to grant yourself privileges in a way that might evade detection.
Let's watch a video that demonstrates these user-based persistence techniques.
Windows Persistence Techniques P1 | Account Tampering | TryHackMe Windows Local Persistence P1
The video 'Windows Persistence Techniques P1' by Motasem Hamdan provides excellent, practical demonstrations of account tampering for persistence.
Please watch two segments from this video: Creating a Privileged User (03:08 - 14:25): Observe how a new user is created and added to privileged groups like 'Administrators' and 'Backup Operators'. Pay close attention to the steps required to enable remote login via WinRM, a common scenario in enterprise environments. RID Hijacking (31:01 - 41:44): This is a more advanced and stealthy technique. Watch how the Relative ID (RID) of a low-privilege user is modified in the registry to match the administrator's RID (500). This tricks the system into granting administrative privileges to the user upon login, without explicitly adding them to the 'Administrators' group.
RID hijacking is a great example of how persistence techniques evolve to become stealthier. Instead of creating a new, obvious administrator account, you modify an existing, non-suspicious one to have the effective permissions of an administrator.

2. Linux Persistence: Living off the Land
Just like in Windows, persistence in Linux often involves leveraging standard system utilities and configuration files. The goal is to plant a backdoor that executes automatically.
To get a quick but comprehensive overview of the most common Linux persistence methods, let's watch this video from John Hammond.
Lesser Known Linux Persistence Mechanisms
The video 'Lesser Known Linux Persistence Mechanisms' starts with a rapid review of the fundamental techniques you'll encounter most often. This will set the stage for our detailed exploration.
Watch from 01:31 to 08:51. The video covers backdoor users, SSH keys, cron jobs, systemd services, and run control files (.bashrc). It provides a fantastic summary of the core concepts.
Now, let's dive into the specifics of these techniques using a detailed guide written from a detection engineering perspective. Understanding how defenders look for these techniques will help you use them more stealthily.
Linux Detection Engineering - Persistence Mechanisms
The Elastic Security Labs article 'Linux Detection Engineering - Persistence Mechanisms' offers in-depth explanations of the most important Linux persistence vectors. We'll use it as our primary reference.
Please read the following sections from the article. As you read, think about how each technique could be used to launch a reverse shell you learned about in previous lessons. 'T1053.003 - scheduled task/job: Cron': This is the Linux workhorse for scheduled execution. 'T1453 - create or modify system process (systemd)': Focus on systemd services and timers. This is the modern standard for managing processes and scheduled tasks on most Linux distributions. 'T1546.004 - event triggered execution: Unix shell configuration modification': Learn how files like .bashrc and .profile can be abused. 'T1098.004 - account manipulation: SSH': Focus on how modifying the authorized_keys file provides stealthy remote access.
To summarize the key Linux techniques:
- Cron Jobs: The classic Linux scheduler. By adding a line to a user's crontab or a system-wide cron file (e.g., in
/etc/cron.d/), you can run a command at any interval. - Systemd Services/Timers: The modern, more powerful replacement for cron and init systems. You can create a service file to launch your backdoor on boot and a timer file to run it on a schedule.
- Shell Configuration Files: Files like
~/.bashrc,~/.profile, or/etc/profileare executed whenever a user starts a shell session. Adding your payload to one of these files is a simple way to trigger it. - SSH Authorized Keys: One of the most common and effective methods. By adding your own public SSH key to a user's
~/.ssh/authorized_keysfile (especially the root user's), you can log in directly without a password, even if the user's password is changed.
Test your understanding!
You have gained root access on a Linux server and SYSTEM on a Windows server. Your goal is to establish stealthy, long-term access that will survive a reboot on both machines. You need to choose one persistence method for each OS.
Which methods would you choose and why? Justify your choices based on stealth and effectiveness.
Show answer
There are several good answers, but here is a strong pair of choices:
-
Linux: Adding your public SSH key to the root user's
~/.ssh/authorized_keysfile.- Why? This is extremely stealthy. It doesn't create new running processes that can be easily spotted. It leverages a legitimate administrative protocol (SSH). Access is tied to your key, not a password that can be changed. It's also very reliable.
-
Windows: Creating a new Windows Service that is configured to launch your payload.
- Why? A well-named service (e.g., "Windows Telemetry Monitor" or "Intel Graphics Helper") can easily blend in with the dozens of other legitimate services running on a system. It runs with
SYSTEMprivileges by default and is automatically started on boot, making it highly effective and reliable. It is generally stealthier than adding an obvious entry to theRunkey or a new scheduled task.
- Why? A well-named service (e.g., "Windows Telemetry Monitor" or "Intel Graphics Helper") can easily blend in with the dozens of other legitimate services running on a system. It runs with
Conclusion
You have now learned the fundamental concepts and techniques for establishing persistence, a critical phase of any penetration test or red team operation. Without persistence, your access is fragile and can be lost at any moment.
Key Takeaways:
- Persistence ensures you maintain access to a compromised system across reboots and other changes.
- On Windows, common techniques include manipulating the Registry (
Runkeys), creating Scheduled Tasks and Windows Services, and abusing user accounts (e.g., creating backdoor users or RID hijacking). - On Linux, common techniques include creating Cron Jobs, Systemd services/timers, modifying shell configuration files (
.bashrc), and adding your key to a user's SSHauthorized_keysfile. - The choice of technique often involves a trade-off between simplicity and stealth. The best attackers choose methods that blend in with normal system activity.
Next Lesson Preview:
You've gained access, escalated privileges, dumped credentials, and now established persistence. But your actions have left traces all over the system—logs, uploaded files, command history. In our final lesson of this module, we will focus on covering your tracks. You will learn how to clean up artifacts and payloads from a compromised system to hide the evidence of your intrusion.