
Hello again! In the previous lesson, you learned the jobs of the PlayCanvas viewport, hierarchy, inspector, and Assets panel. Now you will make those panels useful by giving your project a clear structure.
A game project can become confusing surprisingly quickly. Even a small room may soon contain walls, lights, a door, materials, textures, and scripts. Good organization means that when you have an idea such as “make the left wall darker,” you can find the correct thing without hunting through a list of objects called Box, Box 2, and Box 3.
By the end of this lesson, you will have a simple naming system for scene entities and a folder plan for reusable assets. This is not glamorous game design, but it protects the imaginative work you want to do later: your theatre ideas remain easy to find, change, and build.
Two kinds of organization
First, recall the difference between the two places you will organize:
| Place | What it organizes | Example |
|---|---|---|
| Hierarchy | Entities in the current scene | Floor, Wall_Left, Camera |
| Assets panel | Reusable project files | wall materials, textures, 3D models, scripts |
An entity is part of the room currently being built. A floor entity belongs in the Hierarchy because it is physically placed in the scene.
An asset is a reusable resource. A material named wall_plaster belongs in the Assets panel because you might use it on several walls. The material is not a wall itself; it is something that can be assigned to a wall.
This distinction matters because the two systems are separate:
- Moving
Wall_Leftin the Hierarchy changes the scene. - Moving
wall_plasterinto amaterialsfolder changes only how neatly your project files are stored.
Name entities by their job
A default name tells you what shape PlayCanvas created. A useful name tells you what the shape means in your game.
For example, a cube that has been stretched into a wall should not stay named Cube. Its shape may be a cube, but its job is to be a wall. Rename it Wall_Left.
For this course, use clear words separated by underscores for scene entities:
| Avoid | Prefer | Why |
|---|---|---|
Box | Floor | Explains the object’s role |
Cube 4 | Wall_Back | Tells you which wall it is |
Thing | Doorway_Frame | Tells you what the group contains |
Light 2 | Room_Light | Tells you where or why it is used |
Chair and Chair | Chair_01 and Chair_02 | Makes repeated objects distinct |
You do not need an enormous naming system. You just need one that lets you answer these three questions when you scan the Hierarchy:
- What is this?
- Where is it or what part does it play?
- Is it one of several similar objects?
For the one-room prototype, names such as these are enough:
Camera
Directional Light
Room
Floor
Ceiling
Wall_Back
Wall_Left
Wall_Right
Doorway_Frame
Choose one way to describe directions and stay consistent. For example, if you call one wall Wall_Left, do not later rename a similar object West_Wall unless you have deliberately decided to use compass directions everywhere.
The name does not have to describe every tiny detail. Wall_Left is better than Tall_Gray_Cube_That_Is_A_Wall_On_The_Left, because it remains understandable after you repaint or resize it.
Turn the Hierarchy into a useful scene map
The Hierarchy is more than a list. It is a tree, which lets you place related entities under a shared parent entity.
For the room, a parent called Room gives you one place to collect the floor, ceiling, and walls. Your future scene can be organized like this:
Root
├── Camera
├── Directional Light
└── Room
    ├── Floor
    ├── Ceiling
    ├── Wall_Back
    ├── Wall_Left
    ├── Wall_Right
    └── Doorway_Frame
        ├── Frame_Left
        ├── Frame_Right
        └── Frame_Top
The parent Room is a label and a group for the pieces that form the room. Doorway_Frame is another group inside it, collecting the three pieces that make the doorway shape.
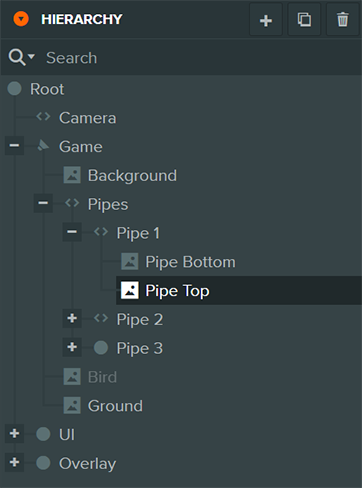
Parenting has a practical effect: if you move or rotate a parent, its children move or rotate with it. That makes it useful for a doorway frame made from several pieces.
However, do not treat parents as ordinary folders. They affect the child entities’ transforms. Keep your Camera and main light near the Root for now, rather than putting them inside Room. You want the Room group to mean “the physical room pieces,” not “everything in the entire scene.”
PlayCanvas Tutorial 1 - Getting started with PlayCanvas
Watch the selected parts of PlayCanvas Tutorial 1 – Getting started with PlayCanvas by Daniel Wood. It demonstrates the difference between entities and assets, then shows why placing related entities into a parent-child structure is useful.
Watch the Hierarchy tour to see how the panel lists scene entities and helps locate them. Continue with assets and folders, focusing on the example where one material asset can be used by more than one entity. Later, watch parenting entities; notice that moving a parent moves its children, while a child can still be moved on its own.
Use grouping only when it means something
A good hierarchy tells the story of how the scene is constructed. A messy hierarchy hides that story.
Here are three useful reasons to make a parent entity:
- A complete object has several pieces. A doorway frame has a left side, right side, and top piece.
- Several pieces belong to one area. Floor, ceiling, and walls belong under
Room. - You may need to move the complete group later. Moving
Doorway_Frameshould move every piece of that frame together.
Here are poor reasons:
- The entity list looks long.
- You do not know where something should go.
- You are grouping unrelated objects just because they are nearby.
For example, putting Floor, Wall_Left, and Camera inside a parent called Stuff does not help. A name such as Stuff makes you do extra detective work later.
The official Hierarchy guide is worth using as you start reorganizing. It explains that dragging an entity changes its parent, and that PlayCanvas normally preserves the object’s visible world position when you reparent it.
Hierarchy Panel | PlayCanvas Developer Site
Read the official PlayCanvas guide to see the editor’s exact drag-and-drop behavior. This will help you reorganize objects without worrying that they will suddenly jump to a different place in the room.
In the “Organizing the Hierarchy” subsection, read the drag-and-drop explanation. Focus on the difference between reordering an entity and making it a child of another entity. Then read the short “Searching the Hierarchy” subsection, from the search description, and remember that good names make search much more useful.
A small but valuable habit: whenever you create a new room piece in the next lessons, rename it immediately. It is much easier to rename one newly created cube than to guess which of twelve cubes should become Wall_Right.
Build your starter scene structure
Open your PlayCanvas project and set up this small foundation. You are not building the room geometry yet; you are making a sensible place for it to go.
- In the Hierarchy, create one empty entity under the Root and name it
Room. - Leave the existing
CameraandDirectional Lightwhere they are for now. - If you already have any test cubes or objects from exploring PlayCanvas, rename them according to what they are meant to become. For example, rename a stretched wall-shaped cube
Wall_Back, notCube. - Drag every actual room piece under
Room. - If you have already made a doorway from multiple pieces, create a
Doorway_Frameparent underRoom, then place those frame pieces beneath it.
You can rename a selected entity in the Inspector’s Name field. After renaming, glance at the viewport to make sure you selected the correct object before making any further changes.
Use the Hierarchy search box as a quick check. Typing wall should show only your wall entities. If it shows nothing because your objects are still named Box 1 and Box 2, that is useful evidence that they need better names.
Give assets their own shelves
The Assets panel needs a different kind of organization. Here, folders work like shelves in a workshop: they do not change what an asset does, but they make it much easier to find.
Start with only the folders you are likely to need for this prototype:
Assets
├── materials
├── models
├── scripts
└── textures
Use lowercase folder names so they stay visually consistent. The folder name tells you the kind of resource it contains:
| Folder | Put these here later |
|---|---|
materials | Surface appearances, such as wood, plaster, or metal |
models | Imported 3D objects, if you use any |
scripts | JavaScript behavior files |
textures | Image files used by materials |
Do not make dozens of empty folders “just in case.” These four are enough for now. If you later add sound for the abandoned-theatre idea, you can make an audio folder at that time.
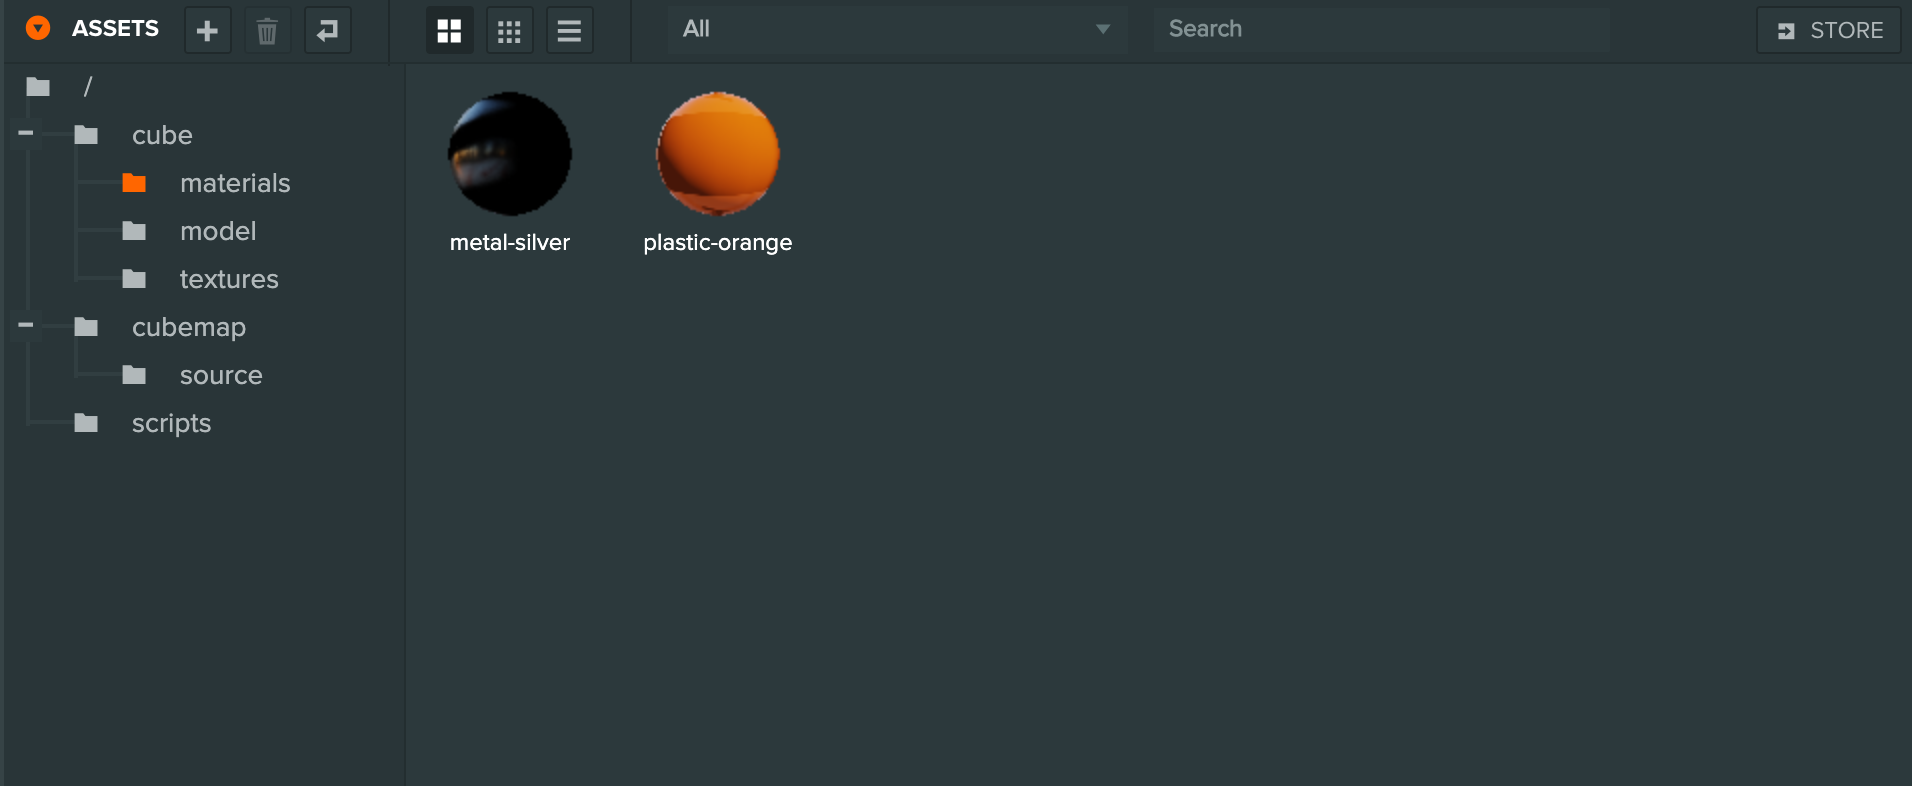
The important idea is that the folder handles the broad category, while the asset name explains its particular role. For example:
materials
├── wall_plaster
├── floor_wood
└── door_metal

scripts
├── player_controller
└── door_controller
You do not need to create those assets yet. They are examples of the naming style you will use when they exist.
Assets Panel | PlayCanvas Developer Site
Read the official PlayCanvas documentation for the exact ways to create, rename, delete, and rearrange asset folders.
In the “Folder Hierarchy” section, read the complete folder guide. Create the four starter folders using the Add Asset button or the folder context menu. Pay special attention to the fact that folders can be dragged into each other, but are only for organization and are not included in a published build.
Once the folders exist, do a quick tidy-up if you already have any assets:
- Drag a material into
materials. - Drag an imported image into
textures. - Put any JavaScript file into
scripts. - Leave an asset where it is if you are unsure what it is; guessing is less useful than checking it in the Inspector first.
Your organization rule for the rest of the course
Use this rule whenever you create something:
Give it a meaningful name immediately, then place it with its related entities or assets.
For a scene object, that means a clear entity name and a suitable parent in the Hierarchy.
For a reusable file, that means a clear asset name and a suitable folder in the Assets panel.
This takes only a few seconds at creation time, but it prevents a lot of frustration later—especially once the player, door, collision shapes, lights, and scripts begin appearing in the project.
Key takeaways
You now have an organization plan for the PlayCanvas project:
- The Hierarchy contains scene entities; the Assets panel contains reusable project files.
- Name entities by their role, such as
Floor,Wall_Left, andDoorway_Frame, rather than leaving default names likeCube. - Use parent entities to represent real groups, such as
RoomandDoorway_Frame. - Remember that parenting affects transforms: moving a parent also moves its children.
- Keep asset folders simple:
materials,models,scripts, andtexturesare enough to begin. - Good names make the Hierarchy and Assets searches genuinely useful.
Next, you will navigate the 3D viewport and change an entity’s position, rotation, and scale. Because your entities are clearly named, you will be able to select the exact wall or floor piece you intend to transform.
Can't find a good explanation? Sign up and we'll make it for you
Sign up