
Welcome to the next step in bringing your React application to iOS. In the last lesson, we navigated the structure of the native iOS project inside Xcode, identifying the critical roles of App.xcworkspace, Podfile, and Info.plist. With that foundational knowledge, your project is configured and ready to be compiled.
Today, we will execute the command that ties everything together. You will learn how to build and launch your application on the iOS Simulator using a single Capacitor CLI command: bunx cap run ios. This is a significant milestone, as it confirms that your entire development environment—from the web app build to the native iOS toolchain—is correctly configured and working in concert.
The All-in-One run Command
Capacitor provides a streamlined command for the most common development task: building your web code, packaging it into the native app, and running it on a simulator or device. This single command handles a multi-step process that would otherwise be tedious to perform manually.
Let's start by looking at the official documentation for this command to understand its purpose and syntax.
CLI Command - cap run | Capacitor Documentation
The official Capacitor documentation provides the definitive explanation for the run command.
Read the introductory paragraph and the basic syntax. Pay close attention to the first sentence, which states that the command first runs sync. Also, note the platform input, which is where we will specify ios.
As the documentation confirms, bunx cap run ios is more than a simple "run" button. It's a high-level workflow orchestrator. Let's break down what happens when you execute it.
- Syncs Project (
bunx cap sync): The command first triggers thesyncprocess. As we've discussed, this copies your latest web build assets (from thewebDirspecified incapacitor.config.ts) into the native iOS project. It also checks for any changes in your installed Capacitor plugins and updates the native dependencies accordingly by runningpod install. - Builds Native Project: Next, it invokes Apple's native build tools in the background. It compiles all the Swift/Objective-C code, including the Capacitor framework, your plugins, and the minimal native app shell itself, creating an
.appbundle. - Deploys to Simulator: Finally, it queries your system for available iOS Simulators. If you have multiple simulators, it will present you with a list. After you select one, it installs the
.appbundle onto the chosen simulator and launches it.
Executing the Build and Launch
Before running the command, it's critical to ensure your web assets are up-to-date. The run command uses the existing build output from your web app. If you've made changes in your React code, you must rebuild it first.
Your Turborepo setup should already have a script that handles this. A common pattern, which you have likely implemented, is to chain the web build and the Capacitor sync. A similar workflow is shown in the Capgo blog post on building a mobile app.
Build a Next.js Mobile App from Scratch with Capacitor 8
This article demonstrates a common scripting pattern for Capacitor development, which aligns with our Turborepo setup.
First, review the "Add Mobile Scripts" section to see an example of chaining a build and sync command, similar to what you've configured. Then, jump to Step 7: Build and Run. This shows the exact sequence we are about to follow, using bun and bunx as per your preference.
With that context, let's proceed. From the root of your monorepo, execute the following command:
bunx cap run ios
The video below provides a complete visual walkthrough of this process. While the presenter uses npm, the commands and the resulting flow are identical to what you will experience with bunx.
Build a Mobile App Fast! React + Capacitor + Tailwind + DaisyUI
This video demonstrates the end-to-end process of syncing and running a Capacitor app on the iOS simulator.
Watch the section from sync and run. Notice how the run command automatically triggers a sync, finds the available simulators, and then launches the Xcode build process in the background. This is precisely the workflow you are now executing.
After running the command, you should see output in your terminal indicating that the sync is complete, followed by a list of your installed iOS Simulators. Select one (e.g., an iPhone 14 or similar), and press Enter.
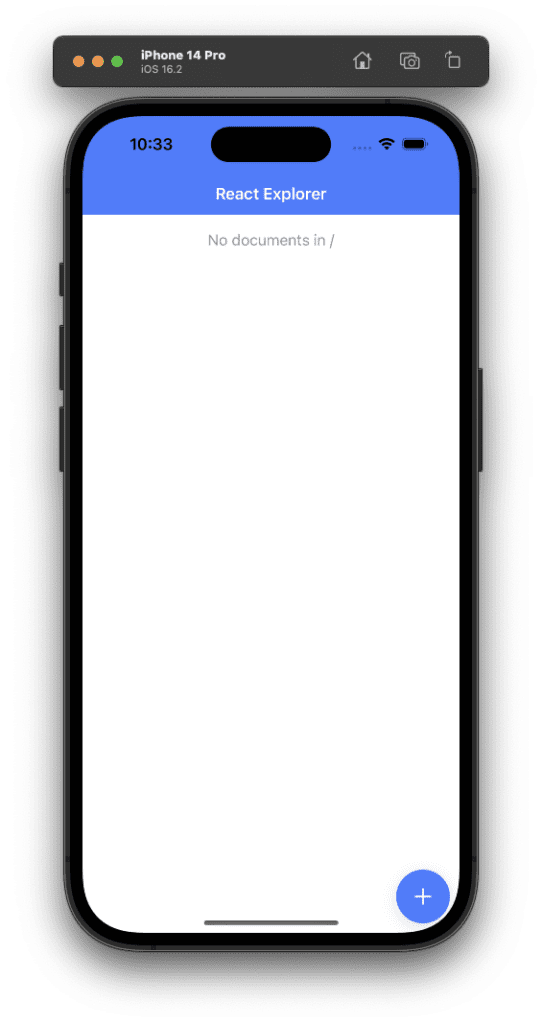
Capacitor will then initiate the native build. This can take a minute or two, especially the first time. You will see output from Xcode's build system scrolling by. If everything is successful, the iOS Simulator will launch, and you will see your React application running inside the native shell.
Potential Issues and Next Steps
A successful launch is a major validation of your setup. However, sometimes issues can arise. The video presenter briefly mentions a common one that we will tackle in a future lesson.
Build a Mobile App Fast! React + Capacitor + Tailwind + DaisyUI
This part of the video provides a quick lookahead at common build issues.
Watch the short segment from potential iOS issues, where the presenter mentions that builds can fail due to missing developer account or certificate settings in Xcode.
This "signing" issue doesn't affect running on a simulator, but it will become critical when we prepare to run the app on a physical device. For now, celebrate the fact that your app is running in a simulated iOS environment.
Conclusion
In this lesson, you have successfully built and launched your Capacitor-wrapped React application on an iOS Simulator. This was accomplished using the powerful and convenient bunx cap run ios command.
Here are the key takeaways:
- The
bunx cap run ioscommand is an orchestrator that automates the development workflow by performing async, a nativebuild, and alaunchon a selected simulator. - It is essential to build your web application's static assets before running the
cap runcommand to ensure the latest version of your code is copied to the native project. - A successful run on the simulator confirms that your entire toolchain, from web build system to Xcode and CocoaPods, is correctly configured.
The CLI is fantastic for quick, iterative development. However, there will be times when you need to dive deeper into the native project for debugging or configuration. In our next lesson, we will explore the alternative workflow: building and launching the app directly from within the Xcode IDE, which unlocks powerful native debugging and analysis tools.
Can't find a good explanation? Sign up and we'll make it for you
Sign up