
In the previous lessons, you've meticulously drafted the individual front and back pieces of your bodice block. Each line and curve was plotted based on your measurements, and the darts were placed to give the flat pattern its three-dimensional potential. You now have two distinct blueprints, one for the front and one for the back.
This lesson focuses on a critical quality assurance step: ensuring these two separate pieces will join together perfectly. In the world of design, no component is created in a vacuum; its edges and connection points must be validated against the parts they will join. Here, we will do the same by checking the primary seams—the side and shoulder seams. We'll use two key techniques: walking the seams to verify they are the same length, and truing the lines to ensure any curves that flow from one piece to the other are smooth and graceful.
By the end of this lesson, you will have verified and corrected your pattern pieces, ensuring a professional and accurate foundation for any garment you choose to build from them.
The Principles of Walking and Truing
Before you begin, it's important to understand the two core actions for this lesson.
-
Walking a Seam: This is the physical process of pivoting one pattern piece along the edge of another, mimicking the way a sewing machine foot "walks" along the fabric. Its purpose is to compare the lengths of two seams that will be stitched together. You are checking for any discrepancies that may have crept in during drafting.
-
Truing a Pattern: This is the process of correcting and refining. After walking, if you find a length discrepancy, you'll adjust the pattern to fix it. Truing also involves checking that curves—like the armhole or neckline—flow smoothly across the seam line from the front piece to the back piece, without creating awkward points or dips.
Your work in product and industrial design has likely given you a strong intuition for how separate components must be engineered to fit together seamlessly. This process is the pattern-making equivalent, ensuring the integrity of the final assembled form.
How to : Check and true sewing patterns — In the Folds
The In the Folds blog provides an excellent overview of these concepts. This will set the stage for the practical steps.
First, read the two methods for checking seams: Method one and Method two. We will be focusing on "Method two," which is also known as walking the pattern. Next, scroll down to the heading "Truing" PATTERNS. Read this brief section to understand the goal of ensuring smooth transitions, which we'll be putting into practice shortly. It starts with the phrase "As well as checking".
Step 1: Walking and Truing the Side Seams
The side seams connect the front and back bodice from the underarm to the waist. The process here is slightly more complex because you must account for the side bust dart on the front pattern piece.
You will "walk" the front pattern piece along the back, pivoting around the dart. The tutorial from Dresspatternmaking provides an excellent visual guide for this process.
Dresspatternmaking - Truing in Pattern Making: Ensuring Seam and Curve Accuracy for a Better Pattern
Follow these visual steps to walk your side seams. Because your block does not have seam allowance yet, you can simply match the cut edges of your paper patterns.
In the section titled (1) Bodice Block - Truing the Side Seam and the Armhole, follow the process shown in the first two images: Image 1a: Align the pieces at the underarm and walk the front pattern down to the top leg of the side bust dart. Make a small pencil mark on your back pattern piece at this point. Image 1b: Pivot the front piece so that the bottom leg of the dart now aligns with the pencil mark you just made. Continue walking the seam to the waistline. Do the ends of the waistline match up? If they do, your seam lengths are correct. If not, you'll need to make an adjustment.
Correcting Length Discrepancies
If there's a small difference (e.g., under 1 cm or 3/8"), the standard practice is to split the difference. For example, if the front is 1 cm longer than the back, you will shorten the front by 0.5 cm and lengthen the back by 0.5 cm. This adjustment is typically made at the hem/waistline, redrawing the line to blend smoothly.
Truing the Curves
Once the lengths match, check the curves that cross the side seam.
- Armhole: Place the front and back pieces next to each other, aligning the side seam at the underarm point. Is the curve of the armhole smooth as it transitions from back to front? Or does it form a "V" or a bubble? Use a French curve ruler to redraw this transition into a single, continuous curve.
- Waistline: The dart legs must be of equal length. When you drafted the dart, you may have already trued the waistline. Double-check this by folding the paper dart closed and ensuring the waistline edge is a smooth, continuous line.
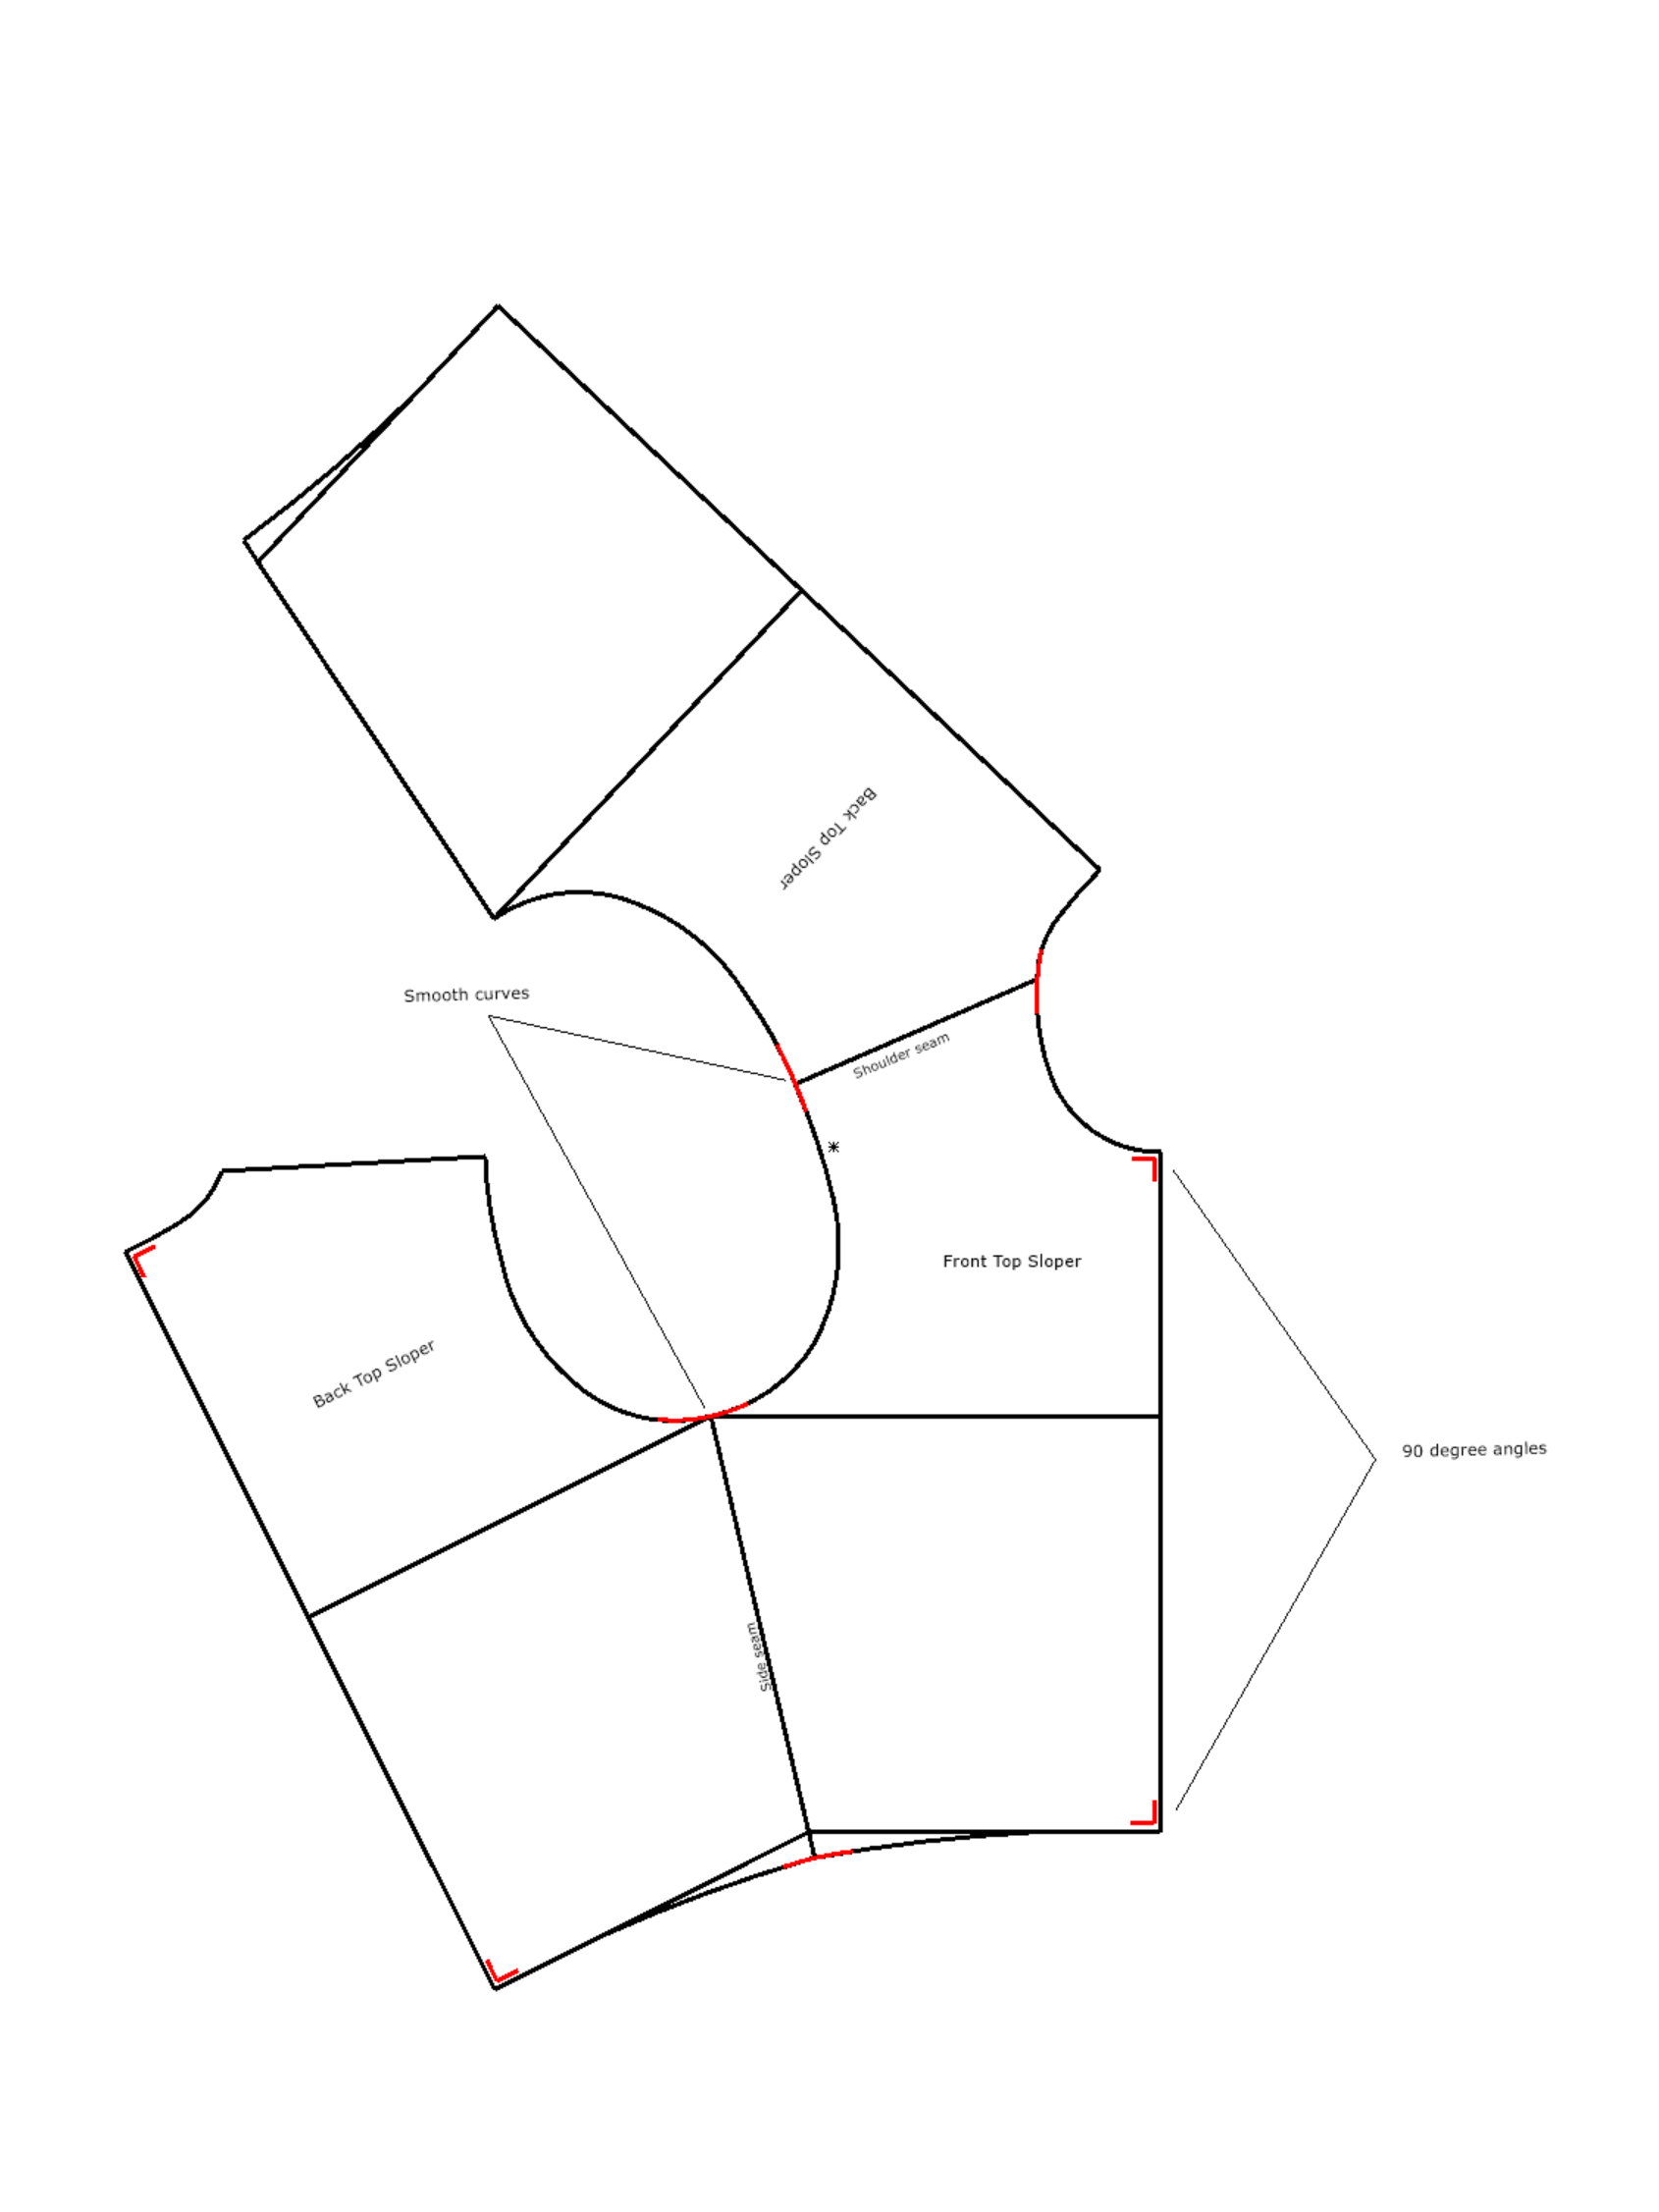
*This image illustrates the process of aligning front and back pattern pieces at the shoulder and side seams to check for smooth, continuous curves.
Step 2: Walking and Truing the Shoulder Seams
The shoulder seam is more straightforward as it's typically a shorter, straighter line. The main points to check are the length and the smooth transition of the neckline and armhole curves.
How To: True | Truing Seams (Pattern Cutting)
This video from Made to Sew provides a clear, practical demonstration of how to check for smooth transitions at the shoulder seam.
Watch the segment from this section, where the presenter tapes the shoulder seams together to check the neckline and armhole curves. Notice how she identifies that the neck is "a little bit out" and redraws the curve to ensure it's smooth.
Follow this process with your own pattern pieces:
-
Walk the Seam: Align the front and back shoulder seams at the neckline edge. Walk the patterns toward the armhole. Check if the lengths are identical. If there's a small discrepancy, adjust it by adding or removing length at the armhole end of the shoulder seam.
-
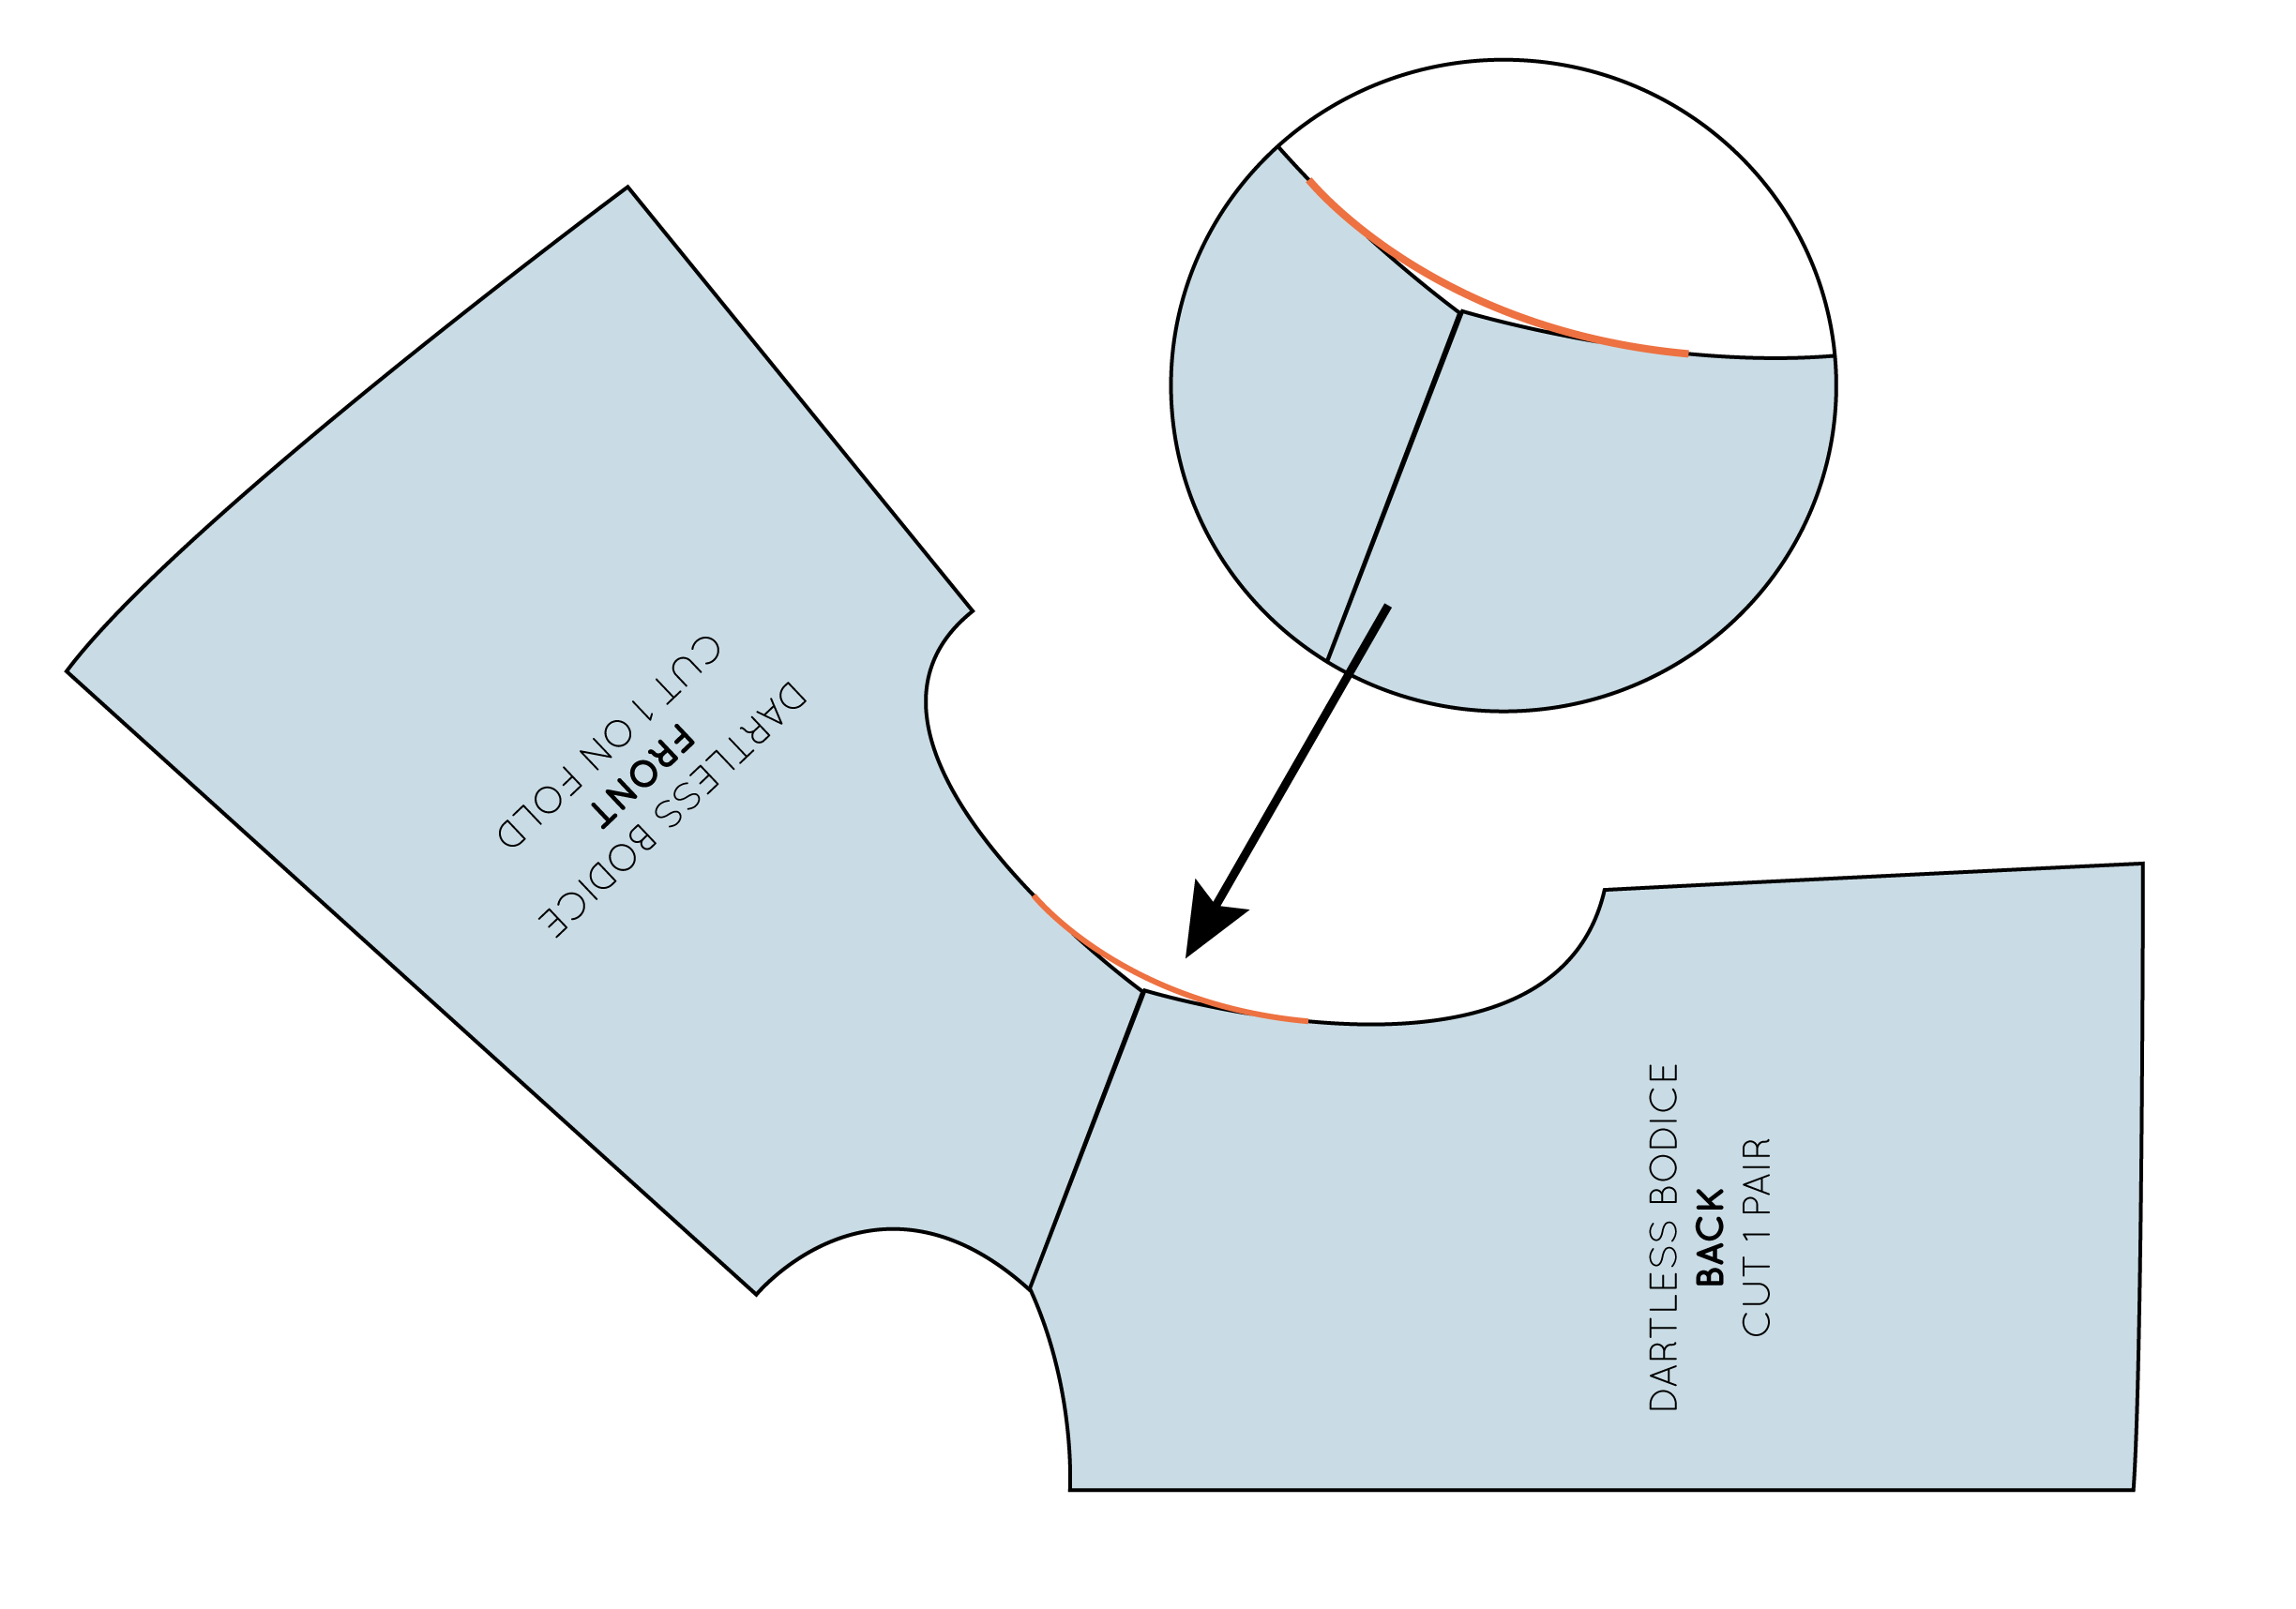
True the Curves: Place your front and back pattern pieces together, matching the shoulder stitching lines as if they were sewn and pressed open.
- Neckline Curve: Examine the point where the front and back necklines meet. They should form a gentle, continuous curve.
- Armhole Curve: Look at the "corner" where the shoulder seam meets the armhole. This should also be a smooth curve, not an angle.
This process of walking and truing may seem meticulous, but it is the foundation of a well-fitting garment. It ensures that the structural lines of your design are sound before you commit to cutting fabric.
Conclusion
You have now completed the crucial validation phase of your pattern drafting. By walking and truing the side and shoulder seams, you have ensured that your front and back bodice pieces are not just individually accurate, but that they will integrate into a coherent, well-fitting whole.
Key Takeaways:
- Walking is the technique used to compare the lengths of adjoining seams by pivoting the pattern pieces against each other.
- Truing is the process of correcting length discrepancies and smoothing the transitions of curves (like necklines and armholes) across seams.
- It's essential to account for darts when walking seams by pivoting around them.
- Small length differences are best corrected by splitting the difference between the two pattern pieces.
Your pattern sloper is now structurally sound. The next and final step in creating your block is to prepare it for use. In the next lesson, you will learn how to add specified seam allowances to all edges of the front and back pattern pieces, along with the essential markings that will guide you during cutting and sewing.
Can't find a good explanation? Sign up and we'll make it for you
Sign up