Welcome back! In our last lesson, we built a comprehensive test suite for our USDStablecoin, rigorously verifying its minting, burning, and pausable features in a local Hardhat environment. With the confidence that our contract's logic is sound, we're now ready to move from our local sandbox to a live, shared blockchain environment.
Today's objective is to deploy the upgradeable stablecoin to a testnet and demonstrate its core functionalities: minting, transferring, and pausing. This is a pivotal moment in the development lifecycle, where your code transitions from a local simulation to a tangible on-chain asset. For someone with your experience in deploying and managing financial software, this process will feel familiar—it's the "go-live" stage, albeit in a controlled testing environment. We will configure our project for deployment, deploy the contract, and then use standard ecosystem tools like a block explorer and MetaMask to interact with it, just as a real user or administrator would.
Why Are We Deploying an Upgradeable Contract?
As a brief refresher, our USDStablecoin is designed to be upgradeable. This is crucial for long-lived contracts that manage value, as it allows us to fix bugs or add new features after deployment without requiring a costly and disruptive data migration to a new contract address. The mechanism we've been using is the proxy pattern.
The following video from OpenZeppelin provides a quick, high-level review of how this pattern works.
Deploying More Efficient Upgradeable Contracts
This short clip explains the core concept of the proxy pattern, where users interact with a proxy that delegates calls to a separate implementation contract.
Watch the section from "we're going to start" to understand the basic diagram of user, proxy, and implementation. This reinforces why we have a stable address (the proxy) while the logic (the implementation) can be replaced.
With that in mind, let's prepare our project to deploy this proxy and its first implementation to a public testnet.
Step 1: Configuring the Deployment Environment
To deploy to a public network, our Hardhat project needs three things:
- An RPC Endpoint URL: A gateway to a blockchain node that allows us to send transactions. We'll get this from a service like Infura or Alchemy.
- A Private Key: The key for the account that will pay the gas fees for the deployment transaction. We will manage this securely to avoid exposing it.
- Testnet Funds: A small amount of the testnet's native currency (like Amoy MATIC or Sepolia ETH) to pay for gas.
The following guide provides a clear, step-by-step process for setting all of this up. We will use the Polygon Amoy testnet for this lesson, but the principles are identical for other testnets like Sepolia.
Deploying ERC20 Token With Hardhat: A Step-by-Step Guide
This guide from Semaphore covers the essential setup for testnet deployment, including creating a .env file for security, getting your MetaMask private key, and setting up an Infura project to get an RPC endpoint.
Follow these sections closely: Read the section on "Configuring our Project for Deployment". Create the .env file and install the dotenv package (npm i dotenv). Next, read the section on getting your private key. Follow the steps to safely export your private key from MetaMask and add it to your .env file. Important: Never commit your .env file to version control. Finally, follow the guide for "Getting Sepolia Endpoint in Infura". When creating your API key, select the Amoy network instead of Sepolia. Add the Amoy endpoint URL to your .env file.
After completing these steps, your .env file should look something like this (with your actual key and endpoint):
PRIVATE_KEY="YOUR_METAMASK_PRIVATE_KEY"
INFURA_AMOY_ENDPOINT="https://polygon-amoy.infura.io/v3/YOUR_INFURA_API_KEY"
And your hardhat.config.js should be updated to include the network configuration:
require("@nomicfoundation/hardhat-toolbox");
require("@openzeppelin/hardhat-upgrades");
require("dotenv").config();

/** @type import('hardhat/config').HardhatUserConfig */
module.exports = {
  solidity: "0.8.20",
  networks: {
    amoy: {
      url: process.env.INFURA_AMOY_ENDPOINT,
      accounts: [process.env.PRIVATE_KEY],
    },
  },
};
Lastly, get some test MATIC for the Amoy network from a public faucet, such as the official Polygon Faucet. You'll need this to pay for the deployment transaction.
Step 2: Writing the Deployment Script
With our configuration in place, we now need a script to execute the deployment. We will use the deployProxy function from the OpenZeppelin Hardhat Upgrades plugin, which handles the deployment of the implementation contract, the proxy contract, and the ProxyAdmin, then links them all together.
Create a new file named deploy-stablecoin.js inside your scripts directory and add the following code:
const { ethers, upgrades } = require("hardhat");

async function main() {
  const USDStablecoin = await ethers.getContractFactory("USDStablecoin");

  console.log("Deploying USDStablecoin (upgradeable)...");

  const usdStablecoin = await upgrades.deployProxy(
    USDStablecoin,
    [], // No arguments for our initializer
    {
      initializer: "initialize",
      kind: "transparent", // Explicitly using the transparent proxy pattern
    }
  );

  await usdStablecoin.deployed();

  console.log("USDStablecoin proxy deployed to:", usdStablecoin.address);
}

main()
  .then(() => process.exit(0))
  .catch((error) => {
    console.error(error);
    process.exit(1);
  });
This script is straightforward:
- It gets the contract factory for our
USDStablecoin. - It calls
upgrades.deployProxy, telling it to deploy our contract as an upgradeable, transparent proxy and to call theinitializefunction. - Once deployed, it prints the address of the proxy contract, which is the stable address we will always interact with.
Step 3: Deploying to the Amoy Testnet
You are now ready to deploy. Open your terminal in the project root and run the following command:
npx hardhat run scripts/deploy-stablecoin.js --network amoy
After a few moments, you should see the output confirming the deployment and printing your new stablecoin's proxy address.
Deploying USDStablecoin (upgradeable)...
USDStablecoin proxy deployed to: 0xYourProxyContractAddressHere
Congratulations! Your USDStablecoin is now live on the Amoy testnet. Copy the proxy address—we'll need it for the next step.
Step 4: Live Demonstration on Polygonscan
Now for the most exciting part: interacting with our live contract. We'll use Polygonscan (the block explorer for Polygon networks) and MetaMask.
-
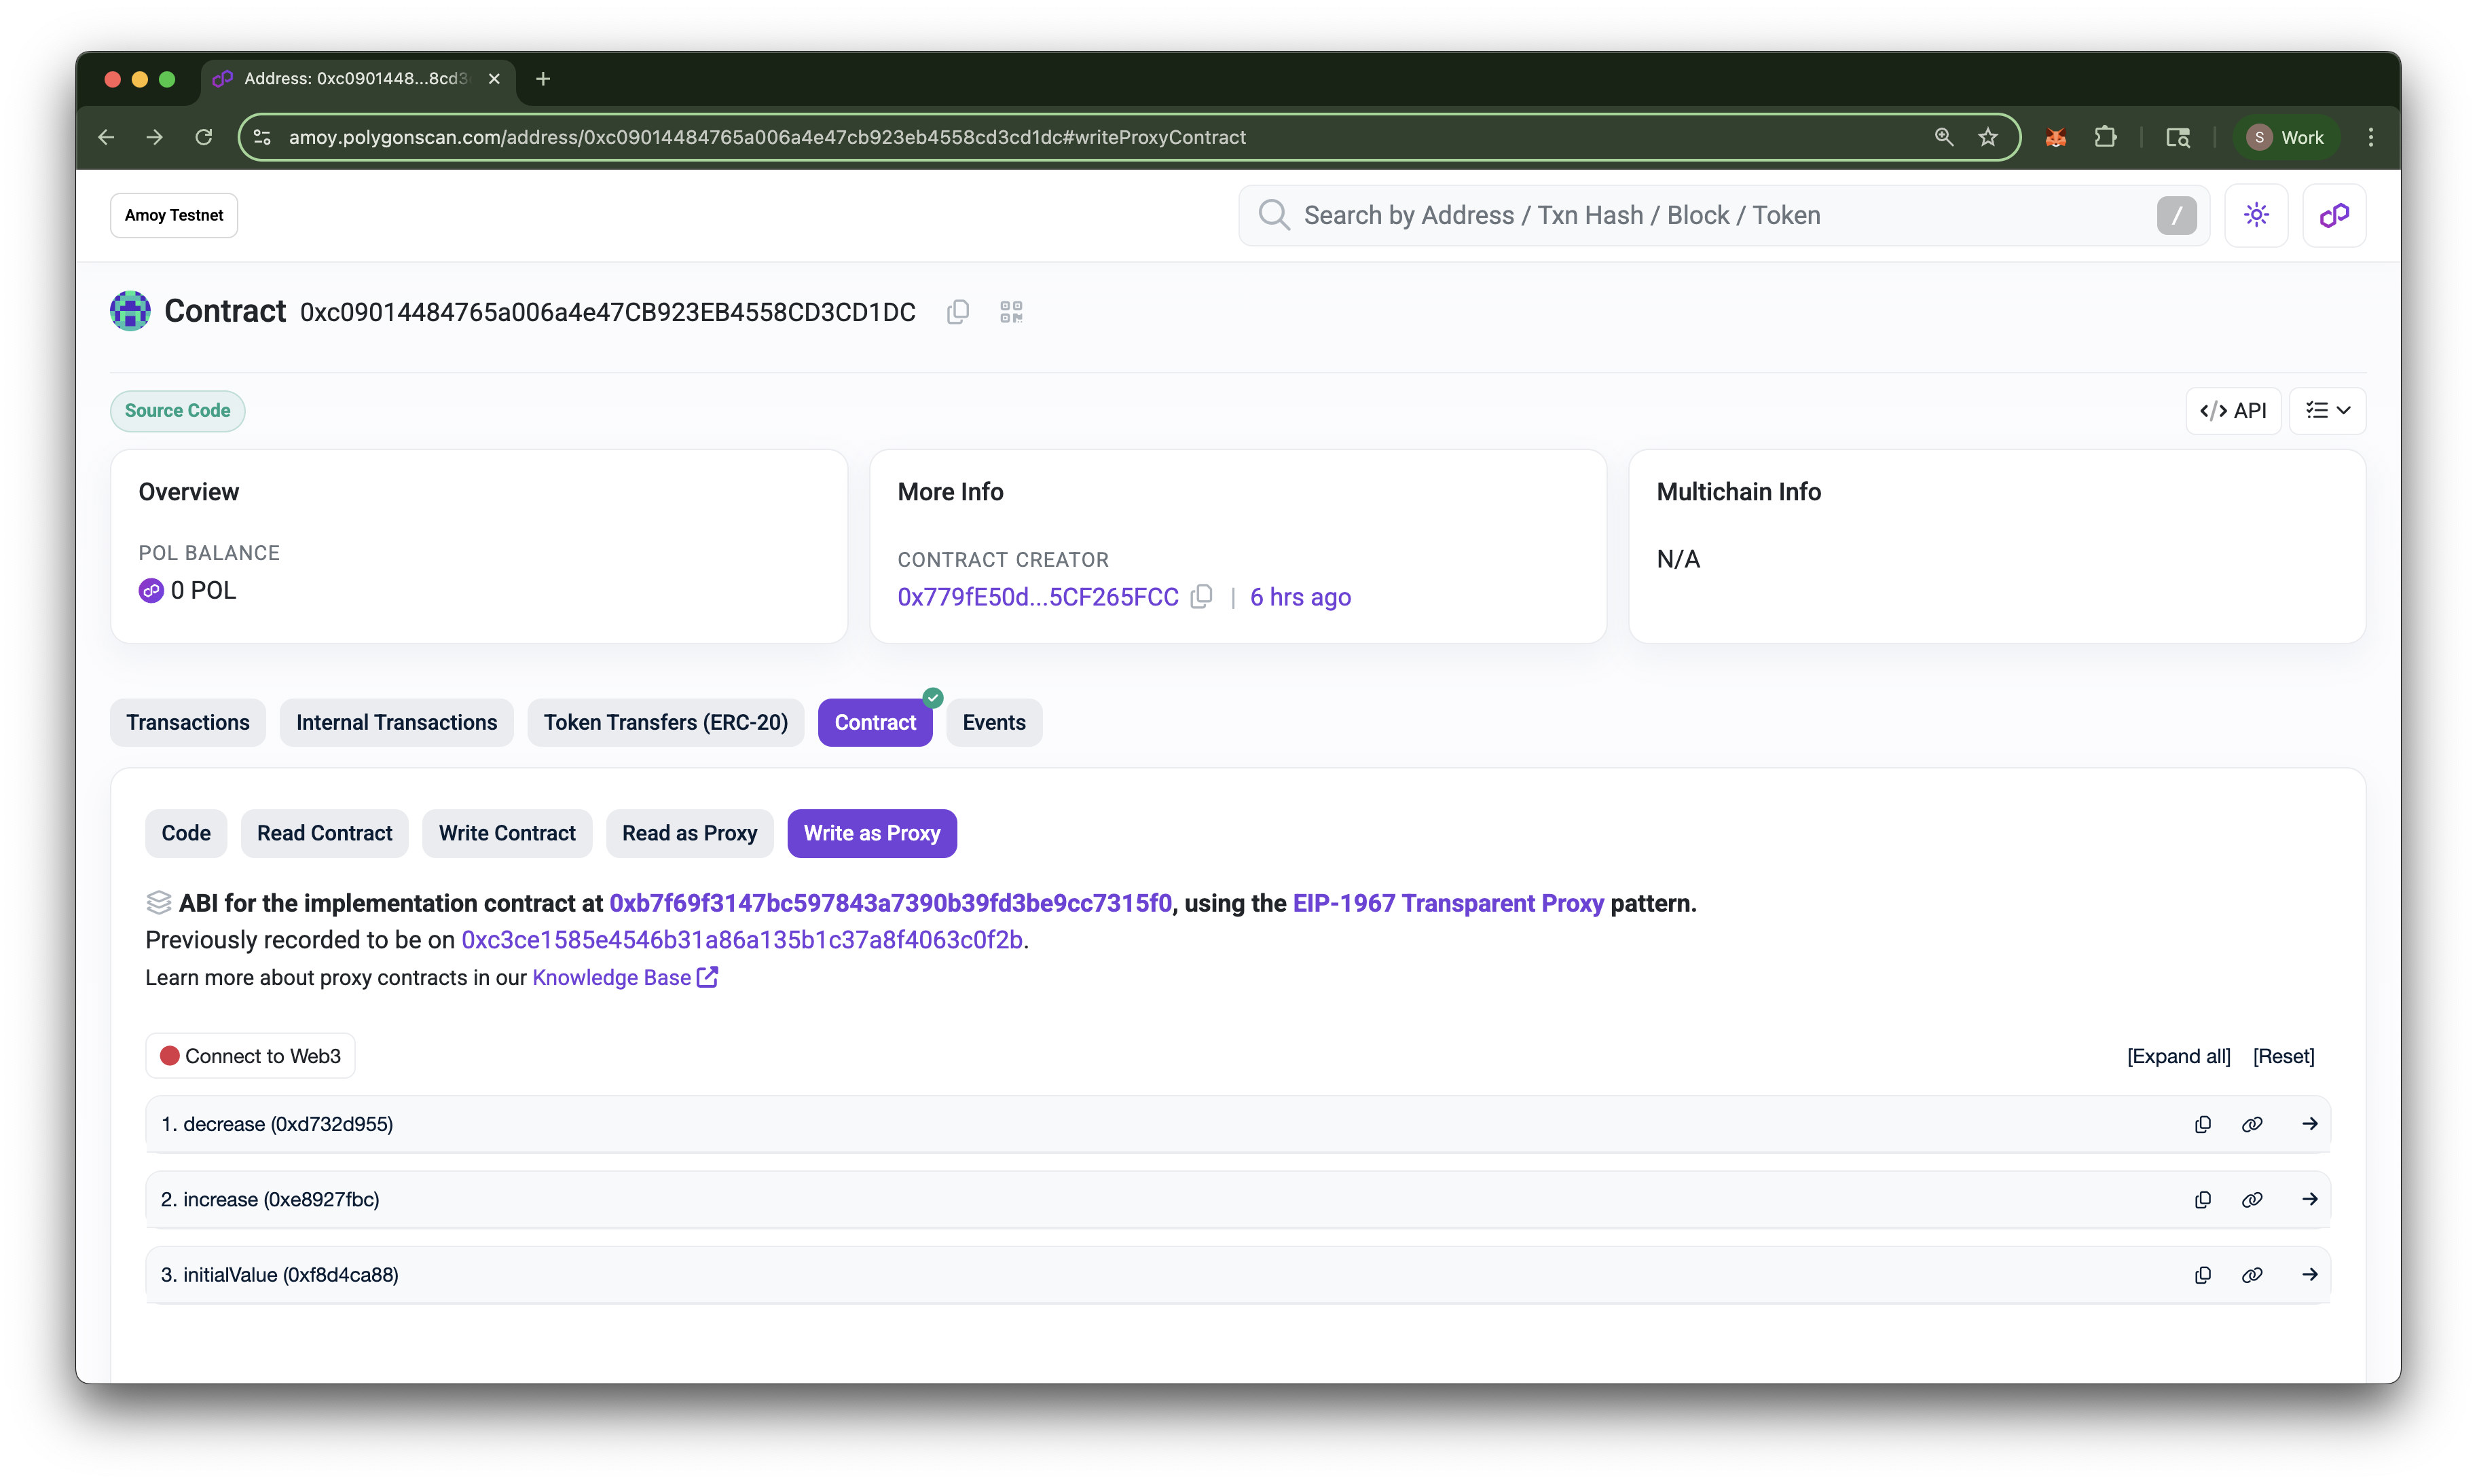
Find Your Contract: Go to amoy.polygonscan.com and paste your proxy contract address into the search bar. This will take you to your contract's main page.
-
Interact as Proxy: Navigate to the
Contracttab. Because Polygonscan recognizes the OpenZeppelin proxy pattern, you will see several sub-tabs:Code,Read Contract,Write Contract,Read as Proxy, andWrite as Proxy. We will use the "as Proxy" options, which allow us to interact with our implementation logic through the proxy's storage.
Demonstrate Minting
The deployer account automatically has the DEFAULT_ADMIN_ROLE, MINTER_ROLE, and PAUSER_ROLE. Let's use our minter power.
- Go to the
Write as Proxytab on Polygonscan. - Click
Connect to Web3and connect your MetaMask account (the one you used for deployment). - Find the
mintfunction. - In the
to (address)field, paste a different account address (e.g., a second account in your MetaMask). - In the
amount (uint256)field, enter the amount of tokens to mint. Remember our stablecoin has 6 decimals, so to mint 100 tokens, you must enter100000000. - Click
Writeand confirm the transaction in MetaMask. - Once the transaction is confirmed, you can check the token balance of the recipient address in the
Read as Proxytab using thebalanceOffunction.
Demonstrate Transferring
Now, let's confirm the recipient can transfer their new tokens.
Deploying ERC20 Token With Hardhat: A Step-by-Step Guide
This guide shows how to add a custom token to MetaMask and transfer it.
Follow the steps in the sections "Importing the token to MetaMask" and "Transferring Tokens with MetaMask". Use your stablecoin's proxy address as the "Token contract address". This will allow you to see your balance and send tokens directly from your wallet.
After importing the token to your recipient's MetaMask account, send a portion of the tokens to a third account to confirm the standard transfer function works as expected.
Demonstrate Pausing
Finally, let's test our emergency Pausable feature.
- Switch back to your owner/pauser account in MetaMask.
- On the
Write as Proxytab on Polygonscan, find thepausefunction and clickWrite. Confirm the transaction. - Once the
pausetransaction is confirmed, switch back to the recipient account in MetaMask. - Try to transfer tokens again. MetaMask should now estimate that the transaction will fail, and if you submit it, it will be reverted by the contract's
whenNotPausedmodifier. - Switch back to the owner/pauser account, call the
unpausefunction, and confirm the transaction. - Attempt the transfer one more time from the recipient account. It should now succeed.
Conclusion
In this lesson, you successfully bridged the gap between local development and on-chain deployment. You configured your environment for a live testnet, deployed your upgradeable USDStablecoin, and demonstrated its core administrative and user-facing functions using essential ecosystem tools.
Key Takeaways:
- Deployment Configuration: You learned how to configure
hardhat.config.jswith a testnet RPC endpoint and manage private keys securely using a.envfile. - Upgradeable Deployment: You used
upgrades.deployProxyto deploy your contract according to the transparent proxy pattern. - On-Chain Interaction: You gained hands-on experience interacting with a deployed proxy contract through a block explorer (Polygonscan), demonstrating how to perform privileged actions like minting and pausing, as well as standard user actions like transferring tokens.
You now have a fully functional, upgradeable stablecoin operating on a public blockchain. In our next module, we will broaden our scope to another critical area of tokenized money: security tokens. We will begin by exploring how they differ from stablecoins and analyzing the design patterns and standards required to handle their unique compliance and identity management needs.