
Welcome back! In our last lesson, you meticulously constructed the front armhole, completing the upper contours of your bodice block. The pattern piece on your desk now has its neckline, shoulder, armhole, and side seam defined.
This lesson addresses the final shaping element for the front bodice: the waist dart. While the side bust dart you drafted previously creates room for the bust, the waist dart is what tapers the garment from the bust down to the waist, creating a fitted silhouette. Your background in industrial design has prepared you to think about how flat materials are manipulated to create three-dimensional forms; this is a classic example of that principle in action.
By the end of this session, you will have drafted the front waist dart, completing the fundamental shaping of your front bodice block.
Why and Where: The Logic of the Waist Dart
A bodice doesn't hang straight down from the bust; it follows the curves of the body. The primary function of waist darts is to remove the excess fabric between the wider circumference of the bust/chest area and the narrower circumference of the waist. The size and placement of these darts are what create the garment's fit.
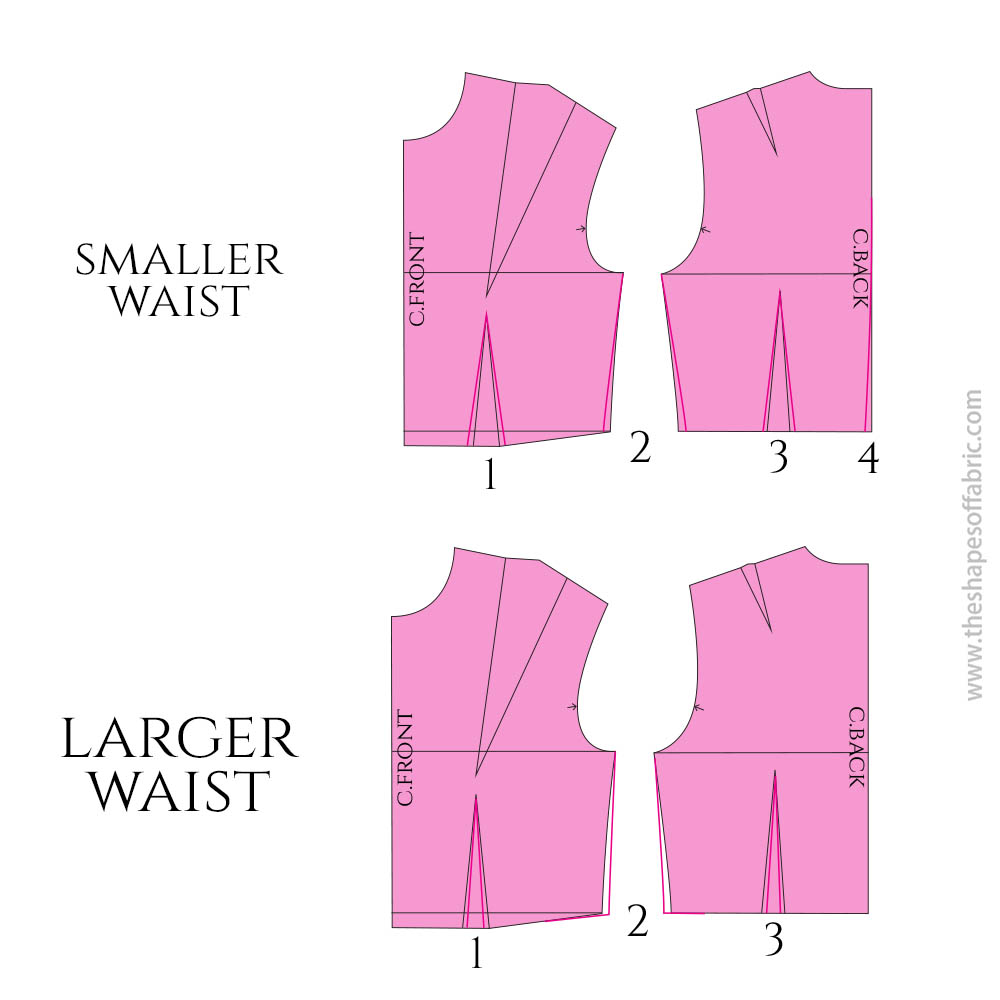
The front waist dart is positioned vertically below the fullest part of the bust. This placement ensures the shaping is applied correctly relative to your body's contours. Your first step is to establish this vertical line on your pattern draft.
You have already marked your bust point (apex) in a previous step. Now, you will draw a vertical line straight down from this point to your waistline.
The tutorial from In the Folds clearly shows how to establish the vertical line that will center your waist dart. We will use it to place the dart correctly.
In the section "Mark the bust point," locate your bust point on the bust line. Now, follow the instruction to draw a vertical line downwards from the bust point to your waistline. This line is the central guide for your dart.
Calculating the Dart's Volume
The "volume" or width of the dart isn't arbitrary; it's calculated based on your measurements. You've already accounted for some of the waist shaping with the back dart you drafted in a previous module. Now, we'll calculate the remaining amount to be suppressed in the front.
Here is the logic:
- Total Waist Suppression: This is the total amount of fabric width that needs to be removed at the waistline to make the pattern fit your body. It's the difference between your half-bust measurement and your half-waist measurement (including ease).
- Front Dart Intake: You've already removed some of this excess with your back waist dart. The width of your front waist dart is the remaining amount.
For example, if your total suppression is 7 cm and your back dart was 3 cm wide, your front waist dart will need to be 4 cm wide. Use the back dart width from your own back pattern piece for this calculation.
Drafting the Front Waist Dart
Now that you have the location and the width, you can draw the dart.
-
Mark the Dart Width: On your waistline, measure and mark half of the calculated Front Dart Intake on each side of the vertical line you drew from the bust point. For a 4 cm dart, you would mark 2 cm to the left and 2 cm to the right.
-
Establish the Dart Point: A dart should never be sewn all the way to the bust apex; doing so creates a pointed and unnatural shape. The dart point must stop slightly below the apex to allow the fabric to curve smoothly over the bust. This is a critical detail for achieving a professional fit. A standard distance is about 2 cm (or ¾ inch) below the bust point.
The resource How to draft the Basic Bodice Pattern confirms this best practice.
How to draft the Basic Bodice Pattern
This guide provides a quick confirmation on the dart's vertical endpoint.
Under the "Bodice Pattern: Front piece" heading, notice the instruction that the dart starts 2cm below the bust point. Mark this new, lower point on your vertical dart line. This will be the tip of your waist dart.
- Draw the Dart Legs: Connect the two points you marked on the waistline to the dart point you just established below the apex. These two lines are the "dart legs."

To ensure both dart legs are the same length, measure one leg. Then, pivot your ruler from the dart point and adjust the second leg's endpoint on the waistline so that its length matches the first. This might slightly alter the waistline curve, which is a normal and necessary adjustment known as "truing the pattern."
The following video provides an excellent demonstration of drafting the dart and truing the waistline.
How to Pattern a Bodice Block from Your Measurements (Front)
This video from The Awl-Nighter walks through the complete process of drafting the front waist dart.
Watch how the presenter marks the dart on the waistline, draws the dart legs, and adjusts the waistline curve. First, see how the dart legs are drawn from the apex to the waistline from this segment. Then, watch the crucial step of shortening the dart point away from the apex, which is explained from this point. Finally, observe how the waistline is redrawn to connect smoothly to the new dart leg point in the section from here.
Follow these steps to draw your own front waist dart, ensuring you lower the dart point and true the dart legs and waistline for an accurate pattern.
Conclusion
Congratulations! You have now drafted the front waist dart, completing the shaping system for your front bodice block. The pattern piece now incorporates both a side bust dart to create volume for the bust and a waist dart to taper the silhouette for a close fit.
Key Takeaways:
- The front waist dart is vertically aligned with the bust apex.
- The width of the dart is calculated based on the difference between your bust and waist measurements, accounting for any shaping already done in the back dart.
- The dart point must end below the bust apex (typically 2 cm / ¾") to create a smooth, rounded shape over the bust.
- Dart legs must be of equal length, which may require redrawing (truing) the waistline slightly.
Your front and back bodice blocks are now fully drafted. However, they are still two separate pieces. The next step is to ensure they will sew together perfectly. In our next lesson, we will begin the finalization process by walking the side and shoulder seams to check for length discrepancies and true the connecting lines.
Can't find a good explanation? Sign up and we'll make it for you
Sign up