In our last lesson, you successfully built a script to connect to your deployed SecurityToken contract and read its on-chain state. This is analogous to querying a database. Now, we'll move from reading data to writing it by programmatically executing transactions. This is the core of any DApp backend or automation script, akin to the "Load" phase in an ETL pipeline where you write transformed data to a target system.
This lesson will equip you to execute mint and transfer transactions directly from your Node.js script. The key new concept is the Signer—an object in ethers.js that represents an Ethereum account and can sign transactions, thereby authorizing state changes. You'll learn how to use a Signer to call your contract's write functions, effectively turning your script into a powerful administrative tool for your token.
1. From Read-Only Provider to State-Changing Signer
In the previous lesson, we used a Provider to connect to the blockchain. A Provider gives you read-only access, which is perfect for fetching balances or token names but insufficient for operations that change the blockchain's state, such as minting or transferring tokens.
To perform these "write" operations, you need a Signer. A Signer is an abstraction of an Ethereum account that can sign messages and transactions, which proves ownership of the account and authorizes the transaction. When you send a transaction, you're asking the network to change its state, and this requires a signature and payment for gas fees.
In ethers.js, the most common way to create a Signer in a backend script is by instantiating a Wallet object with an account's private key and connecting it to a provider.
Let's watch a segment from the Dapp University course that explains this fundamental concept.
Master Ethers.js for Blockchain Step-by-Step [Full Course]
This video provides an excellent walkthrough of creating transactions with Ethers.js. We'll focus on the setup of a wallet, which acts as our signer.
Please watch the section that covers setting up a wallet. Pay close attention to these key points: The importance of using a test network and a burner wallet when handling private keys in code. How to create a new ethers.Wallet instance by passing it a private key and a provider. The explanation of what a Wallet object does: it can sign transactions on behalf of an account, similar to how MetaMask does behind the scenes.
2. Executing Write Functions: The connect() Pattern
Once you have a Signer (our Wallet object), you can't just call a write function on the same contract instance you used for reading. The original instance is connected to a read-only provider. You need to create a new instance of the contract that is "connected" to your signer.
The pattern for this is contract.connect(signer). This method returns a new contract object that has all the same functions, but when you call them, they are executed as transactions signed by the provided signer.
This concise article from MetaMask's documentation explains the pattern beautifully.
Ethers.js: How to send ERC-20 Tokens
This guide shows two ways to send ERC-20 tokens. We'll focus on the modern, simplified approach that Ethers.js enables.
Please read the short section titled "Use a signer". This section perfectly illustrates the contract.connect(signer) pattern and how it simplifies sending a state-changing transaction to a single function call.
3. Building Your Minting and Transfer Script
Now, let's apply these concepts to our SecurityToken. We'll create a new script, execute.js, that will first mint new tokens to a specified address and then transfer some of those tokens to another address.
First, let's update your .env file to securely store the private key of the account that will be sending the transactions (i.e., the administrator of your SecurityToken contract). Remember to use the private key from a burner/test wallet, never one with real funds.
.env file:
SEPOLIA_RPC_URL="https://eth-sepolia.g.alchemy.com/v2/YOUR_ALCHEMY_API_KEY"
PRIVATE_KEY="YOUR_BURNER_WALLET_PRIVATE_KEY"
Now, create a new file named execute.js in your security-token-scripts project. The following code demonstrates the complete flow: setting up the signer, connecting it to the contract, and executing the mint and transfer functions.
// 1. Imports and setup
require('dotenv').config();
const { ethers } = require('ethers');
const contractABI = require('./abis/SecurityToken.json').abi;

// 2. Configuration
const rpcUrl = process.env.SEPOLIA_RPC_URL;
const privateKey = process.env.PRIVATE_KEY;
const contractAddress = '0x...'; // PASTE YOUR DEPLOYED SecurityToken ADDRESS

// The addresses we will interact with
const mintRecipientAddress = '0x...'; // Address to receive the newly minted tokens
const transferRecipientAddress = '0x...'; // Address to receive a subsequent transfer

async function main() {
  try {
    // 3. Setup provider and signer
    const provider = new ethers.JsonRpcProvider(rpcUrl);
    const signer = new ethers.Wallet(privateKey, provider);
    console.log(`Transactions will be sent from: ${signer.address}`);

    // 4. Create contract instance connected to the signer
    const securityTokenContract = new ethers.Contract(contractAddress, contractABI, signer);
    console.log(`Connected to SecurityToken contract at ${contractAddress}`);

    // --- MINTING TOKENS ---
    console.log(`\nMinting 1000 tokens to ${mintRecipientAddress}...`);
    const mintAmount = ethers.parseUnits('1000', 18); // Mint 1000 tokens with 18 decimals

    // 5. Execute the mint transaction
    const mintTx = await securityTokenContract.mint(mintRecipientAddress, mintAmount);
    console.log(`Mint transaction sent! Hash: ${mintTx.hash}`);

    // 6. Wait for the transaction to be mined
    const mintReceipt = await mintTx.wait();
    console.log(`Mint transaction mined in block: ${mintReceipt.blockNumber}`);

    // Check balance after minting
    let balance = await securityTokenContract.balanceOf(mintRecipientAddress);
    console.log(`Balance of ${mintRecipientAddress}: ${ethers.formatUnits(balance, 18)} tokens`);


    // --- TRANSFERRING TOKENS ---
    console.log(`\nTransferring 250 tokens from ${signer.address} to ${transferRecipientAddress}...`);
    // Note: This assumes the signer (admin) minted to themselves first, or has a balance.
    // If you minted to a different address, you'd need to run this from that account's private key.
    // For this example, let's assume you've set mintRecipientAddress to be the same as your signer.address.
    const transferAmount = ethers.parseUnits('250', 18);

    const transferTx = await securityTokenContract.transfer(transferRecipientAddress, transferAmount);
    console.log(`Transfer transaction sent! Hash: ${transferTx.hash}`);

    const transferReceipt = await transferTx.wait();
    console.log(`Transfer transaction mined in block: ${transferReceipt.blockNumber}`);

    // Check balances after transfer
    balance = await securityTokenContract.balanceOf(signer.address);
    console.log(`New balance of sender (${signer.address}): ${ethers.formatUnits(balance, 18)} tokens`);
    balance = await securityTokenContract.balanceOf(transferRecipientAddress);
    console.log(`New balance of receiver (${transferRecipientAddress}): ${ethers.formatUnits(balance, 18)} tokens`);

  } catch (error) {
    console.error('An error occurred:', error);
    process.exit(1);
  }
}

main();
Breaking down the script:
- Step 3: We create both a
providerfor general network communication and asignerusing ourprivateKey. Thesigneris now our identity for sending transactions. - Step 4: We instantiate the contract directly with the
signerinstead of theprovider. This is a convenient shortcut provided byethers.jsthat internally does theconnect()for you. The result is the same:securityTokenContractis now ready to send signed transactions. - Step 5: We call the
mintfunction just like we called read functions before. Because our contract instance is connected to asigner,ethers.jsautomatically builds, signs, and sends the transaction to the network. - Step 6: The call returns a transaction response object almost immediately. However, the transaction itself is not yet confirmed on the blockchain. The
tx.wait()function pauses the script until the transaction is mined into a block, returning a detailed receipt.
After running your script (node execute.js), you can take one of the transaction hashes printed to the console and look it up on a block explorer for the Sepolia testnet. The result should look something like the image below, providing on-chain proof that your script successfully executed the mint function.
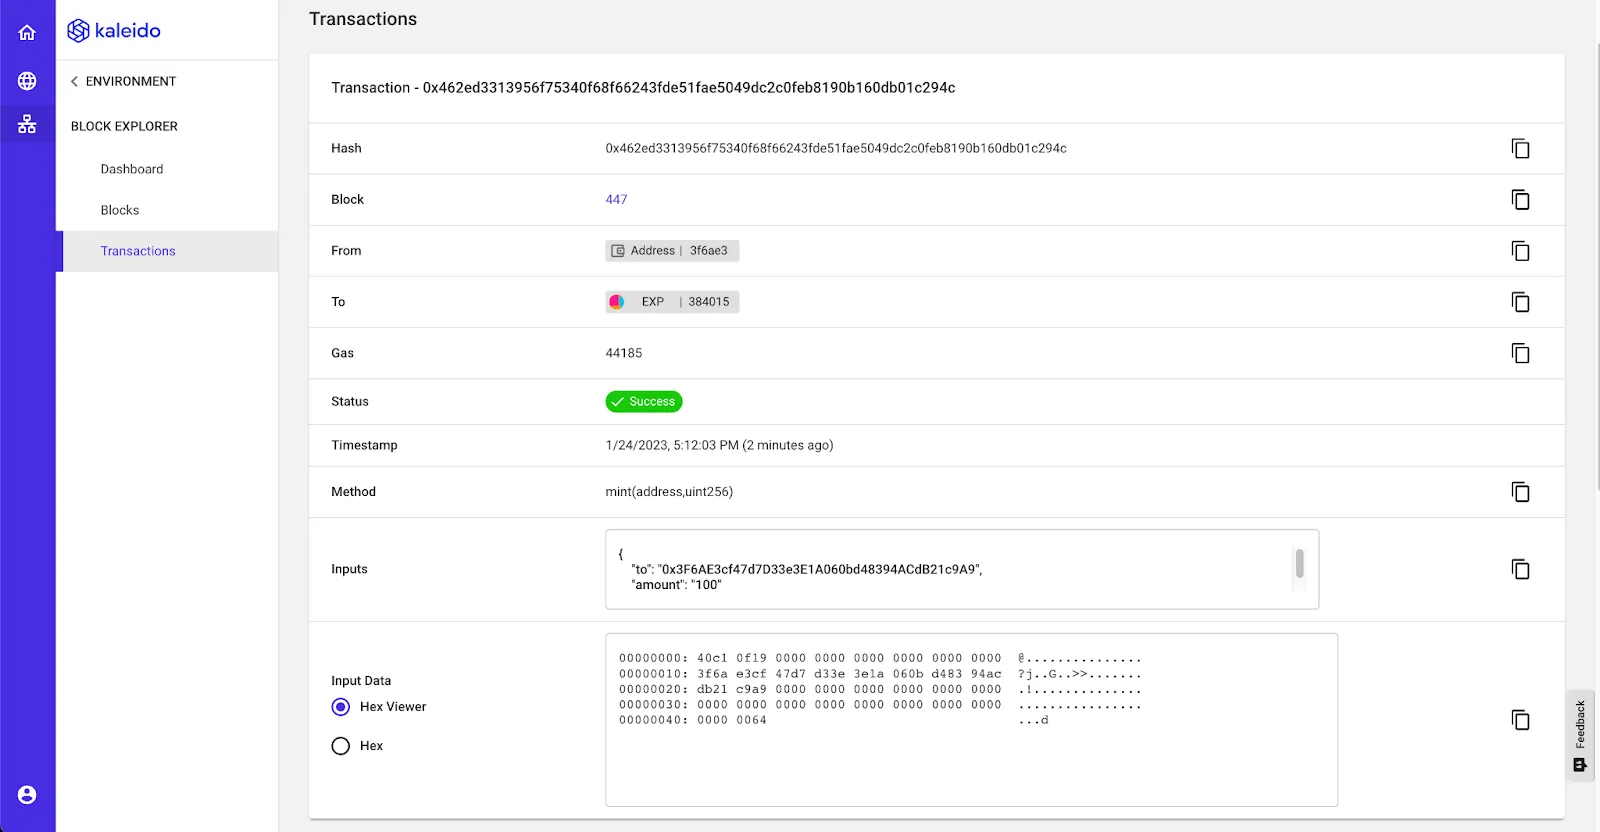
The process for transferring is identical; you just call the transfer function with the appropriate arguments. This powerful and reusable pattern is the foundation for all programmatic write interactions with your smart contracts.
Conclusion
In this lesson, you've bridged the final gap between off-chain scripts and on-chain state changes. You've learned how to go beyond simply reading data to actively executing transactions that alter the state of your smart contract.
Key Takeaways:
- A
Provideris for read-only access, while aSigneris required for write operations. - The
ethers.Walletclass is a common way to create aSignerin a backend script using a private key. - You must connect a
Signerto a contract instance usingcontract.connect(signer)(or by passing the signer during instantiation) to send transactions. - Calling a write function returns a transaction response; you must use
tx.wait()to ensure the transaction has been mined and confirmed.
Your script can now programmatically manage token supply and distribution. The transactions you just executed also emitted events on-chain, logging the details of the mint and transfer. In our next lesson, we will learn how to write a script to listen for these real-time events, enabling you to build reactive applications and monitoring tools.