
Welcome to our final lesson. In our last session, you successfully prepared and submitted your iOS application to the App Store, a significant milestone. Now, we'll complete your journey by navigating the final steps for your Android app: submitting it for review on the Google Play Store.
This lesson guides you through the entire process, from understanding Google's production requirements to creating and submitting your final release. By the end of this session, you will have completed all the necessary actions to make your app available to billions of Android users, fulfilling the core goal of this course.
1. Understanding Google's Path to Production
Unlike Apple's more direct submission process, Google Play implements a mandatory testing phase for new developers to ensure app quality and stability. In a previous lesson, you learned how to use the various testing tracks. To unlock the ability to publish to production, you must first meet a specific set of criteria on the closed testing track.
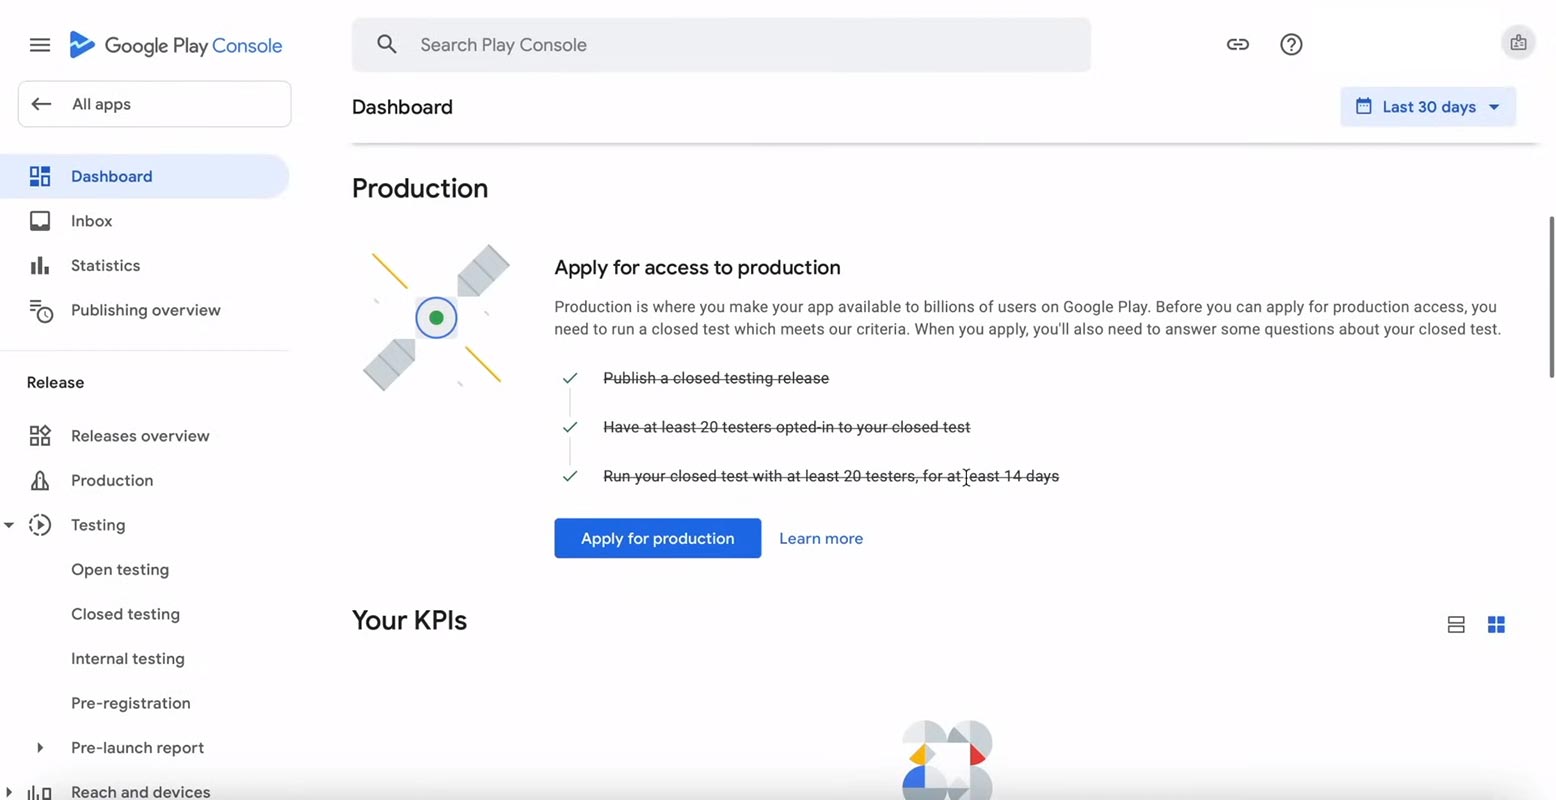
As the dashboard indicates, you must:
- Have an active closed testing release.
- Gather at least 20 testers who have opted-in to your test.
- Run the closed test for at least 14 consecutive days.
This requirement is a key policy from Google and not specific to Capacitor. It's designed to encourage thorough testing before an app goes live. The article from Capgo provides some excellent context on this.
How Easy Is It to Turn a Web App into a Mobile App with Capacitor?
This article, written for web developers, explains the "why" behind app store rules, particularly Google's testing requirements.
Read the section Google Play Testing Adds Calendar Time to understand the rationale and timeline implications of this policy. It's a useful perspective as you plan your launch.
Assuming you have already started this process after our lesson on testing tracks, let's proceed with the steps to prepare and submit your final release once these requirements are met.
2. Preparing the Production Release
Before you can create a production release, you need two things: a final, signed Android App Bundle (AAB), and a complete and polished store listing.
Generating the Final AAB
You've already generated a signed AAB for testing. The process for production is identical, but it's critical to update your app's version information in the android/app/build.gradle file.
versionCode: This is an integer that must be incremented for every new release you upload to the Play Store. IfversionCode1 is in testing, your production release must be 2 or higher.versionName: This is the public-facing version string (e.g., "1.0.1") that users see.
Ensure your build.gradle is updated, then generate the AAB as you've done before. First, build your web assets and sync them.
# From your 'mobile' package directory
bun run build
bunx cap sync android
Then, generate the release bundle:
cd android
./gradlew bundleRelease
This will produce the signed AAB file at android/app/build/outputs/bundle/release/app-release.aab.
Completing the Store Listing and App Content
Your app's presence on the Play Store is defined by a series of forms and asset uploads in the Play Console. You likely filled out some of this when creating the app record, but now is the time for a final, thorough review.
The following video provides a comprehensive walkthrough of every section you need to complete.
How to Publish an Android App to Google Play | Updated 2024
This video by MJSD Coding is an excellent and up-to-date guide for navigating the Google Play Console's submission interface.
First, watch the segment on app content. This covers the crucial "App content" section where you declare your privacy policy, ad usage, content rating, target audience, and fill out the detailed Data Safety form. These declarations are legally significant and must be accurate. Next, watch the walkthrough of the main store listing. This part covers your app's category, contact details, and most importantly, your public-facing metadata: the app name, descriptions, and all required graphic assets (icon, feature graphic, and screenshots).
Pay close attention to the asset requirements. You'll need:
- A high-resolution app icon (512x512).
- A feature graphic (1024x500).
- Phone screenshots (at least 2).
- Tablet screenshots (if your app supports tablets).
For a quick reference, the LobeHub guide offers a concise checklist for these items.
Capacitor App Store Publishing | Ski... · LobeHub
This guide provides useful checklists for store submission assets.
Review the tables under "Android Screenshot Sizes" and "Feature Graphic" for a quick summary of the required dimensions. Then, look at the list under "Store Listing" for a checklist of the metadata fields.
3. Submitting the Application for Review
With your AAB generated and your store listing complete, you are ready for the final submission sequence.
Applying for Production Access
Once your closed test has met the 14-day/20-tester requirement, the "Apply for production" button on your dashboard will become active.
How to Publish an Android App to Google Play | Updated 2024
The video guide clearly shows what happens when the testing requirements are fulfilled.
First, watch the section from new developer accounts which recaps the testing requirements. Then, skip to apply for production access to see how to submit your application for production access. You will be asked a few questions about your app and your testing process.
After you submit your request for production access, Google will review it. This can take up to 7 days. Once approved, you gain the ability to create production releases.
Creating and Rolling out a Production Release
The process of creating a production release is nearly identical to creating a testing release.
- Navigate to the Production track in the left-hand menu of the Play Console.
- Click Create new release.
- Upload the
app-release.aabfile you generated. - Enter your release notes. These notes will be visible to users on the Play Store, so describe what's new in this version.
- Review the release.
- Click Start rollout to Production.
When you start the rollout, you have the option of a phased rollout (also called a staged rollout). This is a highly recommended best practice. Instead of releasing to 100% of users immediately, you can release to a small percentage (e.g., 5%, 10%) and monitor for any unexpected crashes or issues before increasing the percentage.
After you confirm the rollout, your app's status will change to "In review." The review process for production releases typically takes a few days. You will be notified once your app is approved and live on the Google Play Store.
4. Handling Potential Rejections
Just as with the App Store, there is always a chance your app could be rejected during review. Google's review team will provide a reason, typically citing a specific policy violation.
Capacitor App Store Publishing | Ski... · LobeHub
This guide contains a helpful list of common rejection reasons for Android.
Familiarize yourself with the table under "Android Rejections". Common issues for new apps include stability problems (crashes or "Application Not Responding" errors), incorrect Data Safety declarations, or requesting sensitive permissions without clear justification.
If your app is rejected, you will need to fix the identified issue, generate a new AAB with an incremented versionCode, and submit a new release for review.
Conclusion
Congratulations! You have now completed the entire process of wrapping your web application with Capacitor and submitting it for review on both the Apple App Store and the Google Play Store. This is the culmination of your work and the successful achievement of your goal.
In this lesson, we covered the final steps for Android publication:
- We reviewed Google's mandatory closed testing requirements to unlock production access.
- We detailed how to finalize your store listing and app content declarations in the Play Console.
- We walked through the process of applying for production access, creating a production release, and rolling it out for final review.
You started with a web application and have now transformed it into a full-fledged mobile app ready for distribution on the world's two largest mobile platforms. Well done.
Can't find a good explanation? Sign up and we'll make it for you
Sign up