
Hello! Welcome back to our series on production operations for n8n.
In our last lesson, we focused on monitoring and diagnostics, equipping you with the skills to identify and troubleshoot issues in your live workflows. Now that you can react to problems, it's time to prepare for them proactively. The most critical preparation you can undertake is ensuring you can recover from a major failure, such as data corruption or a server outage.
Today, we will address the learning outcome: Implement a strategy for backing up and restoring n8n data. As a developer who manages your own self-hosted instance, a robust backup strategy is not just a best practice—it's your safety net. We'll explore a comprehensive strategy that covers all critical components of your n8n environment.
Understanding What to Back Up
Before diving into commands, let's clarify what "n8n data" actually means in your Docker-based setup. Your instance's state is primarily stored in two places:
- The Database (PostgreSQL): This is where the majority of your data lives. It holds your workflows, credentials (encrypted), execution history, and user settings.
- The
n8n_dataVolume: This Docker volume is also critical. It's configured in yourdocker-compose.ymland stores essential files, most importantly the encryption key (encryption.key) that n8n uses to secure your credentials in the database. Without this key, your backed-up credentials are unusable.
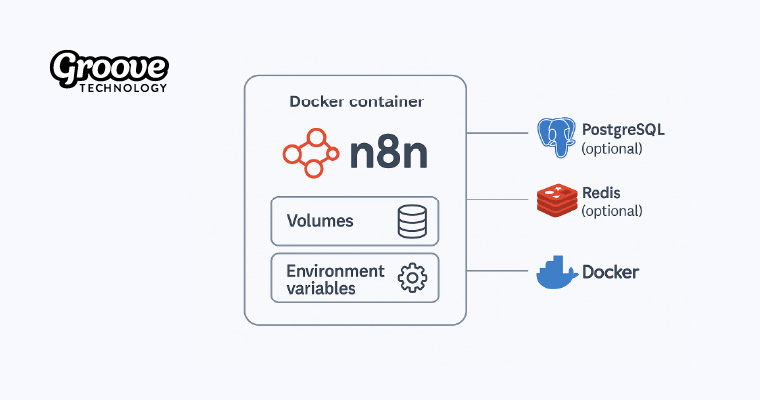
Therefore, a complete backup strategy must capture both the database content and the n8n_data volume.
1. The Core Strategy: Full System Backup and Restore
The most reliable method for protecting your self-hosted instance is a full system backup. This involves creating consistent snapshots of your database and the n8n data volume. This is the method you would rely on to recover from a complete server failure.
The article from n8nlogic provides a clear, practical guide for exactly this scenario.
Let's review the definitive guide for backing up a Docker-based n8n instance with a PostgreSQL database. This resource provides the exact commands you'll need.
Read the section 'Backups and upgrades'. Focus on the command blocks for 'Dump/restore Postgres' and snapshotting the 'n8n_data' volume. We will break these down next.
Let's dissect the commands from the article. You would run these from your server's terminal, in the directory containing your docker-compose.yml file.
Backing Up the PostgreSQL Database
The standard and safest way to back up a live database is to create a "dump" file. This is a snapshot of the database's state at a single point in time.
The command provided is:
docker exec -t n8n-postgres pg_dump -U "$POSTGRES_USER" "$POSTGRES_DB" > n8n_$(date +%F).sql
Let's break this down:
docker exec -t n8n-postgres: Executes a command inside your runningn8n-postgrescontainer.pg_dump: The standard PostgreSQL utility to create a database backup.-U "$POSTGRES_USER" "$POSTGRES_DB": Specifies the user and database name to dump, using the environment variables you've already defined.> n8n_$(date +%F).sql: Redirects the output of the command into a timestamped.sqlfile on your host machine.
Backing Up the n8n_data Volume
As we discussed, this volume contains your vital encryption key. The backup command creates a compressed archive of the volume's contents.
The command provided is:
docker run --rm -v n8n_data:/data alpine tar czf - -C / data > n8n_data_$(date +%F).tgz
This is a common Docker pattern that might look complex, but is quite elegant:
docker run --rm ... alpine: Starts a new, temporary container using the lightweightalpineimage. The--rmflag ensures the container is deleted after the command finishes.-v n8n_data:/data: Mounts your existingn8n_datavolume into the temporary container at the/datapath.tar czf - -C / data: This is thetarcommand running inside the temporary container. It creates (c) a gzipped (z) archive (f -) and sends it to standard output. It archives the contents of the/datadirectory (where your volume is mounted).> n8n_data_$(date +%F).tgz: Redirects the archive stream from standard output into a timestamped.tgzfile on your host machine.
The Restore Process
Restoration is the reverse process. Should you need to recover on a new server, you would:
- Set up your
docker-compose.ymlfile and.envfile. - Start the
n8n-postgrescontainer (docker compose up -d n8n-postgres). - Restore the database dump:
cat your-backup.sql | docker exec -i n8n-postgres psql -U "$POSTGRES_USER" -d "$POSTGRES_DB" - Restore the n8n data volume:
cat your-volume-backup.tgz | docker run --rm -i -v n8n_data:/data alpine tar xzf - -C / - Start your n8n container (
docker compose up -d n8n).
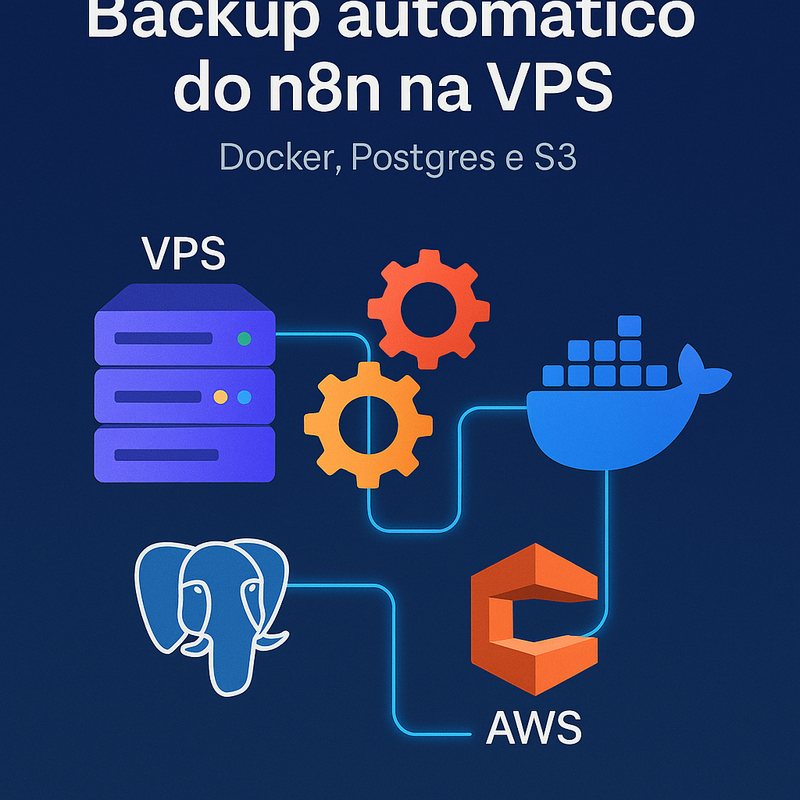
For a true production strategy, you would automate these backup commands using a cron job and sync the resulting backup files to a remote location like AWS S3, Google Cloud Storage, or any other off-site storage.
2. Complementary Methods: Application-Level Backups
While a full system backup is essential for disaster recovery, n8n also provides tools for exporting and importing specific data. These are useful for migrating workflows, versioning, or recovering a single deleted item without a full system restore.
Method A: Using the n8n Command Line Interface (CLI)
n8n has a powerful CLI that can export workflows and credentials directly.
The n8n documentation details the CLI commands for exporting and importing data. This is a more surgical approach compared to the full system backup.
First, read the 'Running CLI commands' section to see how to execute commands within a Docker container. Then, review the sections on 'Export workflows and credentials' and 'Import workflows and credentials'. Pay attention to the --backup flag for exporting and the warning about overwriting data during import.
To run a CLI command, you use docker exec. For example, to export all your workflows into separate JSON files in a backup directory on your host, you could do the following:
- Create a directory on your host:
mkdir -p ./n8n-backups/workflows - Run the export command:
Note: Thedocker exec -u node -it your-n8n-container-name n8n export:workflow --backup --output=/backups/workflows--outputpath is relative to the container's filesystem. You need to have a volume mount that maps a host directory to/backupsinside the container for this to work.
This method is excellent for creating clean, readable JSON files of your workflows and credentials, which is perfect for version control with Git.
Method B: Workflow-based Backup to Git
A clever, "n8n-native" approach is to create a workflow that backs up all other workflows to a Git repository. This automates the process of versioning your workflow code.
How to auto-backup n8n workflows to GitHub
This video provides a step-by-step walkthrough of creating an n8n workflow that automatically backs up all your other workflows to a GitHub repository.
Watch the segment from 01:43 to 04:22 to understand the logic of the backup workflow itself. Then, watch from 05:35 to 06:16 to see how simple the restoration process is (copying the JSON from GitHub and pasting it onto the n8n canvas).
This is a fantastic strategy specifically for versioning your workflows. However, it's crucial to understand its limitations:
- It typically only backs up workflow JSON. It does not back up your credentials, execution history, or user settings.
- The restore process is manual (copy/paste), which is fine for one workflow but not for a full instance recovery.
Test your understanding!
You have implemented all three backup methods discussed: a nightly full system backup, a CLI export of workflows to a Git repository, and the workflow-based backup to GitHub.
- A colleague accidentally deletes a single, complex workflow. What is the fastest and simplest way to recover it?
- Your cloud server provider has a catastrophic hardware failure and the entire virtual machine is lost. Which backup(s) are essential for a full recovery on a new machine?
Show answer
- The fastest way would be to use the backup from the CLI export or the workflow-based Git backup. You can simply find the correct JSON file for the deleted workflow in your Git history and paste its contents directly onto the n8n canvas to recreate it. A full system restore would be overkill.
- For a complete disaster recovery, you need the full system backup: the PostgreSQL dump file (
.sql) and then8n_datavolume archive (.tgz). Only this combination will restore your entire instance, including all workflows, encrypted credentials, execution history, and user data. The application-level backups would be useless without the encryption key from then8n_datavolume.
Conclusion
Today you've learned how to construct a multi-layered backup strategy that protects your n8n instance from both minor mishaps and major disasters. This is a cornerstone of running reliable, production-grade automations.
Key Takeaways:
- A complete backup strategy for a self-hosted n8n instance requires backing up both the PostgreSQL database and the
n8n_datavolume. - The core of your strategy should be a full system backup using
pg_dumpandtarto create archives, which should be stored off-site. - Application-level backups using the n8n CLI or a Git-based workflow are excellent complementary methods for version control and quick recovery of individual items.
- Always understand which backup method is appropriate for which recovery scenario.
Preview of the Next Lesson:
We briefly touched on using Git for backups today. In our next lesson, we will formalize this process and explore how to: Track workflow versions using a Git-based workflow (export/import and commit). This will allow you to manage your automation code with the same rigor you would apply to any other software project.