
Hello and welcome back!
In the last lesson, we solidified our self-hosted n8n setup by configuring Docker volumes for persistent storage. You learned that this is critical for safeguarding your workflows, credentials, and the all-important encryption key. Our docker-compose.yml file now includes both an n8n service and a postgres service, with volumes ensuring their data survives container restarts.
Today, we'll focus on the connection between these two services. The learning outcome for this lesson is to connect a self-hosted n8n instance to an external database. While our current setup uses a PostgreSQL container that is "external" to the n8n container itself, we'll first dissect the exact mechanism that makes this connection possible. Then, we'll generalize this knowledge so you can confidently connect n8n to any external database, like a managed service from a cloud provider—a common practice in production environments.
1. From SQLite to PostgreSQL: The Configuration Switch
By default, a new self-hosted n8n instance uses an embedded SQLite database. This is simple and works out of the box, but for more robust, scalable deployments, PostgreSQL is the recommended choice. To make this switch, we need to provide n8n with a set of instructions—a database connection string—using environment variables.
As a software developer, you're likely familiar with configuring applications through environment variables, and n8n follows this standard practice.
The official n8n documentation lists all the variables available for this purpose. Let's take a look.
Supported databases and settings
The official n8n documentation, under 'Supported databases and settings', provides the definitive list of environment variables for configuring a PostgreSQL connection. This is our source of truth.
Please read the introduction and the section titled 'PostgresDB'. Familiarize yourself with the key variables like DB_TYPE, DB_POSTGRESDB_HOST, DB_POSTGRESDB_USER, DB_POSTGRESDB_PASSWORD, and DB_POSTGRESDB_DATABASE.
The most important variable is DB_TYPE=postgresdb. This tells n8n to ignore SQLite and look for a PostgreSQL database using the other DB_POSTGRESDB_* variables you provide.
2. Dissecting Our Docker Compose Connection
Our current docker-compose.yml stack is a perfect case study for how this works. Let's review the setup you've already built, which is well-represented in the Self-Host n8n with Docker on a VPS guide.
Self-Host n8n with Docker on a VPS
This guide provides an excellent practical example of a .env file and a docker-compose.yml file working together to connect n8n to a Postgres container.
Review the contents of the .env file (Step 5.1) and the docker-compose.yml file (Step 7). Pay close attention to how variables like ${DB_POSTGRESDB_DATABASE} are used in both the postgres and n8n service definitions.
Let's break down the key interactions you just reviewed:
-
The
.envfile: This file stores the actual connection details (host, user, password, database name). This is a best practice that keeps secrets out of your version-controlleddocker-compose.ymlfile. -
The
postgresservice: It uses these variables (POSTGRES_USER: ${DB_POSTGRESDB_USER}, etc.) to initialize the database and create the specified user with the correct password on its first run. -
The
n8nservice: It loads the entire.envfile (env_file: - .env) and uses theDB_*variables to form its connection string.
The magic that ties it all together is Docker's networking. When you set DB_POSTGRESDB_HOST=postgres in your .env file, you're telling the n8n container to connect to a host named postgres. Within the private network created by Docker Compose, each service is automatically accessible to others using its service name as a hostname.
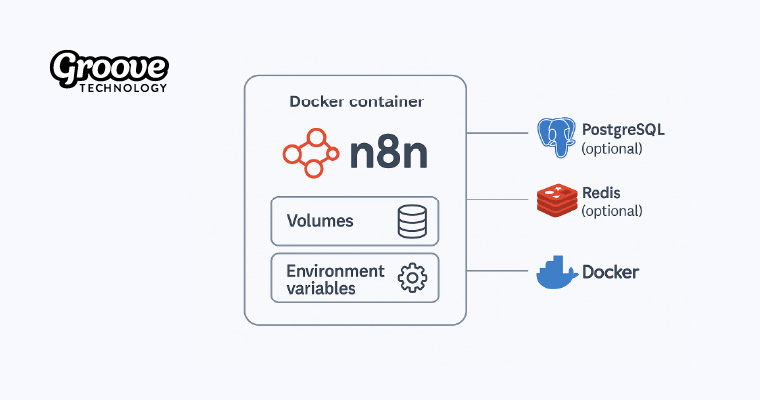
The following diagram illustrates this architecture, showing n8n connecting to an external PostgreSQL instance, both running as Docker containers.
To see this principle in action, let's watch a short video clip. The presenter is setting up chat memory for an AI agent within n8n, which requires a database connection. Notice what they enter for the Host.
Build 100% Self-Hosted AI Agents in 2026 (Surprisingly Easy)
In this clip from Yashica Jain's 'Build 100% Self-Hosted AI Agents' video, watch how the n8n application is configured to connect to the PostgreSQL database running in the same Docker Compose stack.
Watch from 00:28:54 to 00:30:08. The key moment is when 'postgres' is entered as the Host for the credentials. This visually confirms that the Docker service name is used as the hostname for inter-container communication.
This demonstrates perfectly how the service name postgres becomes the resolvable network address for the database from within the n8n container.
3. Connecting to a Truly External Database
Running PostgreSQL in a container is great for development, but for a production setup, you'll often use a managed database service like Amazon RDS, Google Cloud SQL, or DigitalOcean Managed Databases. These services handle backups, scaling, and maintenance for you.
So, how do you connect your self-hosted n8n to one of these? The process is surprisingly straightforward and involves two main steps:
Step 1: Update your .env file
You simply replace the local Docker-centric values with the connection details provided by your cloud provider.
DB_POSTGRESDB_HOST: Change frompostgresto the long endpoint URL provided by your managed database service (e.g.,db-n8n-prod-do-user-12345-0.b.db.ondigitalocean.com).DB_POSTGRESDB_USER,DB_POSTGRESDB_PASSWORD,DB_POSTGRESDB_DATABASE: Update these with the credentials for your managed database.DB_POSTGRESDB_PORT: Use the port specified by your provider.- SSL/TLS: Most managed databases require an SSL connection. You may need to add
DB_POSTGRESDB_SSL_REJECT_UNAUTHORIZED=falseor configure otherDB_POSTGRESDB_SSL_*variables depending on your provider's requirements.
Step 2: Simplify your docker-compose.yml file
Since the database is no longer running in your Docker stack, you can remove its definition entirely.
- Delete the entire
postgresservice block. - Remove the
depends_on: - postgresline from then8nservice definition. - Delete the
n8n_db_datavolume from the top-levelvolumesdeclaration.
Your n8n service is now completely decoupled from a local database container and points to your robust, managed database in the cloud.
Test your understanding!
You've just provisioned a new managed PostgreSQL database on Amazon RDS. You are given the following:
- Endpoint URL:
n8n-instance-1.caxxxxxxxxx.us-east-1.rds.amazonaws.com - Port:
5432 - DB Name:
n8n_prod_db - Master username:
n8n_admin - Master password:
aVerySecurePassword123!
What changes would you make to your .env and docker-compose.yml files to connect your existing n8n Docker container to this new database?
Show answer
-
In your
.envfile:- Set
DB_POSTGRESDB_HOST=n8n-instance-1.caxxxxxxxxx.us-east-1.rds.amazonaws.com - Set
DB_POSTGRESDB_PORT=5432 - Set
DB_POSTGRESDB_DATABASE=n8n_prod_db - Set
DB_POSTGRESDB_USER=n8n_admin - Set
DB_POSTGRESDB_PASSWORD=aVerySecurePassword123!
- Set
-
In your
docker-compose.ymlfile:- Remove the entire
postgres:service definition. - In the
n8n:service, remove thedepends_on: - postgresline. - At the bottom, under
volumes:, remove then8n_db_data:volume definition.
- Remove the entire
After saving the files, you would run docker compose up -d to restart n8n with the new configuration.
Finally, when setting up an external database from scratch, you must ensure the database user n8n will connect with has the correct permissions. The n8n documentation provides the recommended SQL commands to create the user and grant it the necessary privileges.
Supported databases and settings
This section of the n8n docs shows the SQL commands needed to prepare a database for n8n.
Review the commands under the 'Required permissions' heading. You would typically run these commands against your new database using a tool like psql before starting n8n.
Conclusion
You have now mastered the configuration required to connect n8n to a PostgreSQL database, whether it's running in a local Docker container or as a managed service in the cloud. This flexibility is key to deploying n8n in a variety of environments, from development to full-scale production.
Key Takeaways:
- n8n is configured to use PostgreSQL by setting
DB_TYPE=postgresdband providing connection details viaDB_POSTGRESDB_*environment variables. - Within a Docker Compose network, a service's name (e.g.,
postgres) acts as its hostname for inter-container communication. - Connecting to a truly external database involves updating the
DB_*variables in your.envfile with the provider's details and removing the local database service from yourdocker-compose.yml. - Using a managed external database is a professional best practice for production deployments, as it offloads management tasks like backups, scaling, and security.
Preview of the Next Lesson:
Our self-hosted n8n instance is now architecturally sound. It has persistent storage and a robust database connection. The next logical step is to control who can access it. In the upcoming lesson, we will enable user management and configure basic access permissions, transforming your single-user instance into a platform ready for team collaboration.