
Hello! Let's begin today's lesson.
Introduction
In our last session, we explored the theoretical underpinnings of Whonix. We focused on its two-part Gateway-Workstation architecture and established how this "security by isolation" model, enforced by the hypervisor, provides robust protection against IP address and DNS leaks, even if applications inside the Workstation are compromised.
Today, we transition from theory to practice. The learning outcome for this lesson is to install the Whonix Gateway and Workstation templates within Qubes OS. This is a critical hands-on step that adds the necessary tools for anonymity to our secure Qubes environment. We will use the dom0 terminal to fetch, install, and configure these new components, laying the foundation for all our future work with Tor.
1. System Preparation: Updating Dom0
Before installing any new components in Qubes, it's a critical security and stability practice to ensure that dom0—the most privileged domain—is fully up-to-date. This ensures we have the latest security patches and that the system's package manager and configuration tools are prepared for the new templates.
The official Whonix documentation outlines this as a mandatory first step.
This resource from the Whonix wiki provides the exact commands for our installation. We will start with the first prerequisite step.
Please read section '2 Update dom0'. This is a short section that contains the command we need to run. You can stop before '3 Version Number Verification'.
Now, on your Qubes machine, please perform the following actions:
- Open a
dom0terminal:Qubes App Launcher > Terminal Emulator. - Execute the update command you just read about:
This command will connect to the repositories (via yoursudo qubes-dom0-update --show-output --consolesys-netandsys-firewallqubes) and download any available updates fordom0. This may take a few minutes.
After the update is complete, the documentation mentions a version number verification step. While the update should handle this, it's good practice to understand what it's doing. This step checks a configuration file used by Qubes' automation tool, SaltStack, to ensure it's aware of the correct Whonix version you intend to install. This is analogous to checking a dependency version in a requirements.txt file before running a Python project.
2. Installing the Whonix Templates
With dom0 updated, we can now install the Whonix templates. Qubes OS treats templates as packages that can be installed from software repositories. The standard Qubes repositories contain officially supported templates (like Fedora and Debian). Whonix, being a third-party project, is available from the community-maintained repository.
The installation process involves a single command that instructs the Qubes template manager (qvm-template) to install both the Gateway and Workstation templates.
Let's return to the Whonix installation guide to get the command for installing the templates themselves.
Please read the first two points in section '4 Download and Configure Whonix Templates'. Focus on the command provided for downloading both templates. Note the warning that this can take some time.
In the same dom0 terminal, execute the installation command. Note the --enablerepo flag, which explicitly tells the package manager to look in the qubes-templates-community repository.
qvm-template install --enablerepo=qubes-templates-community whonix-gateway-17 whonix-workstation-17
This command will download and install two new templates:
whonix-gateway-17-xfce(which will be namedwhonix-gw-17in Qubes)whonix-workstation-17-xfce(which will be namedwhonix-ws-17in Qubes)
Note: This download is several hundred megabytes and can take a significant amount of time depending on your internet connection.
3. Configuring the Whonix VMs with Salt
Installing the templates provides the "master images" for our Whonix VMs, but it doesn't create the VMs themselves. For that, we use Qubes' built-in configuration management system, Salt (or SaltStack).
You can think of Salt as an infrastructure-as-code tool, similar in principle to Ansible or Terraform. It allows for the scripted, repeatable creation and configuration of system components. Qubes uses it to automate the setup of VMs. We will execute a Salt "state file" (.sls) that contains all the necessary instructions to:
- Create a new AppVM named
sys-whonixbased on thewhonix-gw-17template. - Create another AppVM named
anon-whonixbased on thewhonix-ws-17template. - Correctly configure the networking, setting
anon-whonixto usesys-whonixas its NetVM. - Apply the appropriate tags and settings to integrate them into the Qubes system.
This is the final, mandatory step to make Whonix operational.
The installation guide provides the Salt command needed to configure the system. The 'Reinstall' guide also highlights this as a mandatory step after any installation.
Please review point '3' in section '4 Download and Configure Whonix Templates' of the installation guide. This provides the specific qubesctl command to run.
Now, run the command in your dom0 terminal:
sudo qubesctl state.sls qvm.anon-whonix
You will see a lot of output as Salt executes the configuration steps. Once it completes without errors, your Whonix system is installed and configured.
4. Verification
To confirm that the installation was successful, you can check in two places:
- Qube Manager: Open the Qube Manager. You should see the two new templates (
whonix-gw-17andwhonix-ws-17) listed with a "template" type. You should also see the two new AppVMs (sys-whonixandanon-whonix). - Application Menu: Click the Qubes App Launcher. You will now see entries for
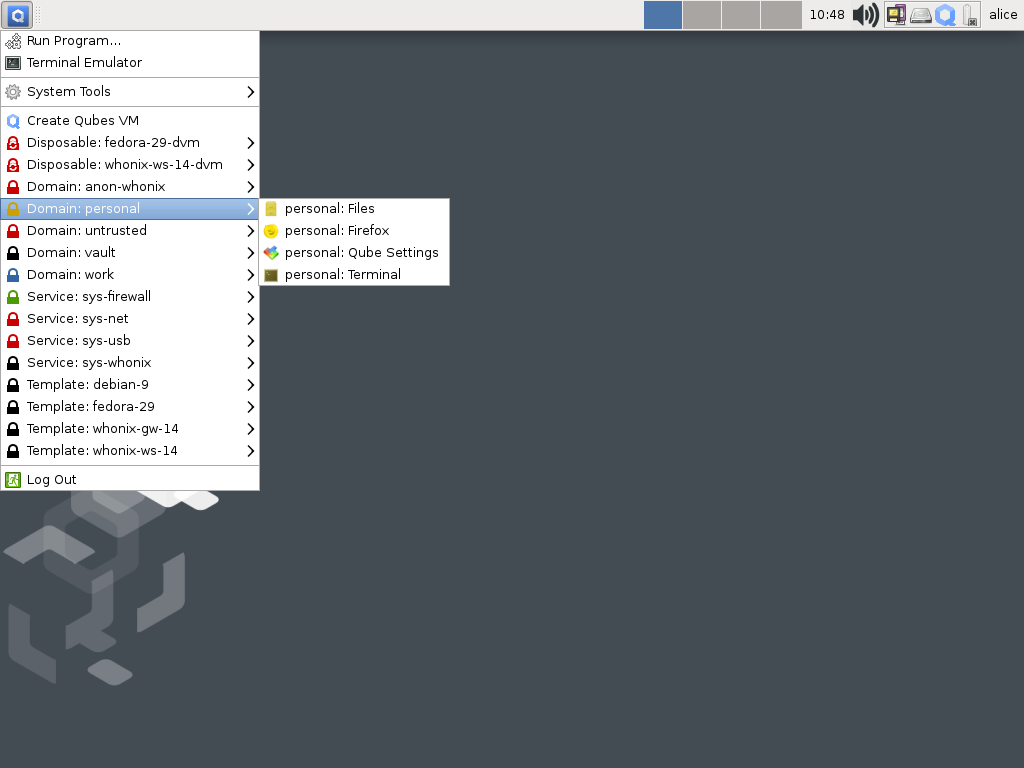
sys-whonixandanon-whonix, along with the templates.
The application menu should now contain entries similar to what is shown in the image below (your version numbers will be different).
Conclusion
In this lesson, we successfully transitioned from theory to a functional installation. By following a methodical, command-line-driven process, we have equipped our Qubes OS with the tools necessary for strong network anonymity.
Key Takeaways:
- System maintenance is crucial: Always update
dom0withsudo qubes-dom0-updatebefore installing new system components. - Qubes OS uses a repository system for templates. Whonix is found in the
qubes-templates-communityrepository. - The
qvm-template installcommand is used to fetch and install new templates intodom0. - Qubes Salt (
qubesctl) is used to automate the creation and configuration of VMs based on the newly installed templates, ensuring a correct and repeatable setup.
Preview of the Next Lesson:
Now that we have the whonix-gw-17 and whonix-ws-17 templates, along with the default anon-whonix AppVM, we are ready to put them to use. In the next lesson, we will create a new AppVM based on the Whonix Workstation template for anonymous browsing and demonstrate how to use the Tor Browser within this isolated, secure environment.
Can't find a good explanation? Sign up and we'll make it for you
Sign up