
Hi. This course is about making schoolwork feel less like a pile of random reminders and more like something you can see and handle. In this first module, you will build a flexible study system: first capture what is happening, then decide what matters most, then give the work realistic time.
Today’s goal is simple: make one reliable view of the next seven days. By the end, it should show your assignments and deadlines, tests or quizzes, and anything that already takes up time, such as school, clubs, work, appointments, travel, or family plans. You are not deciding exactly when to study yet—that comes in the next lessons. Right now, the win is getting the full picture out of your head and into one place.
One planning system, two kinds of information
A planning system does not have to be a fancy app. It can be:
- a paper weekly planner with a task section;
- one calendar app that also shows tasks;
- one note or table with a seven-day layout.
The important rule is: do not make yourself search in five places to work out what is due. Your school platform, emails, handouts, and class chat may be where information arrives, but your planner becomes the place you check to see your week.
There are two different things to capture:
| Type | What it means | Examples | What to record |
|---|---|---|---|
| Fixed commitment | It happens at a particular time. | Lessons, football training, dentist, work shift, birthday meal | Start time, end time, place or link |
| Deadline or assessment | It must be completed by a date, but may not take a specific time slot. | History homework due Thursday, science quiz Friday, English essay due Monday | Subject, task, exact due date/time, requirements |
A deadline is not the same as the time you will work on it. For example, “Spanish vocab quiz Friday” belongs on Friday as an assessment. Later, you will add study blocks earlier in the week. Keeping those separate stops a calendar becoming confusing.
Planning & Organization: Crash Course Study Skills #4
Watch “Planning & Organization: Crash Course Study Skills #4” by CrashCourse for a quick explanation of why calendars and task lists hold different kinds of information, plus a useful habit for recording new work before it disappears from memory.
Watch calendar and tasks to distinguish time-specific events from work with a deadline. Then watch quick capture for the idea of recording new assignments immediately, or temporarily parking them in one capture list and sorting them later.
You can keep both types in one weekly system. On paper, that might mean timed commitments in the main grid and a clearly labelled Due this week list at the side. Digitally, it might mean calendar events plus tasks shown in the same weekly view. What matters is that you can see them together when you plan.
Set up a clear weekly view
Choose the next seven days, including the weekend. A week that begins on Monday is often easiest for school, but start today if that makes more sense. Give yourself about 15–20 minutes for this first setup.
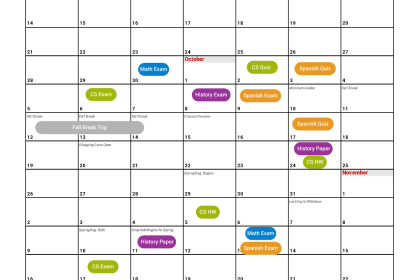
Use a small number of colours only if colour helps you scan quickly. For example:
- blue for tests and quizzes;
- one colour per subject, or one colour for all homework;
- grey for personal commitments.
Do not rely on colour alone: write a short label too. “Maths—quiz” is clearer than an unexplained blue blob.
Step 1: Put in fixed commitments first
Open or gather the sources that tell you where you have to be:
- school timetable;
- sports or club schedule;
- work shifts;
- appointments;
- travel or family plans;
- any regular chores that genuinely take time.
Add each one to the day and time it happens. Include travel time if it affects when you can work. If you have football from 4:00 to 5:30 but usually get home at 6:00, treating the commitment as ending at 6:00 gives you a more honest plan.
At this point, your week may look busy. That is useful information, not a problem to fix by pretending commitments do not exist.
Step 2: Gather school information before organising it
Now do a quick sweep of every place teachers give work. A sensible order is:
- Check your school learning platform or homework app.
- Check each subject’s most recent lesson notes, handouts, or class messages.
- Check email or notifications for changes.
- Look one week ahead as well as this week—especially for tests and larger assignments.
- Do a fast brain dump: write any school task you suddenly remember.
For each item, capture the facts without trying to judge how hard or important it is yet. Use a consistent format:
Subject — task — due date/time — requirement/source
For example:
- English — annotate Chapter 5 — Wed — bring book
- Maths — complete questions 1–12 — Thu 8:30 a.m. — online assignment
- Biology — cells quiz — Fri — revise organelle functions
- Geography — case-study research — next Mon — teacher slide deck
If a teacher has not stated a date, do not invent one. Write “confirm due date” and note where you need to check. That is much safer than trusting a vague memory.
Calendars and College – The Learning Center
Read the “Weekly planning” section from The Learning Center. Although it is written for college students, its core method fits school planning: map fixed commitments first, then capture work and keep realistic buffer time.
In the section titled “Weekly planning,” read the weekly-planning steps. Focus especially on the instruction to mark classes and regular commitments, create a weekly list for each subject, and use colour only as a visual aid. For this lesson, stop after the colour-coding point; scheduling work into open slots is the next stage of the course.
Turn the information into a trustworthy record
Once you have gathered everything, transfer it into your weekly view. Do not leave half the list in a notebook, a screenshot, or an open browser tab. Each item should end up in the planner.
Use this order:
-
Add tests, quizzes, and deadlines to their dates.
If an assignment is due at a particular time, record the time. If no time is stated, label it “due” on that date rather than pretending it is an all-day event. -
Add the task title and requirement.
“Science homework” is too vague. “Science: finish energy worksheet, Q1–8” tells future-you what the task actually is. -
Keep the source easy to find.
For a digital system, add a link if that is quick. On paper, write something like “Google Classroom” or “p. 42.” You do not need to copy the entire task sheet. -
Check every subject.
A simple list of your subjects works as a safety check: Maths, English, Science, History, Geography, language, options. Scan them one at a time and tick each only after you have checked it. -
Leave blank space.
A planner packed edge-to-edge can make you feel behind before the week has begun. Empty space is deliberate room for changed homework, extra time, and normal life.
Here is a basic example of what “captured” means:
| Day | Fixed commitments | Due / assessments |
|---|---|---|
| Monday | School; club 3:30–4:30 | English reading due |
| Tuesday | School; dentist 5:00–5:45 | Maths questions due 8:30 a.m. |
| Wednesday | School | — |
| Thursday | School; family meal 6:30 | Geography research due |
| Friday | School | Biology quiz |
| Weekend | Work shift Saturday morning | Art sketchbook due Monday |
Notice that this is not a full study timetable. It merely gives an honest map of what is already spoken for and what school expects.
Make capture a habit, not a rescue mission
A plan only helps if it stays current. The easiest rule is:
When a teacher gives new work, record it before the lesson ends or put it in one temporary capture list.
The temporary list can be a note called “Add to planner” in your phone or the back page of your planner. It is not a second task system; it is a short-term parking spot. Set a fixed time each day—perhaps after school or before bed—to empty it into your main weekly view.
Use a short weekly check too. At the end of the week or before the next one begins, spend 10–15 minutes doing this:
- look back at what was completed or changed;
- check the coming seven days and the week after;
- add new deadlines and commitments;
- remove or mark off finished items;
- make sure every subject has been checked.
Your planning system is allowed to change. A teacher may move a test, a club session may be cancelled, or you may realise you forgot an appointment. Update the plan; do not abandon it because it is no longer perfect.
Before you finish today, verify that your planning view has all four of these:
- a seven-day layout;
- every fixed commitment you know about;
- every school deadline, test, quiz, or piece of homework you can find;
- enough detail to know what each item means and where to get the instructions.
Key takeaways
A weekly plan starts with capture, not with cramming every empty hour with work. Keep timed commitments and due-date tasks distinct, but visible in one reliable system. Gather information from every school source, record exact details rather than vague reminders, and use one quick-capture habit so new work does not get lost.
Next, you will take this full list and decide what to tackle first using deadline, importance, difficulty, and estimated effort.
Can't find a good explanation? Sign up and we'll make it for you
Sign up