
Hello again! In our last lesson, you took a crucial step by generating and securing your app's production signing key. This digital signature is the cornerstone of your app's identity on the Google Play Store. Now, we need to teach your Android project's build system how to use this key.
This lesson bridges the gap between having a key and actually using it. We will configure your project's build.gradle file—the master script for your Android build—to use the key you just created. To understand the mechanism in a controlled way, we will first apply this signing configuration to your debug builds. This is the build type you've been using all along with the bunx cap run android command.
The Role of build.gradle
In your web development work with Turborepo and bun, you are accustomed to orchestrating tasks and managing dependencies with package.json and turbo.json. In the Android world, the primary configuration file that serves a similar purpose is build.gradle. You'll find this file in your native project at android/app/build.gradle.
This file, written in a language called Groovy, tells the Gradle build system everything it needs to know: the app's ID, version codes, SDK targets, dependencies, and, most importantly for us today, how to sign the application.
Securely Managing Credentials
Our immediate challenge is to provide the keystore credentials (the file location, the alias, and the two passwords) to the Gradle build process. A naive approach would be to hardcode them directly into the build.gradle file. However, since build.gradle is checked into version control, this would expose your secrets to anyone with access to your repository—a major security violation.
The standard and secure practice is to store these credentials in a separate properties file that is excluded from version control. We will create a file named keystore.properties for this purpose.
First, create a new file at android/keystore.properties. Place the following content inside it, replacing the placeholder values with the actual credentials you created in the last lesson.
storePassword=YOUR_STORE_PASSWORD
keyPassword=YOUR_KEY_PASSWORD
keyAlias=your-app-alias
storeFile=../my-release-key.keystore
A quick note on the path: In the previous lesson, you created the keystore at apps/mobile/my-release-key.keystore. The keystore.properties file is at android/keystore.properties (assuming the standard Capacitor project structure where the android folder is at the root). Therefore, storeFile=my-release-key.keystore would work if you moved the keystore file to the android folder. For better separation, you can also use an absolute path, or a relative path from the android folder to the keystore's location. For now, let's assume you've placed my-release-key.keystore in the root of your project, so the relative path from the android directory is ../my-release-key.keystore. Adjust this path if you stored the key elsewhere.
Most importantly, add this new file to your root .gitignore to ensure your credentials are never committed.
# .gitignore


# Android
# ... existing entries
/android/keystore.properties
Configuring the Build Script
Now we will edit android/app/build.gradle to read from keystore.properties and define a signing configuration. The following guide provides the exact code snippets and logic we will use.
Building And Releasing Your Capacitor Android App - Ionic Blog
This article from the Ionic Blog details the command-line approach to signing, which is exactly what we need. It shows how to use a properties file to feed credentials to Gradle.
Focus on the section titled "Generating a Bundle through the Terminal". We will adapt the code shown there. Pay close attention to the three parts of the build.gradle code snippet: The block of code at the top that loads the properties file. The signingConfigs block that defines a new configuration named release. The buildTypes block that applies this configuration to the release build type.
Let's apply this to your project. Open your android/app/build.gradle file and make the following changes:
-
Load the properties file: At the top of the file, just below the
apply plugin: 'com.android.application'line, add the code to find and load your newkeystore.propertiesfile. Note that the path in the example isrootProject.file("keystore.properties"), which assumes the file is in theandroid/directory.apply plugin: 'com.android.application' def keystorePropertiesFile = rootProject.file("keystore.properties") def keystoreProperties = new Properties() keystoreProperties.load(new FileInputStream(keystorePropertiesFile)) -
Define the signing configuration: Inside the
android { ... }block, add asigningConfigsblock. This block defines a named configuration (we'll call itreleaseas is conventional) that pulls its values from the properties we just loaded.android { // ... (compileSdkVersion, defaultConfig, etc.) signingConfigs { release { keyAlias keystoreProperties['keyAlias'] keyPassword keystoreProperties['keyPassword'] storeFile file(keystoreProperties['storeFile']) storePassword keystoreProperties['storePassword'] } } buildTypes { // ... } } -
Apply the configuration to the
debugbuild type: This is where we adapt the guide for our learning objective. Find thebuildTypesblock. Inside it, you'll see areleaseblock and likely an emptydebugblock. Modify thedebugblock to use the signing configuration we just defined.buildTypes { release { // This is typically where the signing config would go for production // We will configure this in a later module minifyEnabled false proguardFiles getDefaultProguardFile('proguard-android.txt'), 'proguard-rules.pro' } debug { // Apply our production key to the debug build for this lesson signingConfig signingConfigs.release } }
Your edited build.gradle should now have these new sections, looking similar to the structure shown in this image. Note how the signingConfigs block defines the key, and the buildTypes block applies it.

Syncing Gradle and Verifying the Setup
Whenever you change a build.gradle file, you must tell Android Studio to synchronize the project with the new configuration. If you have the project open in Android Studio, a banner will often appear prompting you to "Sync Now". You can also trigger this manually.
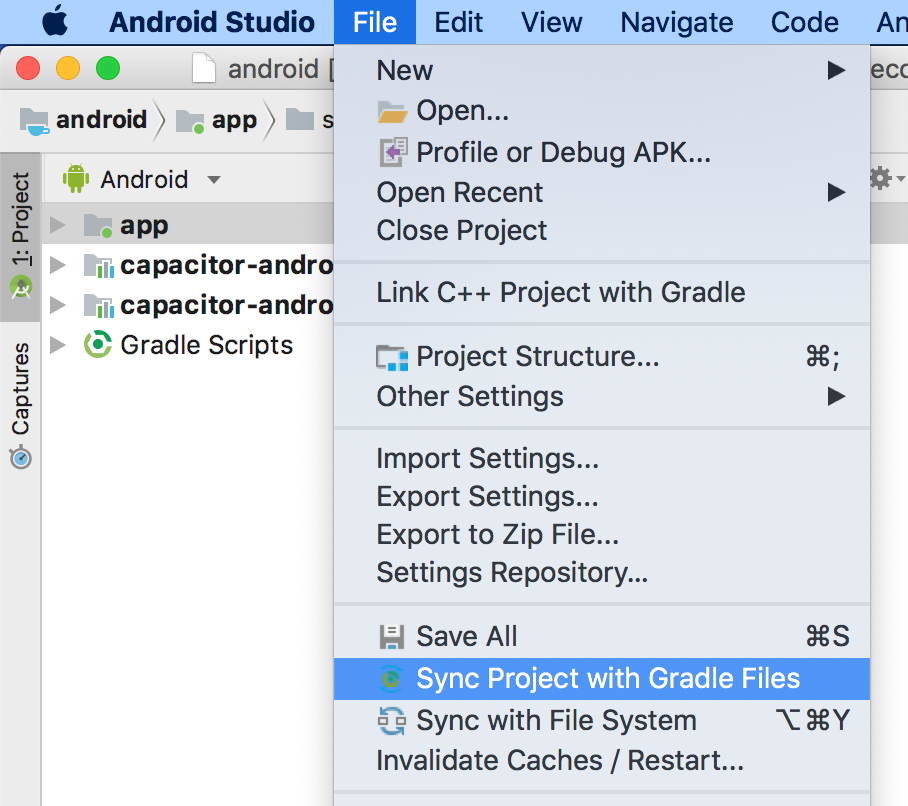
Now, how can you be sure it's working? Here's a simple and effective test:
- Open your
android/keystore.propertiesfile and intentionally change one character in yourstorePassword. - In your terminal, try to build the app as usual:
bunx cap run android. - The build process should fail with an error message related to the keystore password. It might say something like
Keystore was tampered with, or password was incorrect. - This failure is a success for our test! It proves that Gradle is reading your
keystore.propertiesfile and using it to try and unlock the keystore. - Correct the password in
keystore.properties, save the file, and run the build command again. It should now succeed.
Conclusion
You have successfully configured your Android project's build process to use your private signing key. While we applied it to the debug build for this lesson, the mechanism is identical for configuring the release build, which you will do when preparing for store submission.
Let's summarize the key takeaways:
- Credentials like passwords should never be hardcoded in
build.gradle. - The standard practice is to use a separate
keystore.propertiesfile to hold signing information and add this file to.gitignore. - The
build.gradlescript is configured to load this properties file. - A
signingConfigsblock defines a reusable signing configuration. - The
buildTypesblock applies a specificsigningConfigto a build type likedebugorrelease.
Making changes to fundamental build scripts can sometimes lead to unexpected errors. In our next lesson, we will focus on diagnosing and fixing common Android build failures, equipping you with the skills to troubleshoot issues with Gradle, SDKs, and dependencies.
Can't find a good explanation? Sign up and we'll make it for you
Sign up