
Welcome. This course builds one portfolio-ready restaurant application from C# fundamentals through APIs, SQL, React, testing, deployment, and interview preparation. This first lesson establishes the local workspace that every later module will use.
By the end, you will have a solution named RestaurantApp, a .NET 8 console project inside it, and proof that the application builds and runs locally. Although the first program is deliberately small, its folder structure mirrors the multi-project setup you will expand into an ASP.NET Core application.
Prepare the local development environment
For this course, use:
- .NET 8 SDK: provides the
dotnetcommand, C# compiler, project templates, and build tools. - Visual Studio Code: your code editor.
- C# Dev Kit for VS Code: adds C# project and solution support, debugging, code navigation, and test tooling.
The SDK is essential. A .NET runtime can execute an already-built program, but the SDK is what lets you create, build, and run projects during development.
Getting Started with C# & .NET in VS Code (Official Beginner Guide)
Watch “Getting Started with C# & .NET in VS Code (Official Beginner Guide)” by the Visual Studio Code channel. It shows the practical relationship between VS Code, C# Dev Kit, and the .NET SDK.
Watch VS Code setup to see the installation of VS Code and C# Dev Kit. Then watch SDK setup for the SDK installation and the idea of verifying it from a terminal. The video uses an 8.0 SDK example; install a .NET 8 SDK for this course.
After installation, close and reopen VS Code. Then open a terminal:
- In VS Code, select Terminal > New Terminal.
- Run:
dotnet --version
dotnet --list-sdks
You should see an installed SDK version beginning with 8.0, such as 8.0.4xx.
If dotnet is “not recognized” or “command not found,” the SDK is not installed correctly or the terminal needs to be restarted. If dotnet --list-sdks shows no 8.0 entry, install the .NET 8 SDK, not only the runtime.
VS Code is an editor; the terminal is where you will use the .NET CLI. In professional work, being comfortable with both is valuable: IDE commands are convenient, while CLI commands are repeatable and work in local machines, CI pipelines, and containers.
Understand the workspace you are about to create
A .NET codebase commonly has these three levels:
| Item | Purpose in this course |
|---|---|
| Solution | A container that organizes related projects. It will eventually include API, domain, infrastructure, and tests. |
| Project | A buildable unit, defined by a .csproj file. Today it is a console app; later it will include an ASP.NET Core API and test projects. |
| Source files | The C# code inside a project, such as Program.cs. |
A solution file normally ends in .sln. Recent SDK tooling can also create .slnx; both represent a solution and can contain project references. The important requirement today is that the console project explicitly targets .NET 8 through net8.0 in its project file.
Microsoft’s dotnet sln documentation is worth reading now because adding projects to solutions is a workflow you will repeat when the restaurant system gains multiple layers.
dotnet sln command - .NET CLI | Microsoft Learn
Read “dotnet sln command” from Microsoft Learn to understand the command that manages the projects belonging to a solution.
In the “Description” section, read the “Create a solution file” subsection, including the creation examples. Focus on the fact that the solution must exist before it can be modified. Then read the “add” subsection through the explanation of PROJECT_PATH, beginning with adding a project. Notice that the path points to a .csproj file.
For this course, place the solution at the repository root and projects beneath src. That structure keeps application code distinct from future tests and documentation.
Create the .NET 8 solution and console project
Choose a folder where you will keep development projects. In the terminal, run the following commands one at a time.
mkdir RestaurantApp
cd RestaurantApp

dotnet new sln -n RestaurantApp

dotnet new console -n Restaurant.Console -o src/Restaurant.Console --framework net8.0

dotnet sln add src/Restaurant.Console/Restaurant.Console.csproj

dotnet sln list
Here is what each command accomplishes:
mkdir RestaurantAppcreates the root folder for the whole restaurant system.cd RestaurantAppmakes that folder your current terminal location.dotnet new sln -n RestaurantAppcreates the solution container.dotnet new console ... --framework net8.0creates a console project and explicitly targets .NET 8.dotnet sln add ...registers the project with the solution.dotnet sln listverifies that the solution contains the intended project.
The final command should list a path similar to:
Project(s)
----------
src/Restaurant.Console/Restaurant.Console.csproj
Your workspace should now resemble this:
RestaurantApp/
├── RestaurantApp.sln
└── src/
    └── Restaurant.Console/
        ├── Restaurant.Console.csproj
        └── Program.cs
Depending on your installed SDK, the solution file may appear as RestaurantApp.slnx instead. That is acceptable: the console project and its net8.0 target are what matter for this lesson.
Open this whole folder in VS Code:
code .
If the code command is unavailable, open VS Code normally and use File > Open Folder to select the RestaurantApp folder. Opening the root folder—not just Program.cs—lets C# Dev Kit recognize the solution and project structure.
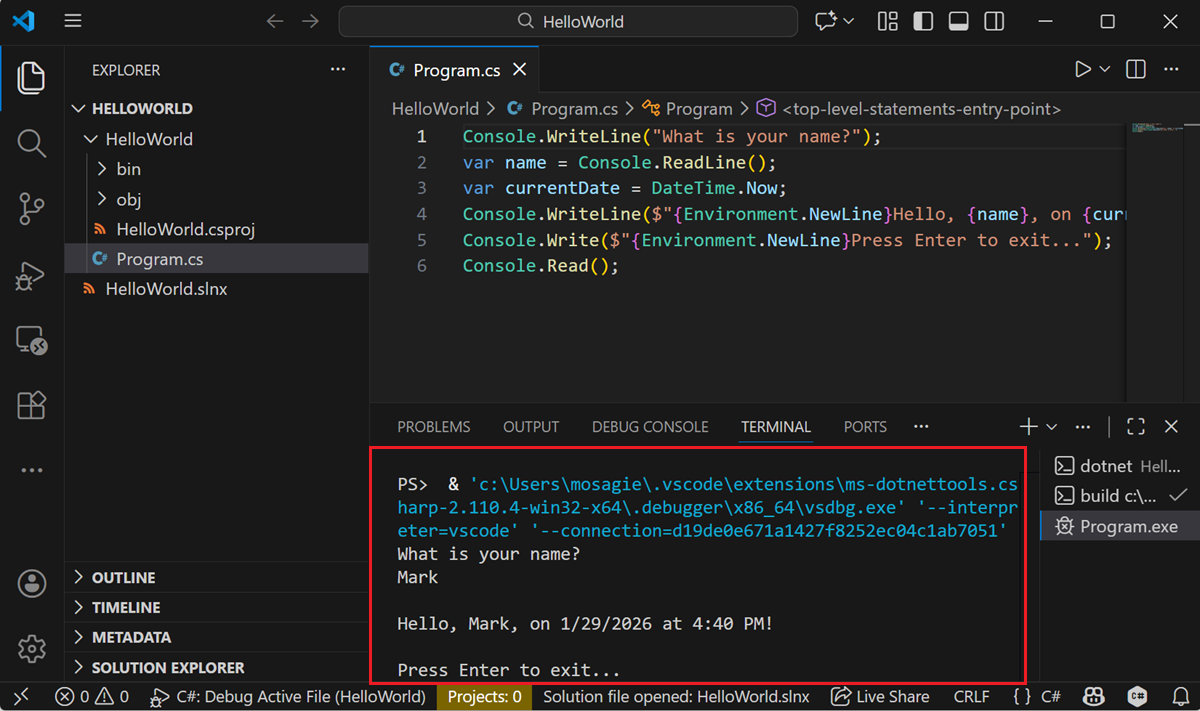
Inspect and run the program
Open src/Restaurant.Console/Program.cs. The template contains a top-level C# statement similar to:
Console.WriteLine("Hello, World!");
Top-level statements let a small program start without manually writing a Main method. The console project template supplies the necessary project configuration; this line is simply the code that writes text to the terminal.
Replace it with a restaurant-specific message:
Console.WriteLine("Restaurant backend workspace is running.");
Save the file. From the root RestaurantApp folder, run:
dotnet run --project src/Restaurant.Console/Restaurant.Console.csproj
Expected output:
Restaurant backend workspace is running.
dotnet run restores dependencies if needed, builds the project, and then launches the compiled application. On later, larger projects, you will often build separately first:
dotnet build
A successful build ends with a message similar to:
Build succeeded.
    0 Warning(s)
    0 Error(s)
After the first build, you will notice two extra folders inside Restaurant.Console:
bin/: compiled output produced by the build.obj/: intermediate files used by the build system.
Do not edit either folder manually. They are generated artifacts, not your application source code.
Use the VS Code interface when appropriate
The command-line approach is the recommended path for this course because every action is visible and reproducible. VS Code also has a graphical project-creation workflow, useful when you are becoming familiar with the tooling:
- Open the Command Palette with
Ctrl+Shift+Pon Windows/Linux orCommand+Shift+Pon macOS. - Select .NET: New Project.
- Choose Console App.
- Choose a location and project name.
- Choose the
.slnsolution format when prompted. - Select Create Project.
Microsoft’s console-app guide documents this VS Code flow. Its current template instructions may show a newer framework selection; for this course, select .NET 8 whenever the framework picker is shown.
The CLI and the VS Code interface create the same essential components: a project file, Program.cs, and a solution reference. For job-oriented development, learn to recognize the files and commands underneath the UI rather than relying exclusively on buttons.
Resolve common setup problems
| Symptom | Likely cause | Action |
|---|---|---|
dotnet is not recognized | SDK missing or terminal opened before installation | Install the .NET 8 SDK, then restart VS Code and its terminal. |
No 8.0 version in dotnet --list-sdks | Only a runtime or another SDK is installed | Install a .NET 8 SDK. |
dotnet sln add cannot find a solution | You are not in the RestaurantApp root folder | Run cd RestaurantApp, then repeat the command. |
dotnet run reports it cannot find a project | Command was run from the wrong folder or without a project path | Use the full --project src/Restaurant.Console/Restaurant.Console.csproj command shown above. |
| VS Code shows only files, not C# tooling | C# Dev Kit is missing or needs a reload | Install/enable C# Dev Kit and reload VS Code. |
Build fails after editing Program.cs | C# syntax was changed incorrectly | Check quotation marks, parentheses, and the ending semicolon; then save and build again. |
Before moving on, preserve these facts in your own notes:
- The solution organizes projects.
- The
.csprojfile defines one project and its target framework. Program.cscontains the application’s starting code.dotnet rungives rapid feedback by building and executing the application.- Your project targets
.NET 8because its creation command used--framework net8.0.
You now have a functioning .NET 8 solution with a console project, opened in a local development environment and verified by an actual run. This is the base workspace for the restaurant application.
Next, you will create a GitHub repository and use commits, branches, and pushes so this working starting point is safely preserved before you begin changing the code.
Can't find a good explanation? Sign up and we'll make it for you
Sign up