
Hello again. The Player now moves through BattleFire using a Rigidbody in FixedUpdate(), while input is read separately in Update(). That separation lets the player collide reliably with obstacles and remain stable at different frame rates.
The camera has a different job: it is presentation, not physics. In this lesson you will configure a fixed-angle top-down camera that tracks the Player in LateUpdate(), keeps a configurable world-space offset, and uses a small amount of smoothing without rotating as the Player turns. This is a suitable baseline for BattleFire’s arena combat and leaves the Player clearly visible during movement.
Decide what “top-down” means for BattleFire
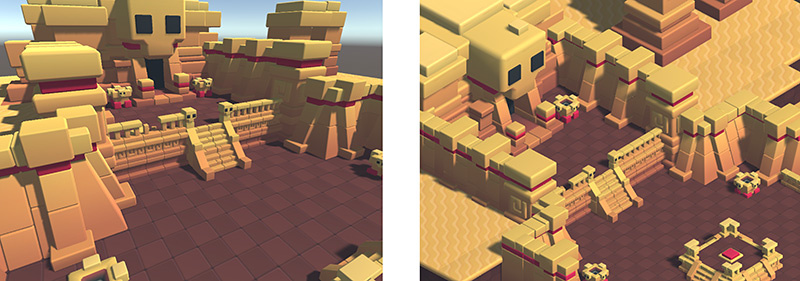
A top-down camera does not have to point perfectly straight down. For a 3D arena, a slightly angled overhead view usually makes obstacles and character models easier to read while still providing a tactical view.
For BattleFire, use a fixed world-facing camera:
- The camera follows the Player’s position.
- It does not inherit the Player’s rotation.
- Its pitch and heading remain fixed as the Player moves.
- Its offset is measured in world coordinates, such as 14 units above and 10 units behind the Player.
This last point matters. Your PlayerController rotates the Player toward movement direction. If the camera were parented to the Player, or if its offset were based on target.forward, the camera would swing whenever the Player turns. That is usually disorienting in a top-down shooter.
You also need to choose a projection mode. Start with Orthographic for BattleFire: objects stay the same apparent size regardless of their distance from the camera, which makes arena spacing easier to judge. A perspective camera can be a good artistic choice later, especially if height and depth should feel more dramatic.
Why the camera updates in LateUpdate
Your Player’s movement is calculated during physics updates. Its Rigidbody interpolation then helps present that motion smoothly between physics steps. The camera should observe the Player’s most recently presented position and move afterward.
LateUpdate() is designed for this sort of dependent visual behavior:
- Unity processes gameplay and movement updates.
- The Player reaches its current visible position.
- The camera reads that final Player position and follows it.
Do not put this camera movement in FixedUpdate(). The camera does not participate in collision simulation, and updating it only on physics ticks can make visual motion appear less smooth.
Lesson 1.3 - High Speed Chase - Unity Learn
Read Unity Learn’s concise introduction to camera-follow scripts. It demonstrates the essential pattern: hold a target reference, apply an offset, and move the camera in LateUpdate().
In the tutorial’s Sections 2 through 5, read the basic workflow. Focus on why the target is assigned in the Inspector rather than discovered by name at runtime, and why changing Update() to LateUpdate() improves the result.
The Unity Learn example snaps directly to the desired position. That is a valid first implementation. For BattleFire, we will add a very small, configurable smooth-follow time. It softens the camera motion but should remain short enough that the Player stays near the center of the action.
Configure the Main Camera
First, leave Play mode if it is active. Changes made during Play mode will revert when you stop the game.
In the Hierarchy, select Main Camera. Configure its Camera component with these starting values:
| Property | Starting value | Purpose |
|---|---|---|
| Projection | Orthographic | Gives the arena a consistent tactical scale. |
| Size | 9 | The vertical extent of the visible arena; tune this after testing. |
| Near Clipping Plane | 0.1 | Prevents objects close to the camera from being clipped unnecessarily. |
| Far Clipping Plane | 100 | More than enough for the initial arena. |
Next, configure the Transform. Assuming your Player begins around world position , use:
| Transform field | Starting value |
|---|---|
| Position | X 0, Y 14, Z -10 |
| Rotation | X 55, Y 0, Z 0 |
The camera is now above and slightly behind the Player, pitched downward toward the arena. The script will maintain this relative placement once the game starts.
These values are a starting composition, not a universal rule:
- Increase Orthographic Size if the Player reaches the edges of the screen too quickly.
- Decrease it if enemies and obstacles are too small to read.
- Raise the camera offset’s Y value for a wider view.
- Increase the magnitude of its Z value for a shallower angle.
- Keep the camera’s rotation fixed while tuning the offset, so you can understand which setting is changing the view.
Do not make Main Camera a child of Player. The follow script will handle position tracking while preserving the camera’s independent orientation.
Create a configurable follow script
Create a new C# script at:
Assets/Scripts/CameraFollow.cs
Attach it to Main Camera, then replace its contents with this code:
using UnityEngine;

[RequireComponent(typeof(Camera))]
public class CameraFollow : MonoBehaviour
{
    [Header("Follow Target")]
    [SerializeField] private Transform target;

    [Header("Framing")]
    [SerializeField] private Vector3 offset = new Vector3(0f, 14f, -10f);

    [SerializeField, Min(0.01f)]
    private float smoothTime = 0.08f;

    private Vector3 followVelocity;

    private void Awake()
    {
        if (target == null)
        {
            Debug.LogError(
                "CameraFollow needs a Player Transform assigned.",
                this
            );

            enabled = false;
        }
    }

    private void Start()
    {
        transform.position = target.position + offset;
    }

    private void LateUpdate()
    {
        Vector3 desiredPosition = target.position + offset;

        transform.position = Vector3.SmoothDamp(
            transform.position,
            desiredPosition,
            ref followVelocity,
            smoothTime
        );
    }
}
The script deliberately uses private serialized fields rather than public fields:
privateprevents unrelated scripts from freely overwriting the target, framing, or smoothing configuration.[SerializeField]still exposes each field in the Inspector, where it belongs for scene-specific setup.- The
Awake()check produces a useful Console error and disables the component if its required target was not assigned.
This builds on the safe component setup habits you used for the Player’s Rigidbody.
Assign the Player target
After Unity finishes compiling:
- Select Main Camera.
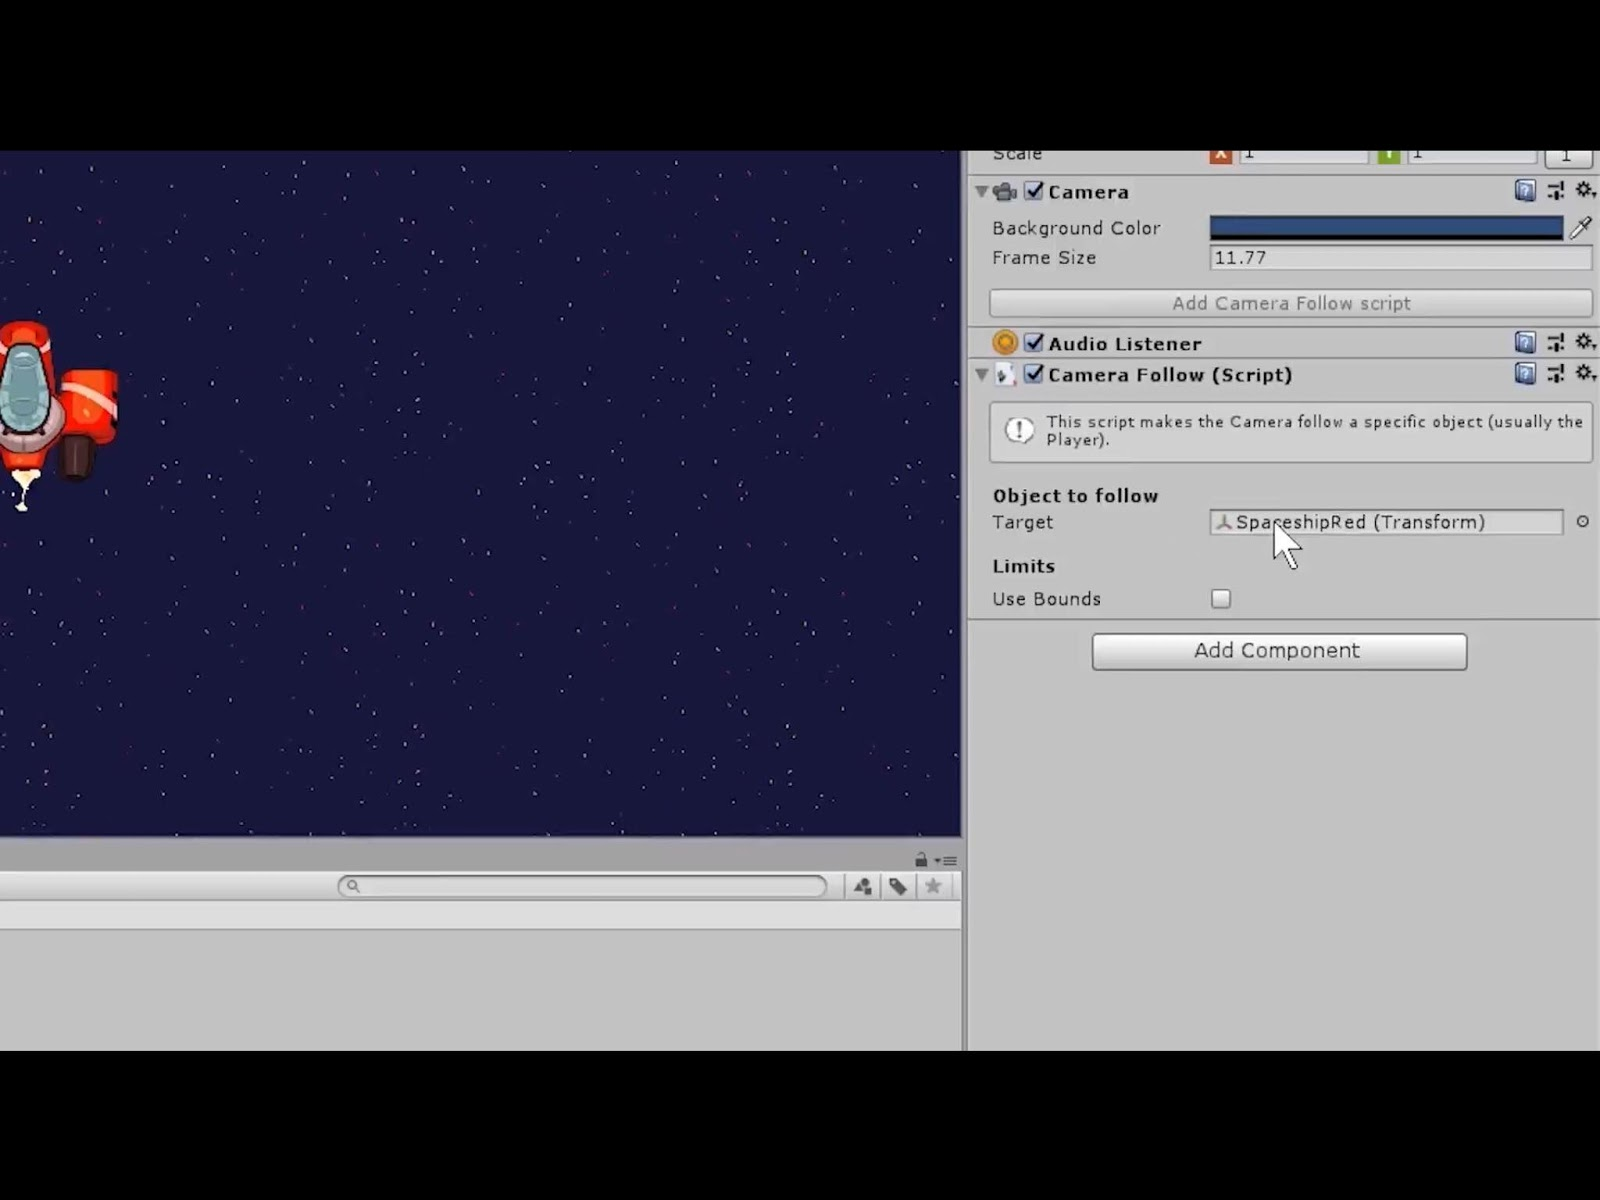
- Find the Camera Follow component in its Inspector.
- Drag the root Player GameObject from the Hierarchy into the Target field.
- Set Offset to
X 0,Y 14,Z -10. - Set Smooth Time to
0.08.
Assign the root Player object, not a mesh child inside the Player hierarchy. The root is the object that owns the Rigidbody and represents the Player’s actual world position.
The camera Inspector should conceptually resemble this configuration: a camera component contains a follow component, and that component has a Transform reference to the object being followed.
Read the follow calculation
The essential camera-follow equation is:
In the script, that is:
Vector3 desiredPosition = target.position + offset;
With the initial offset of , the camera stays:
- 0 units to the Player’s left or right,
- 14 units above the Player,
- 10 units in the negative world Z direction.
Because this uses the literal offset vector, it is world-space. The offset does not rotate with the Player. When the Player turns from north to east, the camera remains in its fixed aerial orientation.
Start() immediately places the camera at the desired position:
transform.position = target.position + offset;
Without this line, the camera might visibly glide from its editor position toward the Player at the beginning of Play mode. Snapping once at initialization avoids that distracting startup movement.
The continuous follow happens here:
transform.position = Vector3.SmoothDamp(
    transform.position,
    desiredPosition,
    ref followVelocity,
    smoothTime
);
Vector3.SmoothDamp moves the camera toward its desired position with a gradual, damped response.
transform.positionis the camera’s current position.desiredPositionis where the camera wants to be.followVelocityis stored between frames so Unity can calculate a smooth motion curve.smoothTimeis approximately how long the camera takes to settle near a changed destination.
For BattleFire, 0.08 seconds should feel responsive. Try to keep it in the range of 0.05 to 0.12 initially:
| Smooth Time | Typical result |
|---|---|
0.01 | Almost immediate follow; minimal lag. |
0.05–0.12 | Responsive but visually softened movement. |
0.25 or more | Noticeable lag; the Player can drift far from center. |
Since this is visual smoothing rather than physics movement, SmoothDamp uses the rendered-frame timing internally. That is appropriate here; unlike Player movement, the camera does not need to execute on the fixed physics schedule.
Test the camera deliberately
Enter Play mode in Main.unity and move the Player with WASD.
Verify the following:
- The Player remains visible and generally near the center of the Game view.
- The camera travels with the Player across the floor.
- The camera does not rotate when the Player changes direction.
- The camera motion is smooth during both straight and diagonal movement.
- Obstacles remain readable from the chosen angle.
- The Player does not leave the view when moving near arena boundaries.
Then test the framing, not just the code. BattleFire will eventually have several enemies, bullets, and mobile UI, so a camera that works only for one isolated Player is not yet correctly tuned. Adjust Orthographic Size and the offset while out of Play mode until the camera shows enough tactical space without making the Player too small.
Diagnose common camera issues
| Symptom | Likely cause | Fix |
|---|---|---|
| Camera does not move | Target was not assigned, or the script is not on Main Camera | Drag the root Player into Target and verify CameraFollow is enabled. |
| Console reports that the target is missing | The Inspector reference is empty | Assign Player while not in Play mode. |
| Camera follows but faces away from the arena | The camera Transform rotation is wrong | Start with Rotation X 55, Y 0, Z 0, then make small adjustments. |
| Camera rotates whenever the Player turns | Main Camera is parented to Player, or the script uses the Player’s forward vector | Remove the parent relationship and retain the fixed world-space offset. |
| Camera feels shaky | Follow code is running in Update() or FixedUpdate(), or Player interpolation was changed | Keep the camera code in LateUpdate() and retain the Player Rigidbody’s Interpolate setting. |
| Camera trails too far behind | Smooth Time is too large | Reduce it toward 0.08, 0.05, or lower. |
| Too little arena is visible | Orthographic Size is too small | Increase the Camera component’s Size gradually. |
Key takeaways
You now have a BattleFire camera that follows the Player without becoming part of the Player hierarchy:
- A fixed world-space offset produces a stable top-down framing.
- Orthographic projection provides a consistent tactical view of the arena.
- The target is assigned safely through a serialized Inspector reference.
LateUpdate()makes the camera react after gameplay movement has been processed.Vector3.SmoothDampprovides responsive visual smoothing while preserving a fixed camera angle.- The camera is independent of the Player’s rotation, which prevents unwanted view spinning.
Next, you will turn the configured Player into a reusable Player.prefab and verify that prefab changes propagate correctly to scene instances.
Can't find a good explanation? Sign up and we'll make it for you
Sign up