Hello! Welcome back.
In our last lesson, we covered the essential physical work of "FBA Prep"—how to package your individual products, apply the correct FNSKU barcodes, and prepare your master shipping cartons according to Amazon's strict rules.
Now, we'll take that physical preparation and connect it to Amazon's system. This lesson is a practical, step-by-step walkthrough of the "Send to Amazon" workflow in Seller Central. This is where you digitally inform Amazon about the inventory you're sending, which is the final and most critical step before your products are on their way.
Your goal for this lesson is to learn how to create and execute an FBA shipment plan within Seller Central to send inventory to an Amazon fulfillment center. We will cover every step, from selecting your products to printing the final box labels.
1. The "Send to Amazon" Workflow: An Overview
The "Send to Amazon" workflow is a multi-step process inside Seller Central that generates your shipment plan. At a high level, the process involves four main stages:
- Choose inventory to send: You'll select which products (SKUs) you're shipping and provide detailed packing information.
- Confirm shipping: You'll set a ship date and choose your shipping carrier, which determines your shipping costs and how Amazon splits your inventory.
- Print box labels: You'll generate the crucial FBA Box ID labels that Amazon uses to identify and receive your inventory.
- Tracking: You'll provide tracking information (or it will be provided automatically) so you and Amazon can monitor the shipment's progress.
This process ensures that when your boxes arrive at the fulfillment center, Amazon knows exactly what's inside, who it belongs to, and where it needs to go.
2. Step 1: Choosing Inventory and Defining Packing Details
This first step is the most detailed, as it's where you provide all the core information about your shipment. Getting this right is critical for a smooth receiving process.
How to Create an Amazon FBA Shipping Plan & Send Your First Shipment
To guide us through this entire process, we will use a detailed video from Crescent Kao. It provides a clear, screen-by-screen walkthrough of the current Seller Central interface. Let's start with the first step.
Watch from 02:44 to 06:25. This section will show you how to start a new shipping plan and fill out the initial, crucial details. Pay close attention to: How to start the 'Send to Amazon' workflow from your 'Manage Inventory' page. The 'Ship from' address: This is where you input your supplier's address if shipping directly from China, or your own address/3PL if shipping from within the US. The 'Marketplace destination' (which will be the United States for your initial setup). How to select the product(s) you intend to ship.
Packing Details: Case-Packed vs. Individual Units
After selecting your products, you need to tell Amazon how they are packed. As we touched on in the last lesson, there are two primary methods:
- Case-Packed Products: Every master carton contains the exact same product (same SKU) with the same number of units in each carton. This is the most common method for private label sellers ordering in bulk from a manufacturer.
- Individual Units: Cartons can contain mixed SKUs, or cartons of the same SKU can have different quantities. This is more flexible but requires you to provide more detailed box-content information later.
For efficiency, Amazon allows you to create packing templates. This is particularly useful for case-packed goods, as you can save the carton dimensions, weight, and units-per-box information to reuse for all future shipments of that product.
How to Create an Amazon FBA Shipping Plan & Send Your First Shipment
Let's continue with the video to see a detailed demonstration of creating a packing template for a case-packed product. This is a highly practical skill that will save you a lot of time.
Watch from 06:25 to 14:00. This is a long but vital segment. Focus on understanding: How to create a 'case-pack template' with units per box, box dimensions, and weight. The Prep and Labeling options: This is where you specify who is applying the FNSKU label. 'By Seller' means you or your supplier is doing it. 'By Amazon' means you will pay Amazon to do it (typically more expensive). How to handle shipments with non-standard boxes (e.g., five standard cartons and one smaller carton) using the 'Individual units' option for the remainder. The importance of providing accurate box dimension and weight information to avoid warnings and errors.
Test your understanding!
Your supplier in China ships your product in master cartons. Each carton contains 50 units, measures 40x30x30 cm, and weighs 12 kg. You plan to use this supplier for all future orders. What is the most efficient way to enter this information into your FBA shipping plan each time you reorder?
Show answer
The most efficient way is to create a reusable case-pack template. The first time you create a shipping plan for this product, you would select "Create new packing template," enter the units per box (50), the carton dimensions (converted to inches), and the weight (converted to pounds). Then you can save this template and simply select it for all future shipments, avoiding the need to re-enter the data.
3. Step 2: Confirming Shipping
Once you've defined what you're sending, the next step is to confirm the shipping details. This is where Amazon tells you where to send your inventory and you tell Amazon how it's getting there.
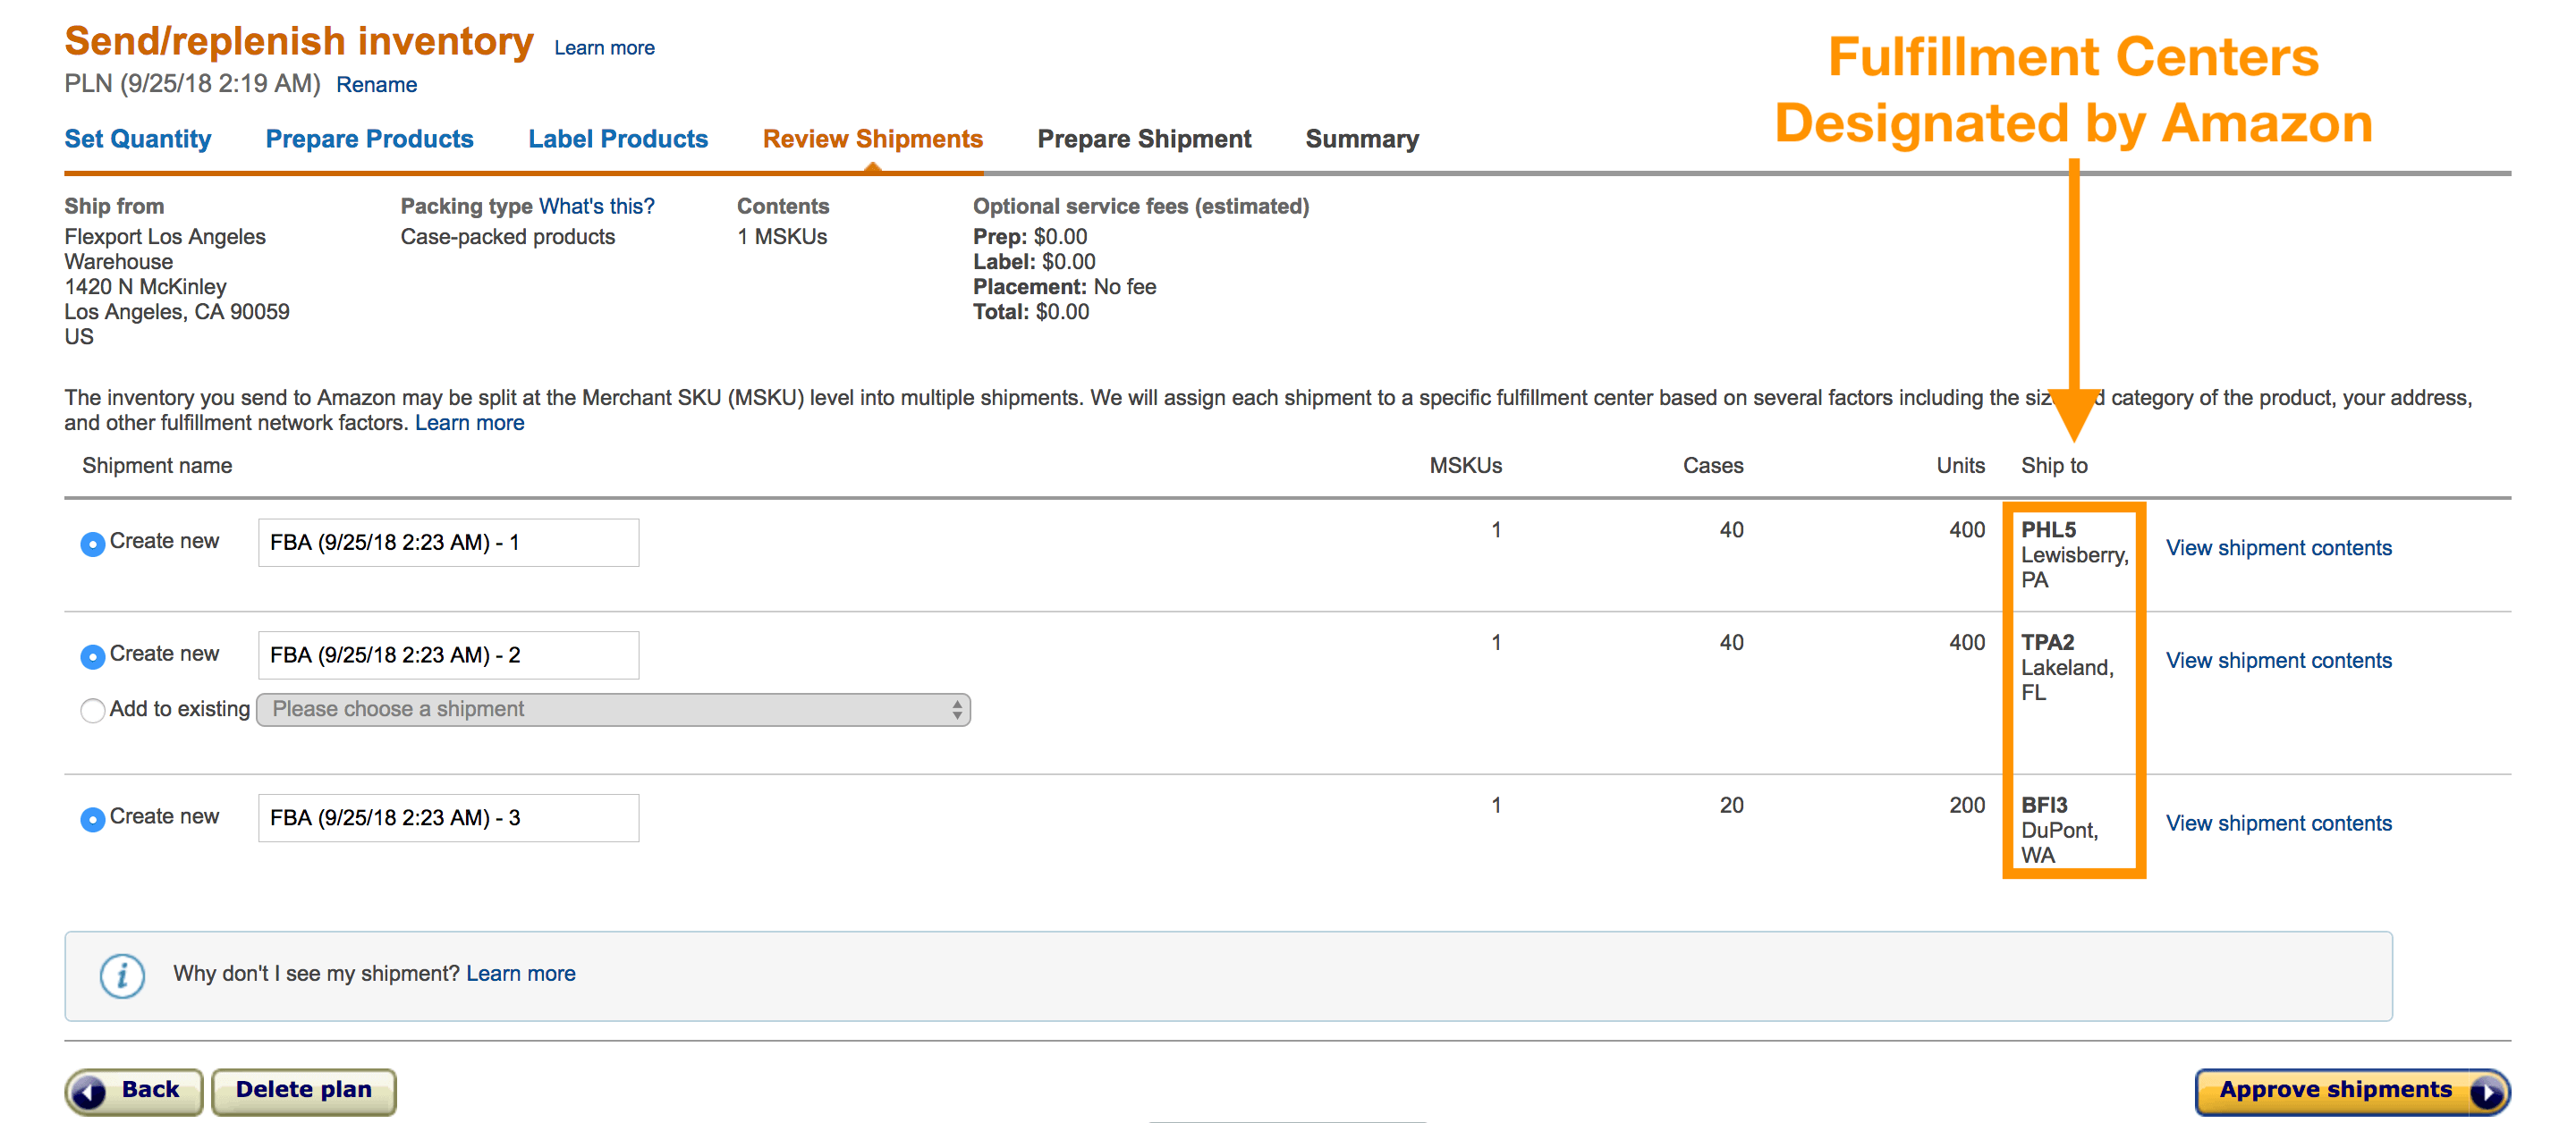
Shipment Splitting and Inbound Placement Fees
A recent and significant change to the FBA program is the Inbound Placement Service Fee. Amazon's goal is to distribute inventory across its network to be closer to customers, which speeds up delivery. To do this, they will often require you to send your inventory to multiple fulfillment centers.
You have a choice:
- Minimal Shipment Splits (e.g., 1 location): You can opt to send all your inventory to a single Amazon location. This is logistically simpler for you but will incur a higher inbound placement fee.
- Multiple Shipments (e.g., 3-5 locations): You can follow Amazon's recommendation to split your inventory across several locations. This reduces or even eliminates the placement fee but requires you or your supplier to create separate shipments for each destination.
For a new seller, especially when shipping from overseas, starting with a single destination might be simpler despite the fee, but you should evaluate the cost trade-off.
Shipping Mode and Carrier Selection
How to Create an Amazon FBA Shipping Plan & Send Your First Shipment
Now, let's watch how to navigate the shipping confirmation step, including the new placement fees and carrier selection.
Watch from 14:10 to 19:46. This section covers the critical shipping decisions. Focus on: The Inbound Placement Service Fee options and the cost difference between sending to one vs. multiple locations. Small Parcel Delivery (SPD) vs. LTL: As a new seller, you will almost always use SPD for box shipments. Amazon Partnered Carrier vs. Non-Partnered Carrier: Partnered Carrier (e.g., UPS) is the best choice for domestic US shipments. You get discounted rates and automatic tracking. Non-Partnered Carrier is the option you'll use when your freight forwarder in China is arranging the final delivery to the Amazon fulfillment center.
4. Step 3 & 4: Printing Labels and Tracking Your Shipment
You're at the final step. After confirming your shipping charges, you can generate the last piece of the puzzle: the FBA Box ID label.
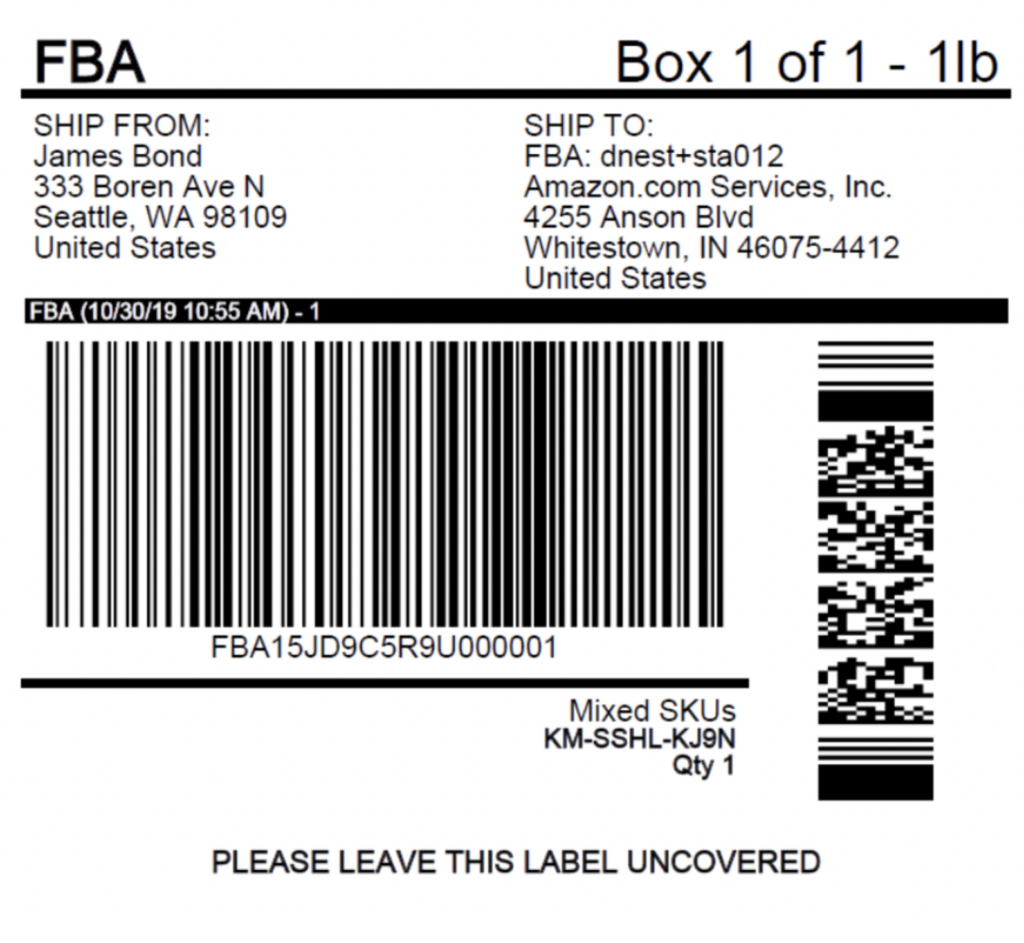
As we covered in the last lesson, each master carton requires two labels:
- The FBA Box ID Label (shown above): You print this directly from the "Send to Amazon" workflow.
- The Carrier Shipping Label: This is the postage label from UPS, FedEx, or your freight forwarder that contains the delivery address.
It is crucial that you or your supplier places both labels on each box without covering each other or the box seam.
How to Create an Amazon FBA Shipping Plan & Send Your First Shipment
The final part of the video explains how to download your box labels and track your shipment's progress.
Watch from 19:46 to 23:30. This wraps up the process. Pay attention to: How to print the FBA Box ID labels as a PDF to send to your supplier. The crucial distinction between the FBA label (for Amazon's warehouse) and the carrier label (for the shipping company). How to enter tracking information for non-partnered carriers. The different shipment statuses you'll see in Seller Central (Delivered, Checked-in, Receiving).
Conclusion
You have now walked through the entire "Send to Amazon" workflow. Creating a shipping plan is a core operational task that you will perform every time you replenish your inventory. While it seems detailed, it becomes a routine process quickly. Accuracy is key—double-checking your quantities, weights, dimensions, and labels will prevent almost all common shipping problems.
Key Takeaways:
- Structure Your Shipment: Start by defining your 'Ship from' address and choosing between case-packed and individual unit packing. Use packing templates to save time.
- Understand Placement Fees: Be prepared for Amazon to split your shipment. Evaluate the cost of placement fees versus the logistical complexity of shipping to multiple locations.
- Choose the Right Carrier Option: Use the Amazon Partnered Carrier for discounted domestic shipping. Use the Non-Partnered Carrier option when your overseas supplier or freight forwarder is handling delivery.
- Master the Two-Label System: Every box needs an FBA Box ID label (from the shipping plan) and a Carrier Label (from the shipping company).
Next Up:
Your product listing is optimized, you know how to prep your inventory, and now you know how to create a shipment to send it to Amazon. Once that inventory arrives, you need to be ready to make sales. In our next lesson, we will focus on developing a product launch strategy, covering how to generate those critical first sales and reviews to build momentum.