Hello! Welcome to the fifth module of our course, "Launching on Amazon with FBA."
In our previous module, you mastered the essentials of setting up, operating, and maintaining a healthy seller account on Walmart Marketplace. We concluded by looking at how to monitor your performance metrics to ensure long-term success. Now, we're shifting our focus to another e-commerce titan: Amazon.
This first lesson addresses the learning outcome: Complete the Amazon Seller Central account registration and verification process. This is a foundational and critical step. While the process is straightforward, Amazon's verification is notoriously strict. A small mistake can lead to weeks or even months of delays. By following the steps in this lesson carefully, you'll set yourself up for a smooth and successful account approval, getting your global e-commerce business on track without unnecessary interruptions.
1. Preparation: The Most Important Step
Before you even go to Amazon's website, the most critical phase is preparation. Having all your documents and information perfectly aligned and ready will make the entire process much smoother. Your IT background gives you an appreciation for data integrity—think of this as a database project where every field must be perfectly consistent across multiple tables.
A common pitfall is mixing up details between the business entity and the person managing the account. To avoid this, we'll organize our information into two distinct sets.
How To Create Amazon Seller Account 2024 - FULL Amazon Seller Registration
To understand this crucial concept of separating your information, watch this segment from the video "How To Create Amazon Seller Account 2024" by Dan Rodgers. He does an excellent job explaining why you need to prepare two separate sets of details.
Watch from the beginning of the video until 05:07. Focus on the distinction he makes between 'Business Information' and 'Primary Contact Person Information' and why they must be kept separate.
As the video explained, you need to prepare two "stacks" of information:
- Business Information: Details related to your US LLC that you set up in Module 1.
- Primary Contact Person Information: Your personal details as the owner and operator of the business.
Here is a comprehensive checklist of everything you need to gather before starting the application.
How to register as an Amazon seller
Amazon provides an official checklist of what you'll need. Let's review it to create our master list.
Scroll to the very bottom of the page to the section titled 'Before you create your selling account, make sure you have the following:'. Review this list. We will use this as the basis for our preparation.
Your Pre-Registration Checklist:
| Item | Details and Important Notes |
|---|---|
| Business Information | Your US LLC name and registered business address (from Module 1). Must match your formation documents exactly. |
| EIN | Your Employer Identification Number for the LLC (from Module 1). |
| Phone Number | Your virtual US phone number (from Module 1). |
| Government-Issued ID | Your Passport is highly recommended. Make sure it's not expired. |
| Business Bank Account Statement | The statement from your fintech account (e.g., Mercury, Payoneer). It must show the business name and address. A brand new, empty statement can sometimes be flagged, so having a few transactions is helpful. |
| Internationally Chargeable Credit Card | This is crucial. Do not use a debit card. This card will be used for the monthly fee and as a backup. It must be a true credit card (e.g., Visa, MasterCard). |
| Email Address | A dedicated business email address, separate from your personal Amazon customer account. |
2. Choosing Your Seller Plan: Individual vs. Professional
Amazon offers two selling plans. The choice you make here impacts your fees and the features you can access.
- Individual Plan: No monthly fee. You pay a $0.99 fee for every item sold, plus other selling fees. It has limited features (e.g., no access to advertising or advanced selling tools).
- Professional Plan: $39.99 per month, plus selling fees. You do not pay the $0.99 per-item fee. This plan unlocks crucial tools like Amazon PPC advertising, the ability to win the Buy Box, and access to advanced reporting.
For your goal of building a serious e-commerce business using FBA and advertising, the Professional plan is the only viable option.
How To Setup Your Amazon Seller Central Account 2024 [Complete Seller Registration]
For a clear breakdown of the differences and why the Professional account is the standard choice for serious sellers, watch this short clip.
Watch the video "How To Setup Your Amazon Seller Central Account 2024" by Camron James from 01:26 to 02:45. He explains the cost-benefit analysis and the features you unlock with a Professional account.
3. Step-by-Step Registration Walkthrough
Now that you are prepared, you can begin the registration process. We will walk through this step-by-step. The following video provides a complete screen-by-screen guide. We will use it as our primary reference, pausing at each key stage to add context.
How To Setup Your Amazon Seller Central Account 2024 [Complete Seller Registration]
This video from Camron James provides a detailed walkthrough of the entire application. We will refer back to different sections of this video as we go through each step of the process.
You don't need to watch the entire video at once. Keep it open and ready to play the specific segments mentioned in the steps below. We will start with the initial account creation.
Step 0: Create Your Account Login
First, go to sell.amazon.com and click "Sign up." You will create your basic login with your name, dedicated business email, and a password. You will then need to verify your email with a One-Time Password (OTP).
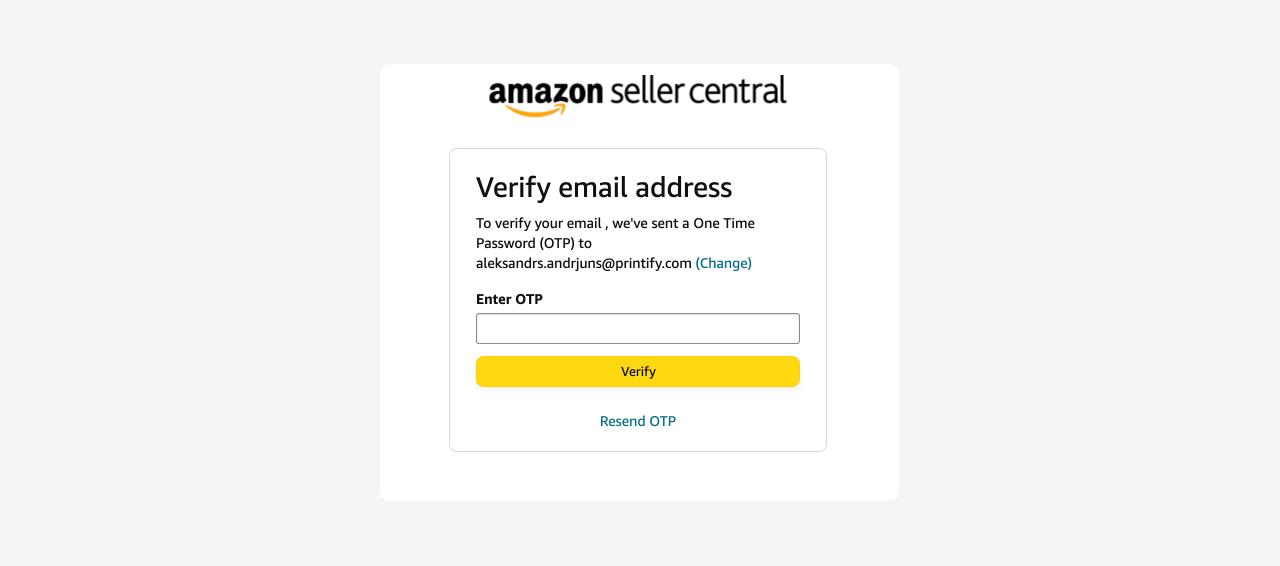
- Video Guide: Watch from 03:06 to 05:05 in the Camron James video for this part.
Step 1: Provide Business Information
This is where you'll use your "Business Information" stack.
- Business Location: United States
- Business Type: Privately-owned business
- Business Name: Your LLC name, exactly as it appears on your registration documents.
- Company Registration Number: This is your EIN.
- Registered Business Address: Your LLC's registered address.
- Phone Number: Your virtual US phone number. You'll verify this with a PIN sent via SMS or call.
- Video Guide: Watch from 05:05 to 09:08.
Step 2: Provide Seller (Primary Contact) Information
Now, switch to your "Primary Contact Person" stack.
- Enter your full legal name, country of citizenship/birth, and date of birth. This must match your passport or ID exactly.
- Enter your residential address.
- Video Guide: Watch from 12:43 to 14:22.
Step 3: Provide Billing Information
Here you will link your financial accounts.
- Bank Account: Enter your US business bank account details (from Mercury/Payoneer). This is where Amazon will send your payouts.
- Credit Card: Enter your internationally chargeable credit card. This is for Amazon's monthly subscription fee and other charges. A debit card will likely be rejected.
- Video Guide: Watch from 14:22 to 20:04. This section is critical as it highlights the need for a true credit card and a business bank account.
Step 4: Provide Store & Product Information
- Store Name: This is the name customers will see. It can be your brand name. Don't worry, you can change this later.
- For the questions about UPCs and trademarks, you can select "No" for now if you haven't sourced a product yet.
- Video Guide: Watch from 20:04 to 21:58.
Step 5: Verify Your Identity
This is the final and most crucial step of the application.

You will be asked to upload scans of your documents. The quality and format are non-negotiable.
-
Document: Government-issued ID (Passport) and a bank account or credit card statement.
-
Format: High-resolution, full-color PDF scans. Do not use screenshots or black-and-white images.
-
Integrity: The documents must not be altered in any way. Ensure all four corners are visible in the scan. If a statement has multiple pages, you must upload all of them, even if some are blank.
-
Video Guide: Watch from 21:58 to 25:36. Pay very close attention to the instructions on document quality.
After submitting, you will likely need to schedule a brief video call with an Amazon associate to show them your ID in person. This is a standard part of the process.
4. The Final Step: Tax Interview
After the main application, you'll be guided through a tax interview. This determines how Amazon reports your earnings to the IRS.
How To Create Amazon Seller Account 2024 - FULL Amazon Seller Registration
The tax interview can be confusing. This clip from Dan Rodgers' video clearly explains how to answer the 'Tax Classification' question.
Watch from 28:48 to 30:20. The key is understanding whether to classify as an 'Individual' or 'Business' for tax purposes.
As you have a single-member LLC (the most common setup for new sellers), you will likely select:
- Tax Classification: Individual. Even though you have an LLC, for tax purposes, a single-member LLC is a "disregarded entity," meaning the income passes through to you personally.
- You will then complete the form (a W-9) using your personal information and the EIN for your LLC.
Test your understanding!
You are at the billing information step. You have your business bank account from Mercury, but you only have a debit card associated with it, not a credit card. What is the correct course of action?
Show answer
The correct course of action is to pause the application and obtain a true, internationally chargeable credit card. Using a debit card is one of the most common reasons for registration failure or future account issues. Amazon requires a valid credit card on file for billing.
Conclusion
You have now completed the step-by-step guide to one of the most important administrative tasks in your e-commerce journey. Taking the time to do this correctly will save you immense frustration down the road.
Key Takeaways:
- Preparation is everything: Gather all documents and organize them into "Business" and "Primary Contact" sets before you start.
- Details must match perfectly: Your name and addresses must be 100% consistent across all documents and the information you enter.
- Use the right tools: A Professional Seller plan, a true credit card, and a dedicated business bank account are non-negotiable for a serious business.
- Verification is normal: Document uploads, video calls, and potential follow-up requests are a standard part of Amazon's process. Be patient and respond promptly.
Next Up:
Once your Amazon Seller Central account is verified and approved, you'll be ready to start analyzing product opportunities. In our next lesson, we'll dive into a critical skill for ensuring your business is successful: calculating a product's profitability on FBA by analyzing the fee structure and using the FBA Revenue Calculator.