
Welcome back. In the previous lesson, you treated model choice as a full memory-budget decision: quantized weights, KV cache, runtime allocations, unified memory, and safety headroom all had to fit together. Now you will turn that plan into a working local service.
By the end of this lesson, you will have a small 4-bit model running as an HTTP server on an Apple Silicon Mac and a Python program that sends it a chat request. This is deliberately a local baseline, not a production deployment: its value is that it gives you a reproducible starting point for later benchmarking, tuning, streaming, and service hardening.
We will use MLX LM for the primary path. MLX is designed for Apple Silicon and makes a good first serving engine because it uses Metal acceleration and unified memory without requiring you to manage a separate GPU runtime.
The serving boundary you are building
A local command-line chat tool is useful for experimentation, but inference engineering usually needs a boundary between the application and the model runtime. Your Python application should be able to send an HTTP request without loading model weights itself.
The resulting setup has three moving parts:
- An MLX LM server process loads the quantized model once and listens only on your Mac.
- A Python client sends a structured chat request as JSON.
- The server tokenizes the messages, performs prefill and autoregressive decoding, then returns generated text and token-usage metadata as JSON.
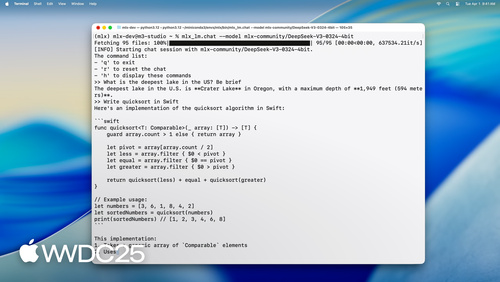
The model used below is mlx-community/Llama-3.2-3B-Instruct-4bit, the MLX LM default. At 3B parameters and 4-bit weight quantization, it is intentionally smaller than the 8B-class example from the previous lesson. That makes it a sensible smoke-test model on a range of Apple Silicon machines. Once the path works, you can repeat the exact workflow with a model selected through your own memory budget.
Before proceeding, verify that you are on Apple Silicon:
uname -m
You should see arm64. MLX LM is specifically intended for Apple Silicon.
WWDC25: Explore large language models on Apple silicon with MLX | Apple
Watch Apple Developer’s “Explore large language models on Apple silicon with MLX” for a concise view of why MLX is suited to this hardware and how its Python interface fits into a larger workflow.
Watch the MLX overview to connect Metal acceleration and unified memory to local LLM inference. Then watch the Python API to see the distinction between loading a model directly in Python and integrating generation into a broader program.
The video’s direct Python API is useful for scripts and experiments. In this lesson, however, Python will act as an HTTP client. This matters: calling load() inside every application process would blur the service boundary and can duplicate heavyweight model state. A long-running server keeps ownership of the model runtime.
Install a minimal MLX environment
Create a dedicated virtual environment. It keeps this baseline isolated from unrelated Python packages and makes it easier to reproduce later.
mkdir -p ~/inference-baseline
cd ~/inference-baseline

python3 -m venv .venv
source .venv/bin/activate

python -m pip install --upgrade pip
python -m pip install mlx-lm
Confirm that the package imports:
python -c "import mlx; import mlx_lm; print('MLX LM import succeeded')"
ml-explore/mlx-lm: Run LLMs with MLX
Read the MLX Explore project README to confirm the installation method and understand how MLX LM identifies models from local paths or Hugging Face repositories.
At the beginning of the README, read package overview, including the pip installation command. Then continue through the “Quick Start” section and note the default model. For this lesson, use the explicit model identifier in the commands rather than relying on a default.
A model identifier such as mlx-community/Llama-3.2-3B-Instruct-4bit is not merely a label. It determines which model repository MLX LM downloads or loads. The 4bit suffix indicates that this is a pre-quantized MLX-compatible model artifact.
Do not try to pass a GGUF file selected for llama.cpp into MLX LM. GGUF and MLX-compatible model repositories are different engine-format paths. The memory reasoning from the previous lesson still applies, but the artifact must be compatible with the runtime you chose.
Start the local model server
Open a second Terminal window. In the first one, stay inside ~/inference-baseline with the virtual environment activated, then start the server:
source .venv/bin/activate

mlx_lm.server \
  --model mlx-community/Llama-3.2-3B-Instruct-4bit
On first launch, MLX LM may need time to download the model before it can serve requests. Keep this terminal open: it is now your server console, and its logs are the first place to look if a request fails.
The MLX LM server listens on port 8080 of localhost by default. localhost means the service is reachable from your own machine, not directly from other machines on the network.
mlx-lm/mlx_lm/SERVER.md at main
Read the MLX LM server documentation from MLX Explore. It defines the local HTTP service, its startup command, and the request fields your Python client will send.
In “HTTP Model Server,” read server setup. Focus on the distinction between choosing a model with the command-line flag and sending generation settings in each request. Then, in “Request Fields,” read the request contract, from messages through stream. Leave the more advanced sampling and speculative-decoding settings for later lessons.
A useful first diagnostic is to query the model-list endpoint from your second Terminal window:
curl -sS http://127.0.0.1:8080/v1/models | python -m json.tool
If this returns JSON, you have demonstrated that:
- the server process is running;
- your client terminal can reach it;
- port
8080is accepting HTTP connections.
This does not yet establish that generation works, but it separates basic server connectivity from model-inference problems.
Next, send one request with curl. This is optional, but it helps isolate failures before Python enters the picture.
curl -sS http://127.0.0.1:8080/v1/chat/completions \
  -H 'Content-Type: application/json' \
  -d '{
    "model": "mlx-community/Llama-3.2-3B-Instruct-4bit",
    "messages": [
      {
        "role": "system",
        "content": "You are a concise technical assistant."
      },
      {
        "role": "user",
        "content": "In two sentences, explain why a KV cache grows during generation."
      }
    ],
    "temperature": 0.0,
    "max_tokens": 100,
    "stream": false
  }' | python -m json.tool
The initial request can be slower than later ones because it includes process startup effects, model loading, and first-use runtime work. That distinction will matter when you build proper benchmarks in the next module.
Query the server from Python
Create a file named client.py in ~/inference-baseline. The program uses only the Python standard library, so it does not require an additional HTTP package.
import json
from urllib.request import Request, urlopen

SERVER_URL = "http://127.0.0.1:8080/v1/chat/completions"
MODEL_ID = "mlx-community/Llama-3.2-3B-Instruct-4bit"

payload = {
    "model": MODEL_ID,
    "messages": [
        {
            "role": "system",
            "content": (
                "You are a concise assistant for an inference engineering learner. "
                "State assumptions when relevant."
            ),
        },
        {
            "role": "user",
            "content": (
                "A 4-bit model fits in memory at startup but fails during long "
                "generation. Give the most likely memory-related explanation."
            ),
        },
    ],
    "temperature": 0.0,
    "max_tokens": 120,
    "stream": False,
}

request = Request(
    SERVER_URL,
    data=json.dumps(payload).encode("utf-8"),
    headers={"Content-Type": "application/json"},
    method="POST",
)

with urlopen(request, timeout=180) as response:
    result = json.load(response)

choice = result["choices"][0]
message = choice["message"]

# Accept either a structured OpenAI-style message or a text message,
# depending on the installed server version.
if isinstance(message, dict):
    answer = message["content"]
else:
    answer = message

print("\nModel response:\n")
print(answer)

print("\nUsage metadata:\n")
print(json.dumps(result.get("usage", {}), indent=2))
Run it from the second terminal:
source .venv/bin/activate
python client.py
The important engineering details are inside a small amount of code:
| Element | Why it matters |
|---|---|
messages | Preserves roles and conversation structure rather than forcing you to manually assemble a chat prompt. |
model | Makes the target model explicit in the request record, even when one model is currently loaded. |
temperature: 0.0 | Reduces sampling variation, which is useful for a baseline. It does not make every implementation perfectly deterministic. |
max_tokens: 120 | Caps generated output length. It is a token limit, not a word count. |
stream: false | Requests one completed JSON response. Token streaming is intentionally deferred to the streaming-API module. |
usage | Reports prompt and completion token counts, which will become inputs to throughput and cost measurements later. |
Notice where the original text of the prompt goes: into the JSON body, over a loopback HTTP connection, to the server process. The Python client has not imported model weights or tokenizers. That separation is the foundation for treating inference as a service rather than a local function call.
Verify the baseline, then record it
At this stage, your success criterion is modest but concrete:
mlx_lm.serverremains running in one terminal.GET /v1/modelsreturns JSON.python client.pyprints a model response.- The response includes usage fields when supported by the installed server version.
- Re-running the client works without re-downloading or reloading the model.
Record these details in a small text file such as baseline-notes.md:
Date:
Mac model and unified-memory capacity:
macOS version:
Python version:
mlx-lm version:
Model identifier:
Quantization:
Server command:
Prompt used:
max_tokens:
Observed behavior:
This is the beginning of reproducibility. In the next module, you will turn informal observations such as “the first request felt slow” into measured quantities such as time to first token, latency percentiles, and tokens per second.
Common setup failures
| Symptom | Likely cause | First action |
|---|---|---|
mlx_lm.server: command not found | The virtual environment is inactive, or installation used a different Python interpreter. | Run source .venv/bin/activate, then reinstall with python -m pip install mlx-lm. |
Connection refused from the client | The server exited, is still starting, or the client has the wrong port. | Inspect the server terminal and retry the model-list request. |
| The first startup takes a long time | The model is downloading or loading into unified memory. | Wait for the server logs to indicate readiness; do not benchmark this first run. |
| Memory pressure or macOS becomes unresponsive | The complete model, cache, runtime, and other applications exceed practical unified-memory capacity. | Stop the server, close memory-heavy applications, and select a smaller compatible quantized model using the budgeting method from the previous lesson. |
| The model produces weak answers | A 3B 4-bit model is a functional baseline, not a guarantee of task quality. | Keep the serving setup fixed and later compare models and quantizations against a compact quality test set. |
One final operational caution: the MLX LM documentation describes this server as having only basic security checks and not being suitable for production. Keep this baseline bound to localhost. Do not expose it to a network or the public internet as-is. Authentication, validation, overload handling, and safe service boundaries are topics you will build later in the course.
Key takeaways
You now have a functioning local inference baseline on Apple Silicon:
- MLX LM loads a quantized, MLX-compatible model and serves it over local HTTP.
- A server process owns the model runtime; a Python client communicates through a stable JSON request and response boundary.
messages, sampling settings, output-token limits, and usage metadata are request-level controls that you should record alongside model and engine details.- The first request is not a meaningful performance result because loading and warm-up effects can dominate it.
- A successful local demo is not a production-ready endpoint: keep it on
localhostand treat security as a later engineering concern.
Next, you will make this baseline measurable by designing a reproducible inference benchmark with controlled prompts, warm-ups, generation settings, and repeated trials.
Can't find a good explanation? Sign up and we'll make it for you
Sign up