
Welcome to your first lesson. Your goal is to build Telegram bots using TypeScript and Bun.js, and this course will guide you from the ground up. To start, we need to set up your development environment. This lesson covers the essential first step: installing the Bun runtime and initializing your first TypeScript project.
Given your extensive background in front-end development, you're already familiar with the core components of a modern JavaScript project, such as package.json and tsconfig.json. Our focus here will be on how Bun simplifies and accelerates this initial setup process, particularly with its native support for TypeScript. By the end of this lesson, you will have a functional "Hello World" project running on Bun, which will serve as the foundation for all subsequent work.
An Introduction to the Bun Toolkit
Before we jump into installation, it's helpful to understand what Bun is. Unlike Node.js, which is primarily a JavaScript runtime, Bun is an all-in-one toolkit. It acts as a runtime, package manager, bundler, and test runner, all integrated into a single, high-performance binary.
For a TypeScript developer, one of its most compelling features is first-class, out-of-the-box support for .ts files. This eliminates the need for separate compilation steps or complex configurations with tools like ts-node or tsc-watch just to run your code.
To get a quick sense of why this is a significant advantage, watch this brief segment from the video "My First Time with Bun".
My First Time with Bun - Why I Believe It Will Replace Node.js
This clip highlights the convenience of Bun's built-in TypeScript support
Watch the section from the beginning of this segment, where the presenter discusses the frustrations of setting up TypeScript in Node.js and how Bun solves this problem.
1. Installing Bun
Your first hands-on task is to install the Bun command-line interface (CLI) on your system. The process is straightforward and can be done using a single command in your terminal.
The video below, "Bun Crash Course", provides a good walkthrough of the installation process on different operating systems.
Bun Crash Course | JavaScript Runtime, Bundler & Transpiler
This video provides a clear demonstration of installing Bun.
Watch the segment from the start of the demo, which covers the installation command and how to verify it. The presenter uses a Mac, but the primary curl command is the same for Linux and Windows Subsystem for Linux (WSL).
For your reference, here is the official installation guide with commands for macOS, Linux, and Windows. Please choose the command that is appropriate for your operating system.
Install Bun - Getting Started Guide
This page from the official Bun documentation provides the definitive installation commands.
Locate the section for your operating system (macOS, Linux, or Windows) and run the recommended installation command. For instance, on macOS and Linux, the most common method is using this curl command. After installation, it is crucial to either open a new terminal window or source your shell's profile file (e.g., ~/.zshrc, ~/.bashrc) as instructed by the installer.
Once the installation is complete, open a new terminal and run the following command to verify that Bun was installed correctly:
bun --version
You should see an output displaying the installed version number, such as 1.0.21 or higher.
2. Initializing a New Project
With Bun installed, you can now create a new project. Bun provides an initializer command, bun init, that scaffolds a new project with sensible defaults for TypeScript development.
-
Create a new directory for your project and navigate into it:
mkdir bun-telegram-bot cd bun-telegram-bot -
Run the initializer command:
bun init
The command will prompt you for a package name and an entry point. You can accept the defaults by pressing Enter.
After the command finishes, you will see output similar to this, along with a new set of files in your directory.
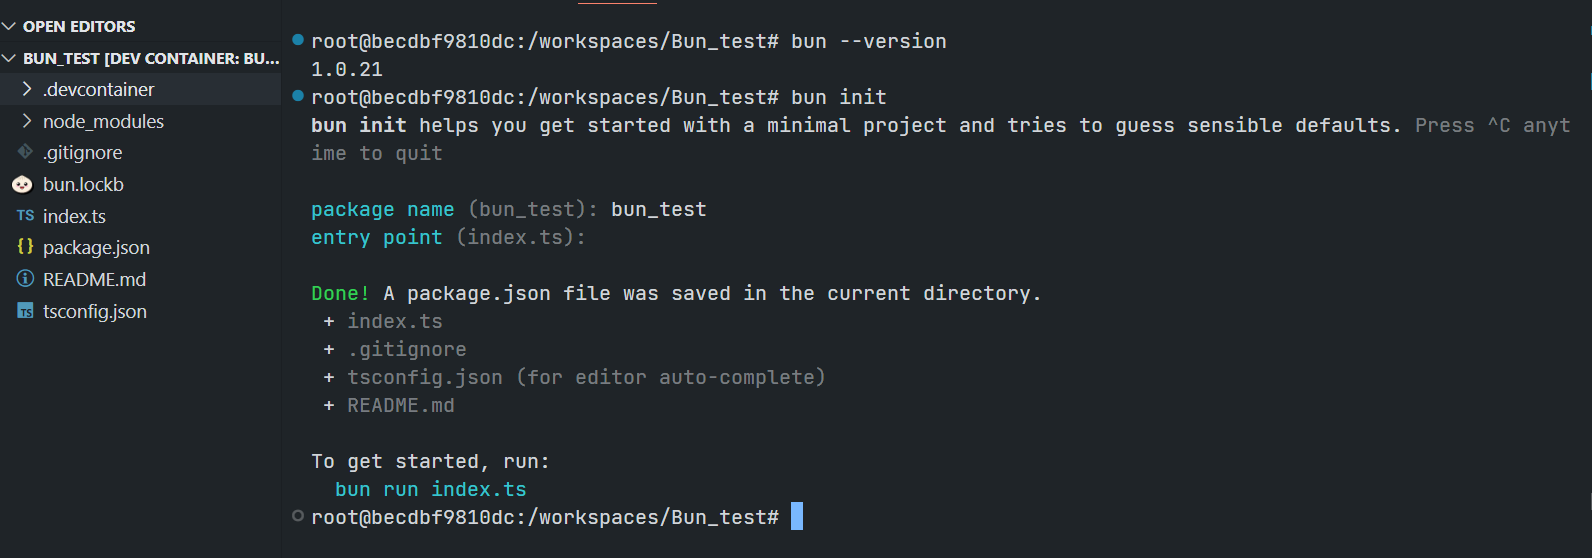
3. Understanding the Project Structure
The bun init command generates a few files. As an experienced developer, you will recognize their purpose, but let's review them in the context of Bun.
package.json: The standard project manifest file. Bun uses this for dependency management and script definitions, just likenpmoryarn. Notice that it automatically adds@types/bunas a dev dependency, providing TypeScript with the necessary type definitions for Bun's APIs.tsconfig.json: A pre-configured TypeScript configuration file. Bun creates atsconfig.jsonwith modern settings optimized for its runtime, such as"module": "ESNext"and"moduleResolution": "bundler". This saves you from having to create this file from scratch.index.ts: The main entry point of your application, containing a simpleconsole.log.bun.lockb: This is Bun's lock file. It is a binary file that serves the same purpose aspackage-lock.jsonoryarn.lock—to ensure deterministic, reproducible installs—but is significantly faster to read and write..gitignore: A standard Git ignore file, pre-populated with common entries likenode_modules.
4. Running Your First TypeScript File
One of the most immediate benefits of Bun is its ability to run TypeScript files directly without any explicit compilation step.
To execute the index.ts file that was created, run the following command in your terminal:
bun run index.ts
You should see the output: Hello via Bun!.
This seamless execution is a core part of the Bun developer experience. The official Quickstart guide provides a good summary of this process.
This guide walks through the init and run commands.
Review the first two steps in the guide. Step 1 covers the bun init command we just used. Step 2 demonstrates the bun run command for executing the entry file. This reinforces what you've just done.
You have now successfully installed Bun and created and run your first TypeScript application. This simple project structure is the starting point from which we will build our Telegram bot.
Conclusion
In this lesson, you've taken the first practical step in your journey to building Telegram bots with Bun. You learned how to:
- Install the Bun runtime on your machine.
- Initialize a new, fully configured TypeScript project using
bun init. - Understand the files generated by the initializer, including the fast
bun.lockblock file. - Execute a TypeScript file directly with the
bun runcommand.
This foundational setup has prepared your development environment. In the next lesson, we will explore the key differences between the Bun and Node.js runtimes. We'll examine performance, API compatibility, and built-in tools, focusing on the aspects that will be most impactful for developing and running your Telegram bot.
Can't find a good explanation? Sign up and we'll make it for you
Sign up