
Welcome back. In the previous lesson, you practised stepping forward and sideways from a stable home position, always using the rule lift, place, settle. You controlled the direction yourself and paused between steps.
This lesson changes just one variable: the direction is now selected by a simple external cue. A partner, card, or spoken prompt tells you which approved step to perform. The aim is not to become “fast” by rushing. It is to notice a cue, choose the correct safe response, and complete it with the same knee-friendly movement quality you used last time.
For now, your non-negotiable rules remain:
- No jumping, running, pivots, or twisting on a planted foot.
- No rearward or diagonal stepping unless your physiotherapist has specifically approved it.
- Use stable support.
- A cue never overrides pain, instability, dizziness, or loss of control.
A cue-response is more than reflex speed
When people say “reaction time,” they often mean one single ability. In movement, it is more useful to separate three stages:
- Perceive: notice the visual or auditory cue.
- Select: identify the approved response: for example, “right” means right foot side-and-home.
- Execute: perform the step accurately, then return to home position.
The second stage matters. A task with only one possible response, such as pressing a button when a light appears, is relatively simple. When you must choose between right and left, you are doing a choice response task. It is naturally slower, particularly while you are still learning the movement map. That is not a sign of poor coordination; it is the brain organising perception, decision-making, balance, and stepping together.
In judo, this eventually supports skills such as noticing a partner’s movement and adjusting your stance. But at this stage the useful version is much quieter: hear or see a cue, make one small supported step, and finish in balance.
A steady rhythm cue, such as a metronome beat, mainly tells you when to move. Today’s cue tells you what to do. That added decision is the new challenge.
Keep the cue system simple
Use the same movement you already know well: side-and-home stepping while facing a stable counter or worktop. Begin with two hands on the support unless your physiotherapist has advised a different level of contact.
Your initial cue map has only two options:
| Cue | Safe response |
|---|---|
| Right | Lift the right foot, place it a small distance to the right, settle, then return it to home. |
| Left | Lift the left foot, place it a small distance to the left, settle, then return it to home. |
Keep both feet generally facing the counter. Your trunk does not turn toward the stepping foot. The standing foot stays quiet on the floor; it does not swivel to help the movement.
A useful internal script is:
Notice. Name. Lift, place, settle, home.
“Name” means silently or aloud identifying the cue before moving: “Right.” This small pause is valuable. It prevents an external prompt from making you rush into a poorly organised step.
Why the cue must not make the task unsafe
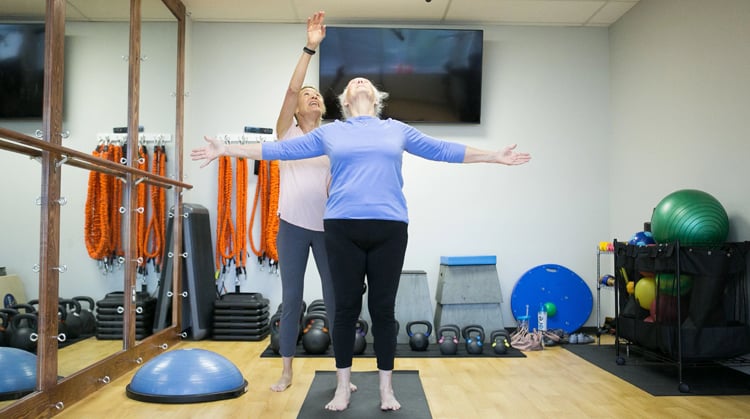
The Choose PT balance guide includes a standing step-training activity in which another person calls clock positions. It is a useful model for linking a spoken cue to a step, but its complete version includes directions behind the body and encourages quick responses. Those are not appropriate requirements for your present knee restrictions.
Health Tips | 6 Exercises to Promote Balance That You Can Do at Home | Choose PT
Read the “Standing Step Training” section from Choose PT. It illustrates the basic principle of responding to a spoken direction while positioned near a stable support.
Begin with the safety advice immediately before the numbered exercises. Then read Section “1. Standing Step Training,” from the setup through the purpose of the drill. Notice how the cue selects the stepping direction. Do not use the rearward clock position, rapid pace, or any direction that your physiotherapist has not approved; your version remains limited to small right and left side steps.
The important adaptation is this:
Random cue order is useful. Random movement quality is not.
You can make the cue order unpredictable while keeping the step size, support, direction range, and pace deliberately conservative.
The supported cue-response drill
Allow 10–15 minutes. Do it only on a day when standing practice fits your rehabilitation plan. This is a coordination drill, not a cardiovascular workout; stop for a rest whenever attention or movement quality fades.
Set up — 2 minutes
Face a stable countertop with clear floor space to both sides. Wear the footwear your rehabilitation plan recommends. Place any cue cards or phone outside your stepping area, where you can reach them without bending, twisting, or taking an extra step.
First perform two slow, self-chosen side-and-home steps per side. This is your movement-quality rehearsal, not the cue drill yet.
Before adding cues, confirm:
- You can lift rather than drag the stepping foot.
- Toes stay generally oriented toward the counter.
- The standing knee remains comfortably soft, not locked or twisted.
- Your trunk does not lurch sideways.
- You can return to home position and pause quietly.
If this rehearsal is not comfortable today, do not add unpredictability. Practise the planned version from the previous lesson or follow your physiotherapist’s alternative.
Visual cue version — 3–4 minutes
For visual cues, use two large cards labelled RIGHT and LEFT. A partner can stand in front of you, outside your movement area, and hold up one card at chest height. They should wait until you have returned to home position before presenting the next one.
Use this sequence:
- Begin in home position with both hands on the counter.
- Your partner displays either RIGHT or LEFT.
- Look at the card, silently name the direction, and make the matching side-and-home step.
- Pause in home position for two calm breaths or until fully settled.
- Receive the next cue.
Start with only four to six cues, then rest. The partner should use a mixed order, such as right, left, left, right, rather than alternating predictably.
A suitable pace is one cue every several seconds, not one cue every second. The next cue should appear only after you are settled. If you begin moving before seeing the card because you are guessing the pattern, ask your partner to vary the order more.
Auditory cue version — 3–4 minutes
Keep the physical setup identical. This time, your partner says “right” or “left” in an ordinary, calm voice. They should not shout, count down, push you, or give the cue while you are still returning home.
The response sequence is the same:
- Hear the word.
- Repeat it quietly if useful: “Left.”
- Perform one controlled side-and-home step.
- Re-establish home position.
- Wait for the next cue.
Begin with four to six spoken cues. If you hear the cue but are uncertain which foot should move, simply remain still and ask for the cue again. Choosing not to move is the correct safety response to uncertainty.
Optional mixed block — 2 minutes
If both versions felt calm and accurate, do one short block in which your partner sometimes shows a card and sometimes says the word. Keep the exact same response map: right means right foot; left means left foot.
This is not necessarily harder because the movement is different. It is harder because attention must identify the cue’s form before selecting the response. Limit this to four cues initially.
If you find the mixed block confusing, return to one cue type. The goal is reliable movement, not passing a test.
Practising alone
A partner provides the clearest unpredictable cue, but you can still practise alone safely.
Place the two cue cards face down on the countertop. Keep one hand on the counter, draw one card with the other hand, read it, replace it, and perform the corresponding supported side-and-home step. Re-shuffle the cards between mini-sets.
This is less reactive than a partner-led drill because you know when the cue is coming. It still trains the link between a visual instruction and the correct movement response.
If you use a phone to play a recording of spoken “right” and “left” cues, first make sure that operating the device does not distract you while standing. Put it on the counter, start the recording before the drill, and keep your hands on the support during the stepping itself. A predictable recording is acceptable at first; accuracy remains more important than surprise.
Quality is the score, not speed
A cue-response task can tempt you to judge yourself by how quickly you move. For your current stage, use a different scorecard:
| What you observe | What it means | What to do |
|---|---|---|
| You identify the cue and step accurately, with a brief pause | Appropriate challenge | Continue at the same pace. |
| You choose the wrong side but remain stable | The decision demand is a little high | Slow the cue rate; rehearse the map again. |
| You step correctly but drag, twist, lean, or rush home | The movement demand is too high | Reduce step size and increase support. |
| You feel knee pain, catching, giving way, or twisting | The task is outside today’s safe range | Stop and follow your clinician’s guidance. |
| You feel dizzy, alarmed, or repeatedly need to grab the support | Balance challenge is excessive | Stop; return to an easier approved drill another day. |
The correct progression is usually not “make the cue faster.” First aim to make the response more consistent: less hesitation, clearer foot placement, a quieter trunk, and fewer extra corrective steps.
For the next two or three practices, keep the following fixed:
- side-and-home direction only;
- small step size;
- the same stable support;
- the same two cues;
- a calm interval between cues;
- no reduced hand support merely to make the drill harder.
You are already progressing one variable from the previous lesson: the order of movement is externally selected. That is sufficient new complexity.
After each practice, record one short observation:
| Practice note | Example |
|---|---|
| Cue type used | “Partner gave spoken right/left cues.” |
| Best quality | “I waited until I knew the direction before stepping.” |
| Adjustment next time | “Keep my left side-step smaller.” |
Takeaways
A safe response to a cue has three parts: perceive, select, execute. Your task is not to react as fast as possible; it is to connect a simple visual or spoken direction to an accurate, clinician-approved movement.
For now, use only right and left side-and-home steps with stable support. Pause after every response, lift rather than swivel the foot, and treat any pain, twisting, loss of balance, or uncertainty as a reason to modify or stop—not as something to push through.
In the next module, you will begin integrating these skills into short coordination sessions and adapting them to everyday activities and currently permitted judo-related movement.
Can't find a good explanation? Sign up and we'll make it for you
Sign up