
Hello! Welcome back to our course on n8n.
In our last lesson, we explored the Split In Batches node, which is essential for processing large datasets in manageable groups. A key takeaway was that when you use conditional logic (like an If node) inside a loop, you must use a Merge node to bring the separate paths back together. That was our first glimpse into the power of merging.
Today, we're going to put that node under the microscope. This lesson is dedicated to fulfilling the learning outcome: Merge data from different branches using the Merge node. You'll learn how to combine data from separate processing streams, a fundamental technique for building sophisticated workflows. This is crucial for tasks like enriching data from multiple sources or consolidating the results of parallel operations.
Given your software development background, you can think of the Merge node as n8n's way of performing operations analogous to SQL's UNION and JOIN clauses. We'll cover the different modes it offers and when to use each one.
1. Why and When to Merge Data
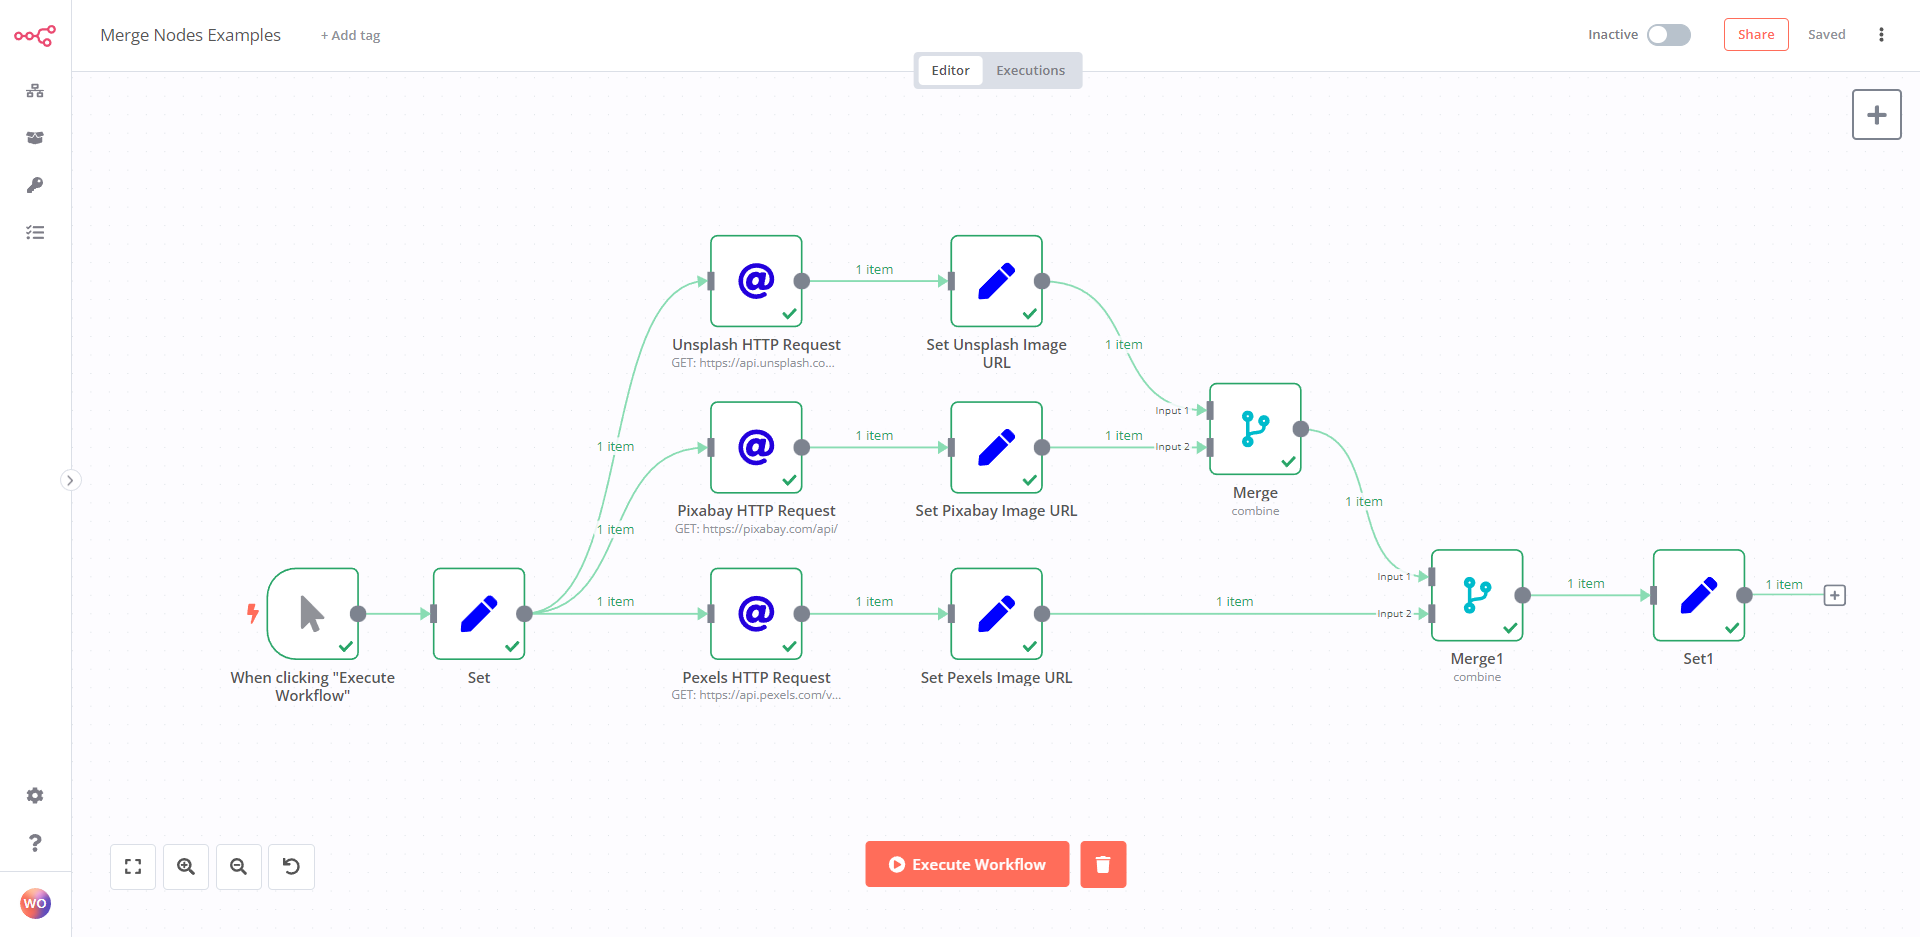
In n8n, it's common to split your workflow into multiple branches to perform different tasks in parallel. For example, you might:
- Fetch user data from your database in one branch.
- Fetch that user's recent activity from a separate analytics API in another branch.
At some point, you'll want to combine this information. This is where the Merge node comes in. It's designed to accept inputs from multiple branches, wait for all of them to complete their processing, and then combine their output items according to a specific set of rules.
The Merge node is one of n8n's logic nodes, designed to control the flow and structure of your data.
Key Concepts of n8n – Part 2: n8n Nodes & Node Types
For a quick overview, this article from Automate Genius Hub briefly categorizes the Merge node among other logic nodes like If and Switch.
Read the section '3️⃣ Logic Nodes (Control Flow)' to see where the Merge node fits within the n8n ecosystem.
The Merge node operates in several modes, but the two most important are Append and Combine. Let's explore them in detail.
2. The Append Mode: Stacking Data
The Append mode is the most straightforward. It takes all the items from its inputs and stacks them on top of each other into a single, longer list. If input 1 has 3 items and input 2 has 5 items, the Append mode will output a single list containing 8 items. This is conceptually similar to a UNION ALL in SQL.
To see this in action, the following video provides a clear walkthrough.
Master the Merge Node in n8n – Combine Data Like a Pro
Watch this first segment from Bradford Carlton's video 'Master the Merge Node in n8n' to understand the Append mode.
Watch from the beginning to 02:52. The video shows how two branches, each with 3 items, are merged into one list of 6 items. Pay attention to how the output is a simple concatenation of the inputs.
A Critical Best Practice: Normalizing Data
The Append mode works perfectly if the items from all branches have the same data structure (or "schema"). But what happens if they don't?
Imagine you're merging customer data from two sources:
- Branch 1 outputs items with fields:
name,email - Branch 2 outputs items with fields:
customerName,customerEmail
If you append these directly, you'll get a messy list where some items have name and email (and customerName/customerEmail are undefined), and others have the reverse. This makes it impossible to process them consistently in later nodes.
The solution is to use a Set node (also known as "Edit Fields") in each branch before the Merge node to standardize the field names.
This next video brilliantly demonstrates this exact problem and its solution. It's a crucial pattern for creating clean, maintainable workflows.
Set, Merge, and Split Out Nodes in n8n Explained
This video from Tommy Eberle shows why you often need to use a Set node along with a Merge node.
Watch from 02:48 to 06:39. Observe the problem caused by merging items with different field names and how the Set node is used on both branches to remap the fields to a consistent schema (customerName, customerEmail) before they are merged.
Test your understanding!
You are building a workflow that pulls product information from two different e-commerce platforms.
- Branch A (Shopify) outputs items with fields
titleandprice. - Branch B (WooCommerce) outputs items with fields
nameandcost.
You want to use the Append mode in a Merge node to create a single list of all products. What must you do to ensure the final list is clean and usable?
Show answer
Before the Merge node, you need to add a Set node to each branch to normalize the field names.
- In Branch A, you could use a Set node to create new fields:
productName(fromtitle) andproductPrice(fromprice). - In Branch B, you would use another Set node to create the same new fields:
productName(fromname) andproductPrice(fromcost).
This ensures that all items entering the Merge node have an identical structure, resulting in a clean, combined list.
3. The Combine Mode: Enriching Data
While Append stacks data vertically, the Combine mode joins it horizontally. It's used to enrich items from one branch with data from another, much like an SQL JOIN. This mode has several powerful sub-options.
Combine by Position
This is the simplest Combine method. It merges items based on their index (order) in the input stream. The first item from input 1 is merged with the first item from input 2, the second with the second, and so on. This is useful when you have two parallel streams of data that you know are perfectly correlated by their order.
Master the Merge Node in n8n – Combine Data Like a Pro
Let's return to the 'Master the Merge Node' video to see 'Combine by Position' demonstrated.
Watch from 04:43 to 07:16. The video shows how two sets of three items are combined one-to-one based on their position in the list.
Combine by Matching Fields
This is the most powerful and commonly used Combine method. It acts like a database JOIN, merging items that share a common value in a specified field (a "key"). For example, you could merge user profile data with user activity data by matching both on a userID field.
Master the Merge Node in n8n – Combine Data Like a Pro
This next segment demonstrates combining by a matching field.
Watch from 07:16 to 11:00. Pay close attention to how a 'row' field is used as the key to merge the two data streams. The video also gives an important tip: avoid spaces in your key fields for reliable matching.
To solidify this concept, let's walk through building a simple example yourself.
Key Concepts of n8n – Part 2: n8n Nodes & Node Types
This article provides a textual explanation and a step-by-step example using Code nodes to practice different merge modes.
Find the section 'Step-by-Step Example: Trying Different Merge Modes'. Follow steps 1 and 2 to set up two Code nodes with sample data. Then, for step 3, configure your Merge node to use 'Combine by Matching Fields' and set the match key to 'language'. Execute the workflow and verify your output matches the screenshot.
This hands-on exercise demonstrates how you can enrich one dataset (names) with related information from another (greetings) using a shared key (language). The article also shows a more complex, real-world example of fetching users, filtering them, fetching their posts, and then merging the user and post data together.
Combine by All Possible Combinations
This mode creates a Cartesian product of the inputs. It pairs every item from input 1 with every item from input 2. If you have 3 items in the first branch and 4 in the second, you'll get 12 (3 * 4) combined items. Use this mode with caution, as it can generate a massive number of items very quickly.
Master the Merge Node in n8n – Combine Data Like a Pro
Finally, let's see what 'All Possible Combinations' looks like.
Watch from 11:00 to 13:18. The video shows how 3 items in two branches result in 9 output items and warns about the potential for 'data explosion'.
4. Other Merge Modes
The Merge node has a couple of other modes that are less common but good to be aware of.
- Choose Branch: This mode waits for all inputs to arrive, then outputs the data from only one of the branches, which you select in the node's parameters. It's a simple way to conditionally route data after parallel processing.
- SQL Query: This advanced mode allows you to write an SQL-like query to merge the inputs, treating
input1andinput2as table names. With your development background, you might find this an intuitive way to perform complex joins directly.
The video below gives a quick overview of these two options.
Master the Merge Node in n8n – Combine Data Like a Pro
This brief clip explains the 'Choose Branch' and 'SQL Query' modes.
Watch from 02:52 to 04:43. This will give you a conceptual understanding of these less-frequently-used modes.
Conclusion
Mastering the Merge node is a significant step toward building complex, multi-path workflows. You now have the tools to bring together data from various sources and processing branches in a controlled and predictable way.
Key Takeaways:
- The Merge node is used to combine data from two or more separate branches in a workflow.
- Append mode stacks items from all inputs into a single, longer list (like a
UNION ALL). It's crucial to normalize data with a Set node before appending if schemas differ. - Combine mode merges items horizontally to enrich data (like a
JOIN).- By Position: Merges items based on their order.
- By Matching Fields: Merges items based on a shared key, which is the most powerful and common method for data enrichment.
- Use
All Possible Combinationswith caution, as it can rapidly increase the number of items.
In our next lesson, we'll look at a different type of advanced flow control: implementing a manual approval step using the Wait node with a webhook resume URL. This will introduce the concept of "human-in-the-loop" automations, where a workflow can pause and wait for external input before continuing.