
Hello! Welcome back to our n8n course.
In the last lesson, we mastered a powerful pattern for handling complex, hierarchical data using sub-workflows to create nested loops. We focused on controlling what data gets processed in what order. Today, we'll shift our focus to controlling when that processing happens.
This lesson addresses the learning outcome: Use the Wait node to pause a workflow for a fixed duration. This is a fundamental capability for building robust automations that need to interact with the real world, where systems aren't always instantaneous. You'll learn how to introduce deliberate pauses into your workflows, a crucial technique for managing API rate limits, waiting for slow external services, or simply pacing an automation.
1. Understanding the Wait Node
In programming, you often use a sleep() or delay() function to pause execution. The Wait node is n8n's equivalent, but with some powerful features tailored for long-running automations.
At its core, the Wait node pauses a workflow's execution. When a workflow hits a Wait node, n8n can offload the execution data to your database, freeing up system resources. When the wait condition is met, it reloads the data and continues the workflow right where it left off.
To get started, let's look at the official documentation.
The n8n Docs for the Wait node provide a concise overview of its purpose and different modes of operation. We will focus on the time-based functionality for this lesson.
Read the introduction, the list of 'Resume' conditions, and the specific section on 'After Time Interval'. This will give you a solid conceptual foundation.
As you saw, the Wait node can resume based on several conditions. Today, we're focusing on After Time Interval, which is the most direct way to pause for a fixed duration.
A key architectural detail, especially relevant given your software development background, is how n8n handles the execution state during the wait.
This section of the documentation contains an important technical note about how the Wait node behaves based on the duration of the pause.
Read the section titled 'Time-based operations'. Pay close attention to the distinction between wait times shorter than 65 seconds versus longer ones. This has implications for system resources and state management.
This distinction is critical:
- Short waits (< 65s): The execution remains in memory. This is efficient for brief pauses, like rate limiting, as it avoids database read/write overhead.
- Long waits (>= 65s): The execution is persisted to the database. This is essential for long-running workflows (e.g., waiting hours or days), as it ensures the workflow can survive server restarts.
When a workflow is in a waiting state, you can see it clearly in the n8n UI.
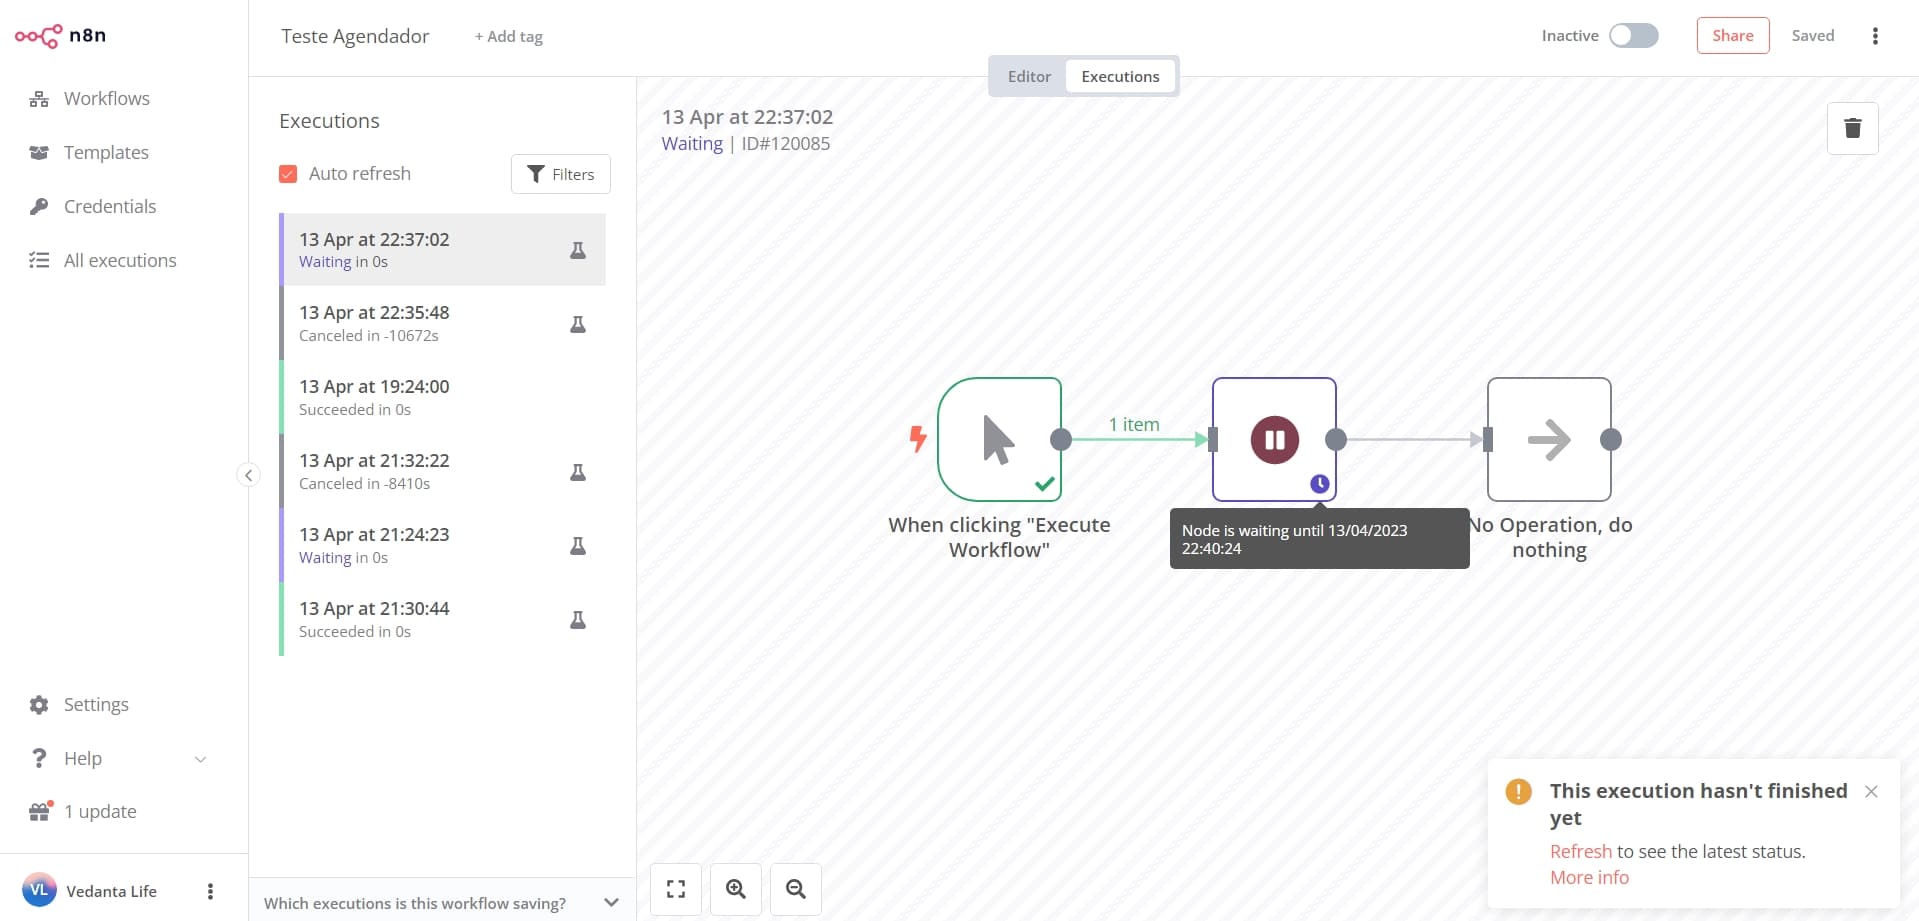
2. Hands-On: Adding a Timed Delay to a Workflow
Now, let's put this into practice. We'll build a simple workflow that uses a Wait node to pause execution for a short period based on a condition. This exercise will not only show you how to configure the Wait node but also how it integrates with other logic nodes like If.
We will follow an exercise from the n8n documentation that demonstrates this perfectly.
Processing different data types
This resource provides a practical exercise involving date manipulation and a conditional wait. We will build the workflow described here.
First, read the introduction under 'Date, time, and interval data' to understand the context. Then, follow the step-by-step instructions in the 'Date Exercise' section to build your workflow. Don't worry about the 'Customer Datastore' node; you can replace it with a Code node that outputs similar data if you prefer, but the original setup should work out of the box.
Building the Workflow
Let's walk through the key steps from the exercise:
- Start with Data: Begin your workflow with a
Manual Trigger(or the default Start node) connected to the Customer Datastore (n8n training) node. Configure it for theGet All Peopleoperation and toReturn All. This will provide the sample data. - Manipulate Data: Add a Date & Time node to process the
createddate from the datastore. This step isn't strictly necessary for learning the Wait node, but it's good practice for data handling. - Add Conditional Logic: Connect an If node to check a condition (e.g., if the date is after a certain point). This will create two branches:
trueandfalse. - Implement the Wait: This is our focus. Drag a Wait node and connect it to the
trueoutput of the If node.- In the Wait node's parameters, set the Resume mode to
After Time Interval. - Set the Wait Amount to
1. - Set the Wait Unit to
Minutes.
- In the Wait node's parameters, set the Resume mode to
- Continue the Flow: Add an Edit Fields (Set) node after the Wait node to complete the
truebranch. - Execute and Observe: Run the workflow. You will see the items that meet the
Ifcondition flow to the Wait node. The workflow execution will then pause. The node will show a countdown timer. After one minute, the execution will automatically resume, and the items will proceed to the final Set node.
If you get stuck or want to verify your setup, you can import the complete workflow solution.
Processing different data types
The documentation provides the full JSON for the completed workflow. You can import this into your n8n instance to see exactly how each node is configured.
Copy the JSON code from the page and paste it directly into your n8n canvas (or use the 'Import from Clipboard' option). This will create the full workflow for you to inspect.
Test your understanding!
Imagine you are building a workflow to send a welcome email and then a follow-up email 24 hours later. You use a Wait node set to 1 Day. Your n8n server restarts due to a power outage 12 hours into the wait. What happens to the workflow execution?
Show answer
The workflow execution will resume correctly after the server comes back online and the full 24-hour period has elapsed. Because the wait time is longer than 65 seconds, n8n offloads the execution data and its state to the database. When the server restarts, n8n checks the database for pending executions and continues them as scheduled.
3. Common Use Cases for Fixed-Duration Waits
Pausing for a fixed duration is a common requirement in automation. Here are a few scenarios where this is invaluable:
- API Rate Limiting: A very common developer task. If an API allows only 60 requests per minute, you can place a
Waitnode (set to 1 second) inside a loop that processes your API calls. This ensures you don't exceed the limit. We'll explore looping patterns like this in more detail later. - Waiting for Asynchronous Jobs: You might trigger an external service (e.g., a video rendering API or a report generation tool) that takes time to complete its job. You can use a
Waitnode to pause your workflow for a reasonable estimate of the job's duration before attempting to fetch the result. - Simulating Human Behavior: In automations that interact with users, like chatbots, instant replies can feel robotic. Adding a 1-2 second
Waitbefore a response can simulate "typing" and improve the user experience. - Ensuring Data Propagation: Sometimes, after writing data to one system (e.g., a database), it might take a few moments for that data to become available in a connected system due to replication lag. A short
Waitcan prevent race conditions where your workflow tries to read data that isn't there yet.
Conclusion
In this lesson, you've learned how to use one of n8n's essential flow control tools. By mastering the Wait node for fixed-duration pauses, you can build more reliable and sophisticated workflows that can gracefully handle real-world timing constraints.
Key Takeaways:
- The Wait node pauses a workflow's execution.
- The After Time Interval mode is used to wait for a specific duration (e.g., seconds, minutes, days).
- n8n intelligently manages system resources by keeping short waits in memory and offloading long waits to the database, ensuring resilience.
- Fixed-duration waits are crucial for tasks like API rate limiting, handling asynchronous jobs, and improving user experience.
In our next lesson, we will explore a more dynamic and interactive use of this node. You will learn how to implement a manual approval step using the Wait node with a webhook resume URL. This will unlock the ability to build workflows that pause indefinitely, waiting for external human or system input before continuing.