
Hello, and welcome to the Linux course. This first module establishes a safe environment in which you can make administrative mistakes, inspect their consequences, and roll back without risking your main computer. That habit—working from a reproducible lab and validating each change—is central to reliable Linux administration.
By the end of this lesson, you will have a disposable RHEL 10-compatible virtual machine, a non-root administrator account, working basic network access, and two recovery routes: a hypervisor snapshot and RHEL rescue media.
Build for safe experimentation
A Linux lab should be disposable, not merely virtual. You need a quick way to undo a bad /etc/fstab edit, a broken service configuration, or an accidental file deletion. A virtual machine provides isolation; a snapshot provides reversibility.
For this course, plan for this small but useful topology:
- One Linux VM now, named something like
rhel-lab1. - A second VM later, for client/server tasks such as SSH, NFS, and HTTP testing.
- A virtual disk devoted to the operating system.
- Ideally, a second blank virtual disk kept unformatted for the storage lessons.
- A saved installation ISO that can boot the VM into rescue mode.
- A clean baseline snapshot.
RHEL’s documented installation minimum is 10 GiB of available disk space and 1.5 GiB RAM for a local-media x86_64 installation. Those are installation minima, not comfortable lab specifications. A practical starting allocation is:
| Resource | Practical lab allocation | Reason |
|---|---|---|
| vCPU | 2 | Responsive shell and service work |
| RAM | 2 GiB for Server; 4 GiB for Server with GUI | Leaves room for normal administration tools |
| System disk | 30 GiB | Space for packages, logs, and exercises |
| Extra disk | 20 GiB, unformatted | Safe target for partition, filesystem, and LVM practice |
| Network adapter | NAT | Guest gets outbound network access with minimal host setup |
Do not use your host computer’s real disk as a practice target. The VM’s disks are the boundary that makes destructive storage exercises safe.
[PDF] Red Hat Enterprise Linux 10 Interactively installing RHEL from ...
Read the “System requirements and supported architectures” material in Red Hat’s installation documentation before assigning VM resources. It distinguishes the minimum needed to install from the resources you should realistically reserve for a usable lab.
In Chapter 1, section 1.2, begin at the disk and RAM requirements. Note the stated minimums, then use the more generous lab allocation above if your host can support it.
Create the virtual machine
You can use a desktop hypervisor such as VirtualBox or VMware Workstation, or KVM/libvirt if your host runs Linux. The essential idea is the same: create virtual CPU, RAM, disks, network adapters, and a virtual optical drive containing the RHEL installation ISO.
The following video uses older RHEL-era screens, so labels and defaults may differ from current software. Its VM-building workflow remains useful. Follow the path for the hypervisor you chose; do not try to reproduce every value exactly.
How to Setup a virtual RHCSA / RHCE lab on VMware Workstation and VirtualBox
Watch “How to Setup a virtual RHCSA / RHCE lab on VMware Workstation and VirtualBox” from ComputerNetworkingNotes for the basic structure of a multi-machine practice lab and a concrete VirtualBox VM creation walkthrough.
Watch the lab rationale to see why hands-on Linux preparation needs isolated systems. If you are using VirtualBox, continue with VirtualBox creation, focusing on the VM name, RAM, virtual disk, and how the ISO is attached as a virtual optical disk. Use your own allocation plan rather than treating the video’s values as requirements.
When creating the VM:
- Name it
rhel-lab1and keep its files in a directory dedicated to lab VMs. - Allocate the CPU, RAM, and primary virtual disk.
- Add a second 20 GiB virtual disk, but leave it untouched during installation. If host storage is limited, skip it for now; you can add one later.
- Attach the RHEL 10 installation ISO to the virtual CD/DVD drive.
- Set the first network adapter to NAT and ensure that “cable connected” or its equivalent is enabled.
- Start the VM and boot from the ISO.
A NAT network is a sensible default because the guest can reach external networks while remaining on a private subnet behind the host.

NAT does not automatically mean every VM can reach every other VM. Some platforms place NAT guests together; others isolate them. When you build a second VM, you will deliberately create a shared private network if required. Also, a NAT guest is not normally reachable from the host by SSH unless you later configure port forwarding or add an appropriate second adapter.
Install a predictable baseline
At the RHEL installer, make choices that support administration practice rather than production deployment:
- Choose your normal language and keyboard layout.
- Select Server if host resources are modest. Select Server with GUI if you want a graphical console as well as a terminal and have adequate RAM.
- Select only the system disk as the installation destination. Do not select the empty practice disk.
- Automatic partitioning is appropriate for this first baseline. You will learn controlled manual partitioning later.
- Enable the NAT-connected interface.
- Set a recognizable hostname, such as
rhel-lab1. - Create a normal login account—for example,
learner—with administrative privileges. - Set a strong root password for console and recovery use, but do not enable password-based root SSH login.
Your normal account is the account you should use every day. The root account has unrestricted control and should be used directly only when necessary. Administrative work is normally performed through sudo, which records the privileged command and avoids routine root login.
[PDF] Red Hat Enterprise Linux 10 Interactively installing RHEL from ...
Continue in Red Hat’s installation guide with the installer settings that create a secure, manageable lab: a protected root account, a standard administrative user, an enabled network connection, and a hostname.
In Chapter 10, section 10.4, read the root and user account guidance. Focus on why daily work should use a non-root account and why an administrative account needs a password. Then read section 10.7, “Configuring network and host name,” beginning with the network and hostname overview. For this lab, DHCP through NAT is enough; persistent static addressing comes later in the networking module.
Once installation completes, remove or detach the ISO so the VM boots from its virtual disk. Log in as your standard account, not root.
Prove that administration and networking work
A lab is not ready merely because it displays a login prompt. Validate the things later lessons depend on.
Run the following commands as your regular lab user:
whoami
id
sudo -k
sudo -v
sudo -l
sudo id -u
Interpret the results:
whoamishould display your ordinary username.idshould show your user and groups. An installer-created administrator commonly belongs towheel.sudo -kremoves any cached authentication, making the next check meaningful.sudo -vshould request your user password and validate your sudo credentials.sudo -llists commands your account may run with sudo.sudo id -ushould print0, the numeric user ID of root.
If the user is not in wheel, sign in as root at the VM console and add the account:
usermod --append -G wheel learner
Replace learner with your actual username, then log out and back in so the new group membership takes effect.
RHEL’s standard sudo configuration grants the administrative wheel group broad privileges. Later, you will learn how to create narrower command-specific sudo policies. For this lab, full wheel access is appropriate because you will be administering the VM.
Chapter 8. Managing sudo access | Security hardening
Read Red Hat’s concise procedure for using the wheel group to grant and verify administrative access. This is the model your lab account should follow.
In section 8.2, start at the wheel group procedure and verification. Compare its verification command with the id output from your own lab.
Now verify the network configuration. Use these commands:
hostnamectl --static
nmcli device status
ip -br address
ip route
getent ahosts docs.redhat.com
curl -I --max-time 10 https://example.com
You are checking separate layers:
| Check | What success means |
|---|---|
hostnamectl --static | The machine has the expected stable hostname |
nmcli device status | The Ethernet device is connected |
ip -br address | The interface received an IPv4 address from NAT/DHCP |
ip route | A default via route exists |
getent ahosts ... | DNS resolution works |
curl -I ... | DNS, routing, and HTTPS connectivity work together |
A failed ping is not conclusive: networks can block ICMP while allowing ordinary HTTPS traffic. For this baseline, curl is a better end-to-end check. Internet connectivity also does not prove that your system is registered or that a package repository is configured; that is a separate software-management task.
Preserve and test recovery paths
Before later lessons modify storage, services, boot settings, and networking, create a snapshot named something like:
clean-install-verified
Take it after administrative access and basic networking have been verified. A snapshot is a rollback point, not a replacement for a backup: it is tied to your hypervisor and may depend on the original VM files. Its value here is speed—after a failed experiment, you can return to a known-good system in minutes.
Keep the installation ISO and confirm you know how to attach it and boot from it. RHEL installation media includes a rescue environment, a minimal operating system used when the installed OS cannot boot normally.
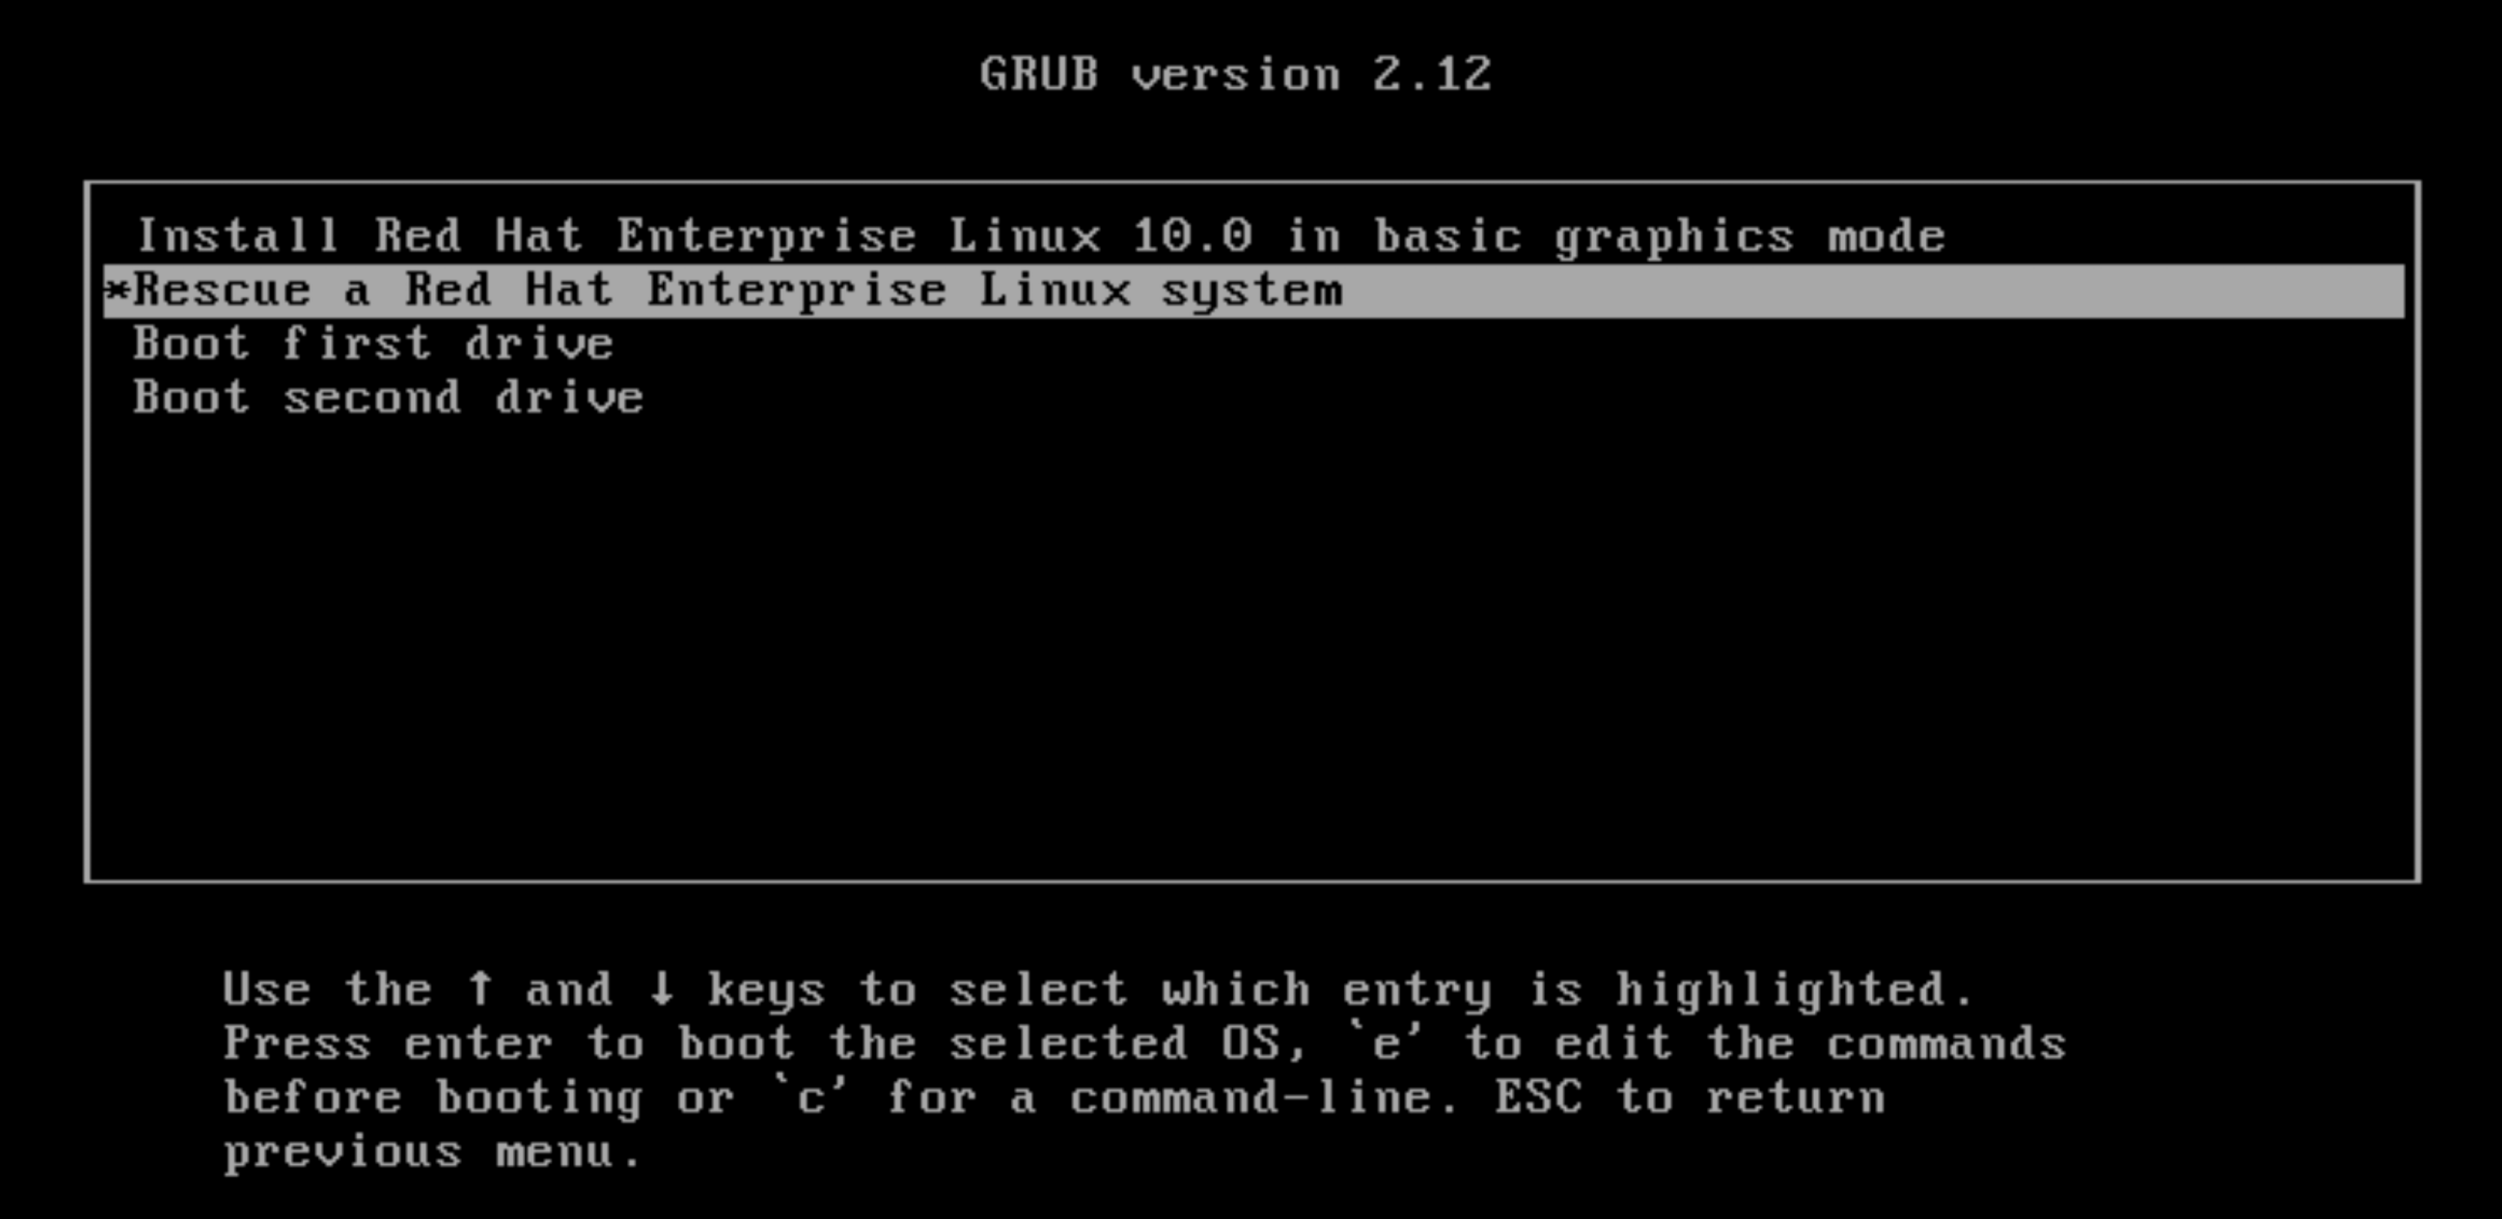
A safe recovery drill does not require breaking the VM:
-
Shut down
rhel-lab1. -
Attach the RHEL ISO and boot the VM from its virtual optical drive.
-
At the boot menu, select Troubleshooting, then Rescue a Red Hat Enterprise Linux system. On some media, the rescue option appears directly in the menu.
-
When prompted to mount the installed system, choose the read-only option.
-
At the rescue shell, verify that the installed system was found:
cat /mnt/sysroot/etc/os-release ls /mnt/sysroot/etc -
Exit and reboot. Detach the ISO so the VM returns to its normal disk boot.
The rescue shell’s own root filesystem is temporary. Your installed system, once found, is mounted beneath /mnt/sysroot. If you later need to repair installed configuration files or run package commands against the installed system, you would first enter it with:
chroot /mnt/sysroot
Do not run bootloader repair commands merely to “test” them. Recovery tools are powerful; use the snapshot and read-only rescue test to confirm your options without creating a problem.
[PDF] Red Hat Enterprise Linux 10 Interactively installing RHEL from ...
Read the rescue-mode overview and boot procedure in Red Hat’s installation documentation. It explains why rescue media differs from normal systemd emergency mode and how the installed system is mounted for repair.
In Chapter 17, section 17.8, begin with the rescue-media requirement. Then follow section 17.8.1 through the explanation of choosing read-write, read-only, or a shell. Pay particular attention to the distinction between the temporary rescue environment and the installed system mounted at /mnt/sysroot.
Key takeaways
You now have the foundation for a reliable Linux practice environment:
- A VM makes system-level work isolated and disposable.
- A dedicated empty virtual disk prevents later storage exercises from endangering the operating system disk.
- Use a normal account with
sudofor administration; avoid routine direct root login. - NAT plus DHCP gives a simple first network configuration, which you verified across interface, route, DNS, and HTTPS layers.
- A clean snapshot and tested rescue media provide two distinct recovery routes.
Next, you will begin using the shell precisely: commands, options, arguments, quoting, and escaping.
Can't find a good explanation? Sign up and we'll make it for you
Sign up