
Hello again. Last lesson established a practical map of Resolve on iPad: the Cut page is where you arrange time and clips, while the Color page is where you adjust the look of selected shots. You also practised using the Apple Pencil deliberately, especially distinguishing the playhead from a timeline clip.
Before an edit begins, Resolve needs a technical container for the work: its timeline format and a dependable place for its media. This lesson develops a simple rule that will prevent many avoidable problems:
Decide how the video will be delivered, then set the timeline before importing or editing footage.
For a short film, YouTube video, or agency promotion, that means choosing the frame’s shape and pixel dimensions, choosing a frame rate that agrees with the main footage, and putting source files somewhere stable.
Start with the delivery brief, not the settings menu
A timeline is the digital canvas on which you assemble the edit. Its resolution sets the canvas width and height in pixels; its frame rate sets how many individual images occur each second.
Neither setting should be chosen because it “sounds highest quality.” They should come from the delivery requirement.
Use this compact planning card before every new project:
| Delivery type | Timeline resolution | Frame rate |
|---|---|---|
| Vertical Reel, TikTok, or YouTube Short | 1080 x 1920 | Match the main footage; often 30 fps |
| Standard YouTube video | 1920 x 1080 | Match the main footage; often 24, 25, 29.97, or 30 fps |
| Higher-detail YouTube or client master | 3840 x 2160 (UHD) | Match the main footage |
| Short-film project | Usually 1920 x 1080 or 3840 x 2160 | Match the established camera format, often 24 fps or 23.976 fps |
The dimensions determine orientation as well as detail:
1920 x 1080is horizontal, or landscape.1080 x 1920is vertical, or portrait.3840 x 2160is UHD 4K landscape.
An iPad held in landscape does not mean the finished video must be landscape. You can comfortably edit a vertical promotional video while holding the iPad horizontally.
For this lesson, use a realistic agency-style delivery brief:
Project: 20-second vertical promotional video
Primary destination: Reels, TikTok, and YouTube Shorts
Timeline:1080 x 1920, 30 fps
Media: phone clips and AI-generated product shots stored in Files or on an external SSD
This format is appropriate when the client does not specifically require a 4K social master. It also keeps storage and export sizes manageable while you develop a reliable workflow.
Resolution: the size and shape of your editing canvas
Resolution is often described only as “HD” or “4K,” but the more useful question is: What frame will the audience receive?
A vertical 1080 x 1920 timeline gives you a tall canvas designed for full-screen phone viewing. A horizontal 1920 x 1080 timeline gives you the familiar widescreen YouTube frame. Their pixel counts differ, but their most important editorial difference is their aspect ratio: what fits inside the picture.
Set the timeline to the intended delivery shape at the start. This avoids a common beginner detour: editing a landscape sequence and attempting to force it into a vertical frame at the end. A late conversion often cuts off faces, product details, and titles.
Timeline resolution versus export resolution
Resolve separates two related ideas:
- Timeline resolution is the canvas on which you edit.
- Export resolution is the size of the rendered file you deliver.
They can differ, but for early projects, make them the same unless a client explicitly asks otherwise. Exporting a 1920 x 1080 timeline as 3840 x 2160 does not create genuine 4K detail; it merely enlarges the existing pixels.
Your M4 iPad Air can handle UHD projects, but UHD footage consumes more storage and makes every stage of the workflow heavier. Choose 3840 x 2160 when the source footage and delivery requirement justify it, especially if you expect to crop or reframe a landscape shot. Choose 1920 x 1080 or 1080 x 1920 for fast-turnaround social and standard YouTube work.

Mixed-resolution footage is normal
An agency project might combine:
- 4K camera footage,
- 1080p phone footage,
- vertical AI-generated clips,
- still graphics,
- client-supplied logos.
That is not automatically a problem. The timeline is the final canvas; each source clip can be scaled or reframed to fit it. What matters now is that you choose the canvas deliberately and do not use a stretching option that distorts people, products, or text. You will work with scaling and reframing later, particularly when adapting an edit between landscape and vertical formats.
For AI-generated footage, request or generate clips in the intended orientation and close to the intended frame rate whenever possible. A vertical product shot generated for a vertical 1080 x 1920 campaign needs much less rescue work than a wide landscape clip forced into the same campaign.
Frame rate: agree with the footage before you cut
Frame rate is measured in frames per second, or fps. At 30 fps, each second of the timeline contains 30 distinct frames. At 24 fps, it contains 24.
This is not merely a playback preference. The frame rate is the grid on which cuts, audio sync, titles, and motion are timed. That is why Resolve can prevent you from casually changing it after a timeline contains media.
Use these principles:
-
Inspect or know the frame rate of the main footage first.
If most of a YouTube project was recorded at 30 fps, make a 30 fps timeline. If a short film was shot at 24 fps, use 24 fps. -
Match the exact established rate when it matters.
24,23.976,30, and29.97are distinct settings. Do not substitute one because its name looks close. Use the frame rate supplied by the camera, client, or established project workflow. -
Do not choose 60 fps merely because it is available.
Use 60 fps when the intended delivery is 60 fps or when the footage was deliberately captured for smooth slow motion. Otherwise, choose the main delivery rate. -
Set it before importing and assembling.
If the rate later proves wrong, the clean solution is usually a new correctly configured timeline, not forcing the existing edit to change.
Resolve’s free version supports timeline formats up to UHD 3840 x 2160 and frame rates up to 60 fps, which covers the formats you are likely to need for this course.
DaVinci Resolve iPad Tutorial - How To Edit Video On iPad!
Watch “DaVinci Resolve iPad Tutorial – How To Edit Video On iPad!” from Justin Brown – Primal Video for a direct iPad demonstration of the settings screen. The first segment shows where the timeline choices live; the final segment reinforces that export is a separate confirmation stage.
At the beginning of the video, watch timeline setup. In the Project Settings window, focus only on Timeline Resolution and Timeline Frame Rate; notice that the presenter matches the rate to the source clips and leaves unrelated settings alone. Later, watch export check to see where Resolve displays the chosen dimensions and frame rate when preparing an output file.
Configure the practice project on your iPad
Create a new, empty project named something clear, such as:
AgencyPromo_Vertical_Practice
Then configure it before bringing in footage:
- Open the project and tap the gear icon at the lower-right of Resolve to open Project Settings.
- In Master Settings, find Timeline Format.
- Set Timeline Resolution to
1080 x 1920. Depending on your Resolve version, choose a vertical preset, enter a custom size, or select an HD resolution and enable the vertical-resolution option. - Set Timeline Frame Rate to 30 fps.
- Leave Playback Frame Rate at its matching default and leave advanced settings unchanged.
- Tap Save.
Your interface may not look identical to the video or screenshot; Resolve updates its iPad layout periodically. Look for the labels Timeline Resolution and Timeline Frame Rate, rather than relying on an exact button position.
Project defaults and individual timelines
Project Settings establish default values for timelines in that project. A particular timeline can also be set to use its own format rather than the project default. This is useful much later if one project contains both a horizontal YouTube master and a separate vertical social cut.
For now, keep it simple: one project, one delivery format, one matching timeline.
If you opened an existing project and see a message that a loaded timeline will not be changed, it means that timeline has its own settings. Do not try to fix this by changing random project options. Instead, either create a new timeline with the correct format before editing, or locate that timeline’s settings from the Media Pool and decide deliberately whether it should inherit the project settings.
Configure media storage as a dependable working system
On a desktop workstation, Resolve can use dedicated scratch disks for media and cache files. On an iPad, your storage choices are shaped by iPadOS and the Files app. The practical objective is the same:
Keep original media in a location that stays available to Resolve for the life of the project.
Treat these as separate things:
| Item | What it contains | What to protect |
|---|---|---|
| Resolve project | Your timeline, edits, grades, settings, and project metadata | Back it up later as a Resolve project backup |
| Source media | Original camera clips, AI clips, music, photos, graphics | Keep in a stable Files or external-drive location |
| Cache and temporary files | Resolve-generated working data | Preserve sufficient free storage; Resolve manages much of this on iPad |
| Exports | Review copies and final deliverables | Store separately from source footage |
A project is not the same thing as the footage. If you protect only the Resolve project but delete the source video, the timeline can remain while its clips become unavailable. Conversely, a folder full of raw clips does not preserve your edits.
A practical iPad folder structure
In the Files app, create a project folder in either On My iPad or a connected external SSD. For a small practice project, internal iPad storage is fine. For agency work, footage-heavy YouTube edits, or 4K source clips, an external SSD is usually the more sustainable choice.
Use a simple structure:
AgencyPromo_Coffee_2025
    01_Source_Media
    02_Audio
    03_Graphics
    04_Project_Backups
    05_Exports
You do not need to build a complicated asset-management system yet. The important decisions are:
- Put the project’s source assets in one recognisable project location.
- Avoid relying on a random Downloads folder as the only copy of client footage.
- If you begin with clips in Photos, keep an organised copy of the selected project assets in Files when the work needs to remain reproducible.
- Do not move, rename, or delete source clips after Resolve has imported them.
- If working from an external SSD, connect it before opening the project and keep it connected during editing.
For external storage, open the drive in Files first and confirm that it is visible and that you can create a folder on it. Then use Resolve’s import workflow to select media from that stable location. The next lesson focuses on importing and organising the clips inside Resolve; today, the goal is simply to ensure that the media has a dependable home before it enters the project.
Keep substantial free space on both the iPad and the working drive. Video files, especially 4K and AI-generated variations, accumulate quickly, and Resolve also needs room for temporary processing and exports.
Confirm the format at export without changing it accidentally
At the end of an edit, Resolve’s Quick Export window shows the output resolution and frame rate. That is a confirmation point, not the ideal place to discover that the project was built in the wrong format.
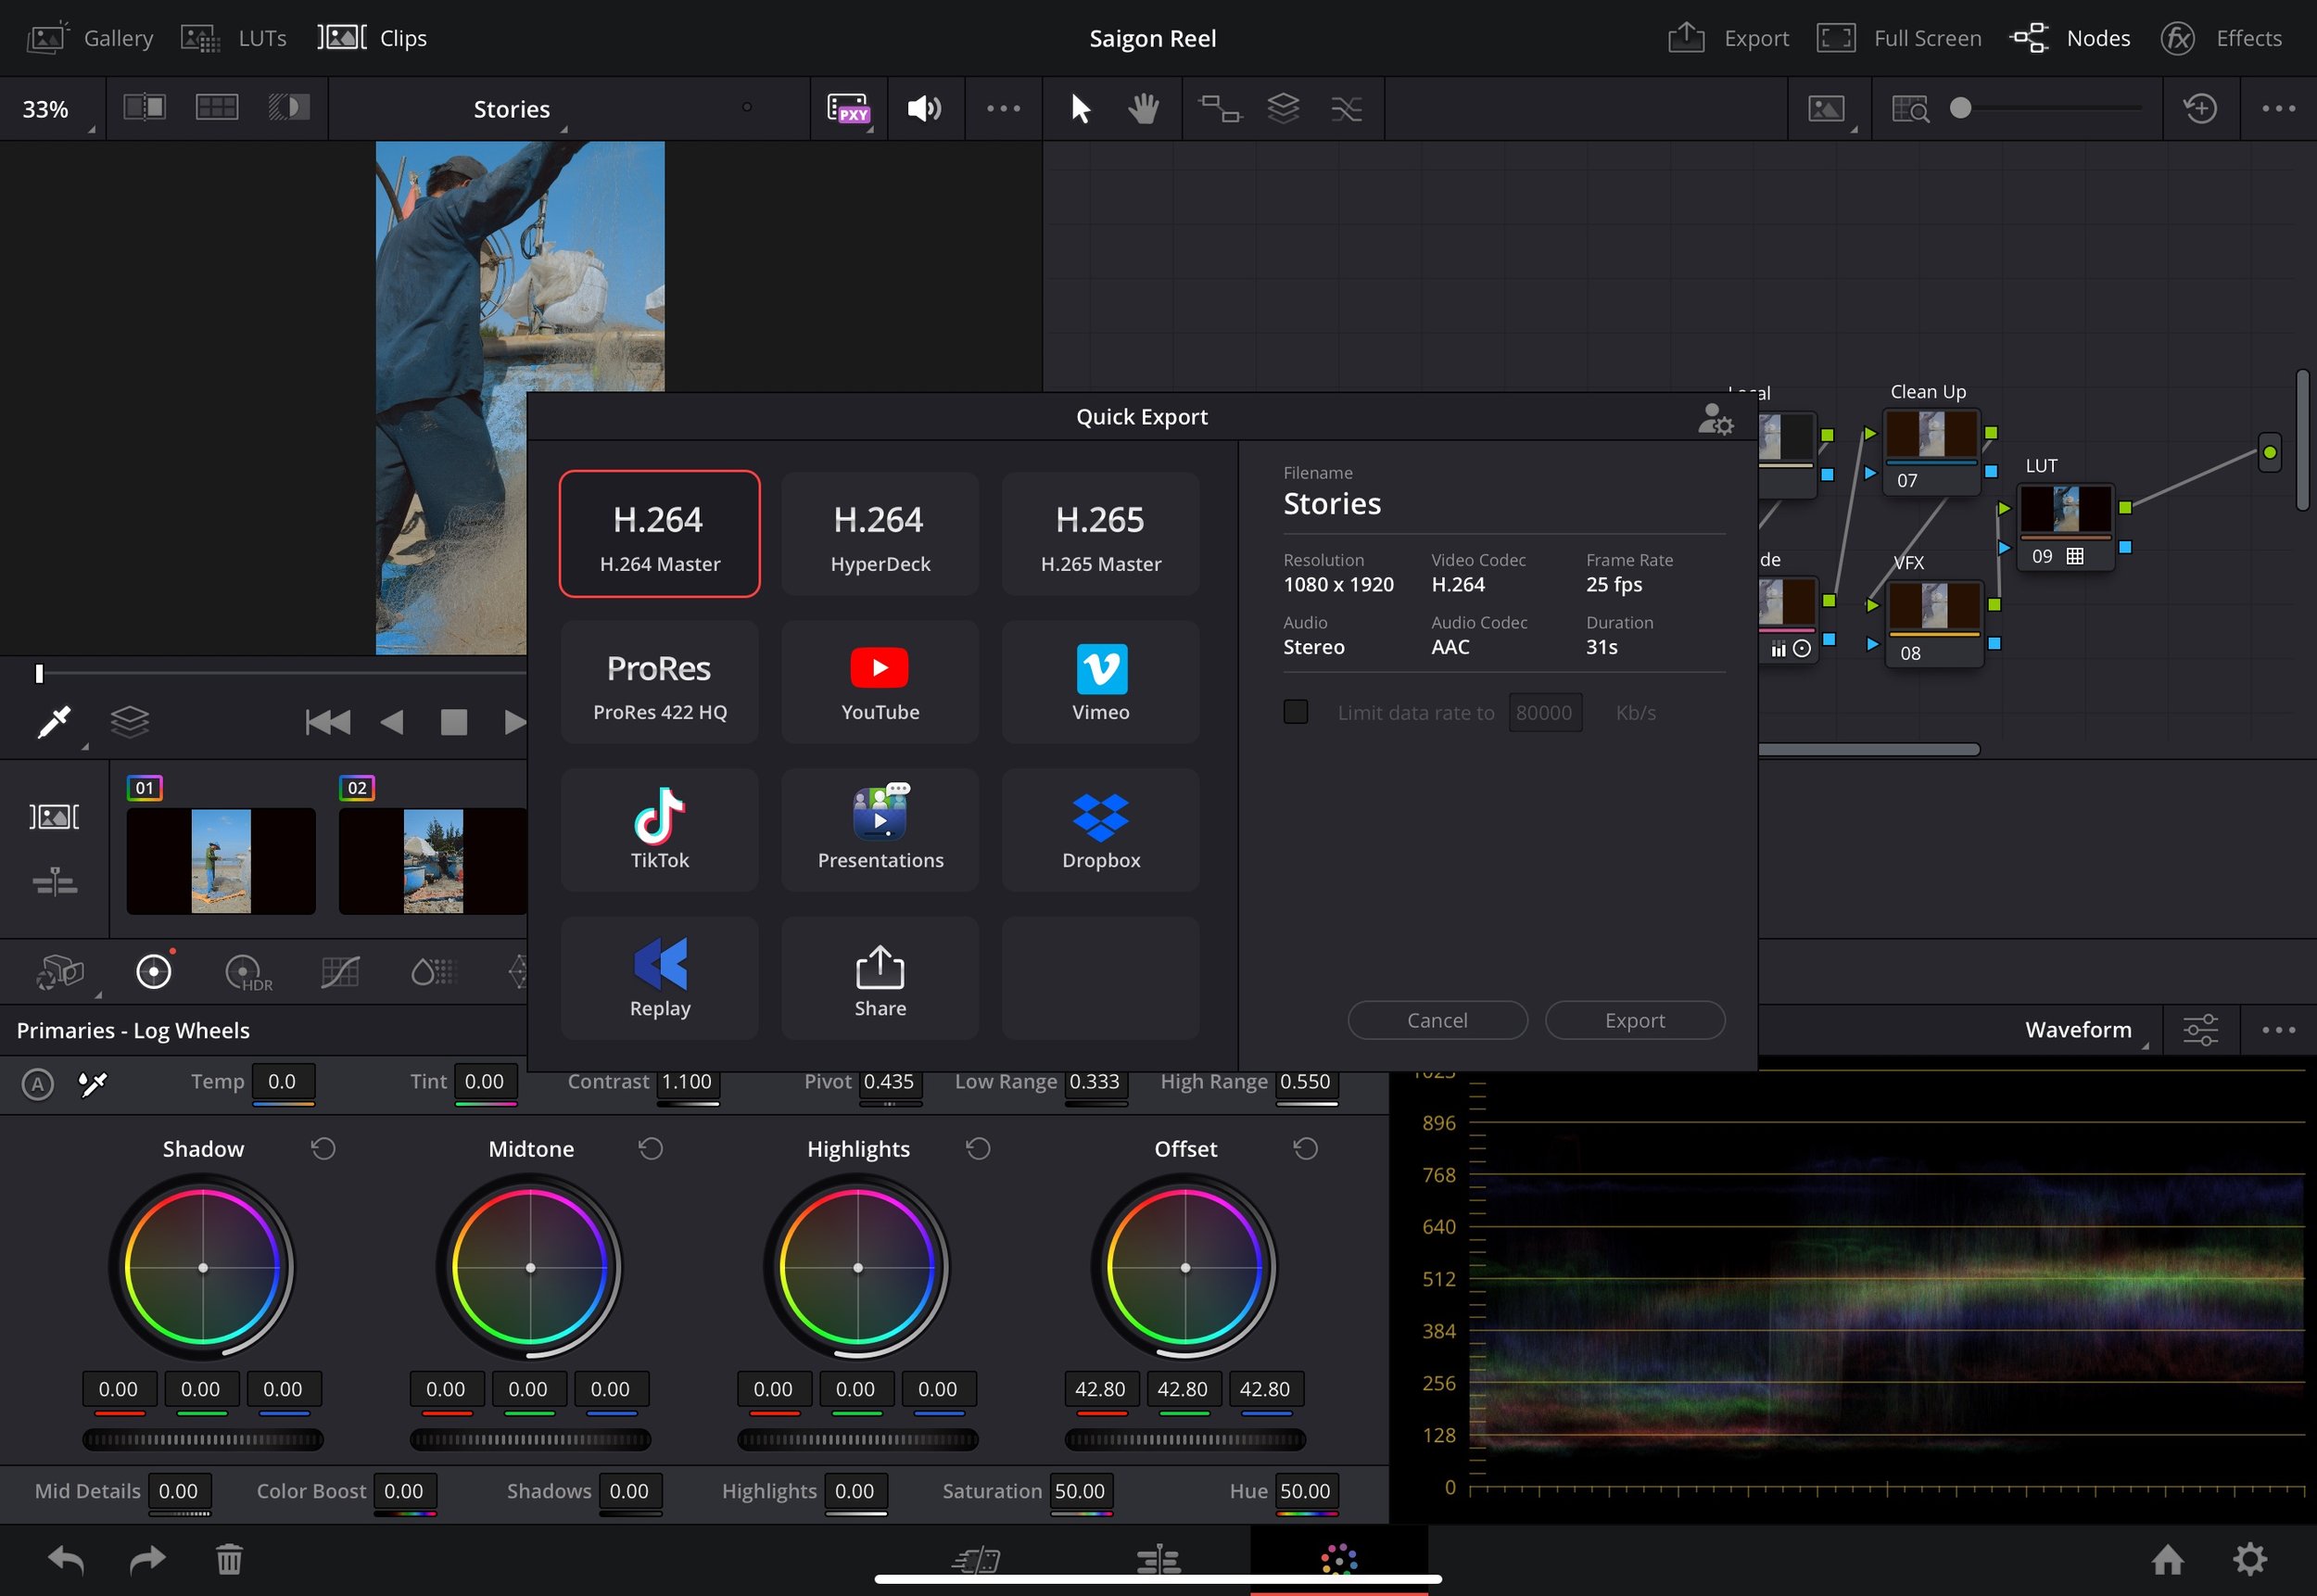
For this practice project, do not export yet. Just remember the consistency check you will use later:
- Is the output orientation vertical or horizontal as requested?
- Does the resolution match the delivery brief?
- Does the frame rate match the timeline?
- Is the export being saved into the project’s
05_Exportsfolder rather than a hard-to-find temporary location?
Wrap-up
You now have the technical starting point for a reliable Resolve project:
- Resolution defines the frame size and orientation of the timeline.
- Frame rate defines the timing grid and should match the established main footage or delivery workflow.
- For the practice promotional brief, the correct setup is
1080 x 1920at 30 fps. - Set the format while the project is empty; frame-rate changes become difficult once editing has begun.
- Keep media in a stable Files or external-SSD project folder, and remember that source media, Resolve project data, cache, and exports are different things.
Next, you will import footage from Photos, Files, or external storage and organise it in Resolve with bins and consistent names—so the clips you have stored safely become easy to find when editing begins.
Can't find a good explanation? Sign up and we'll make it for you
Sign up