
Welcome to the second module of our course. In our previous lesson, we established the crucial workflow for keeping your web application and native projects synchronized using the bunx cap sync command. You now have a clear process for ensuring that any changes in your React code or plugin dependencies are correctly propagated to the ios and android projects in your monorepo.
With that foundation in place, we can now shift our focus from project structure to the development environment itself. This lesson tackles the one-time setup required to build and run your application on iOS. We will walk through the installation of the complete iOS toolchain: Xcode, its companion Command Line Tools, and the CocoaPods dependency manager. By the end of this session, your Mac will be fully equipped to compile and launch your Capacitor application as a native iOS app.
The iOS Development Toolchain
Before your React code can run on an iPhone, it must be embedded within a native iOS application shell that can be compiled. This compilation process relies on a set of tools provided by Apple, collectively known as the iOS toolchain. For a Capacitor project, this toolchain consists of three essential components:
- Xcode: This is Apple's integrated development environment (IDE) for all its platforms. It's the environment where you compile, debug, and manage the native side of your iOS project. Think of it as the iOS equivalent of VS Code for web development, but with a full suite of compilers, interface builders, and device simulators.
- Xcode Command Line Tools: While Xcode provides a graphical interface, many build processes—including those run by Capacitor—need to be triggered from the terminal. These tools provide the necessary utilities (
xcodebuild,swiftc, etc.) to build and manage Xcode projects programmatically. - CocoaPods: This is a dependency manager for native iOS libraries written in Swift and Objective-C. It serves the exact same purpose for your Xcode project that
bunornpmserves for your JavaScript project. When you add a Capacitor plugin that has native iOS code, Capacitor uses CocoaPods to automatically download and link that code into your app.
Let's proceed with installing and verifying each of these components. The official Capacitor documentation provides a great guide for this process.
Environment Setup | Capacitor Documentation
This document outlines the required dependencies for building Capacitor apps on iOS and Android. It will serve as our primary guide for this lesson.
Begin by reading the iOS Requirements section to get an overview. Then, proceed through the subsections for Xcode, Xcode Command Line Tools, Homebrew, and CocoaPods. We will follow these steps together.
Step 1: Install Xcode
As the documentation states, the first and most significant step is to install Xcode.
- Navigate to the App Store on your Mac.
- Search for "Xcode" and click "Get" or "Install".
Be prepared for a substantial download and installation time; Xcode is a very large application. Once installed, launch Xcode at least once. You will be prompted to accept its license agreement and install any additional required components. This is a mandatory step before the command-line tools can function correctly.
Step 2: Install Xcode Command Line Tools
With Xcode installed, you can now add its command-line utilities. As your experience leading development teams has shown, automating builds and interacting with toolchains via scripts is fundamental. These tools make that possible.
Open your terminal and run the command specified in the documentation:
xcode-select --install
A system dialog will appear, prompting you to install the tools. Click "Install" and agree to the terms. After the installation finishes, you can verify that your system is pointing to the correct tools located inside the Xcode application bundle.
xcode-select -p
You should see the following output, confirming the path:/Applications/Xcode.app/Contents/Developer
Occasionally, even after a successful installation, Xcode may not have the command-line tools path selected correctly in its own settings. To be absolutely certain, you can open Xcode, go to Preferences > Locations, and ensure the "Command Line Tools" dropdown is set to your current Xcode version.
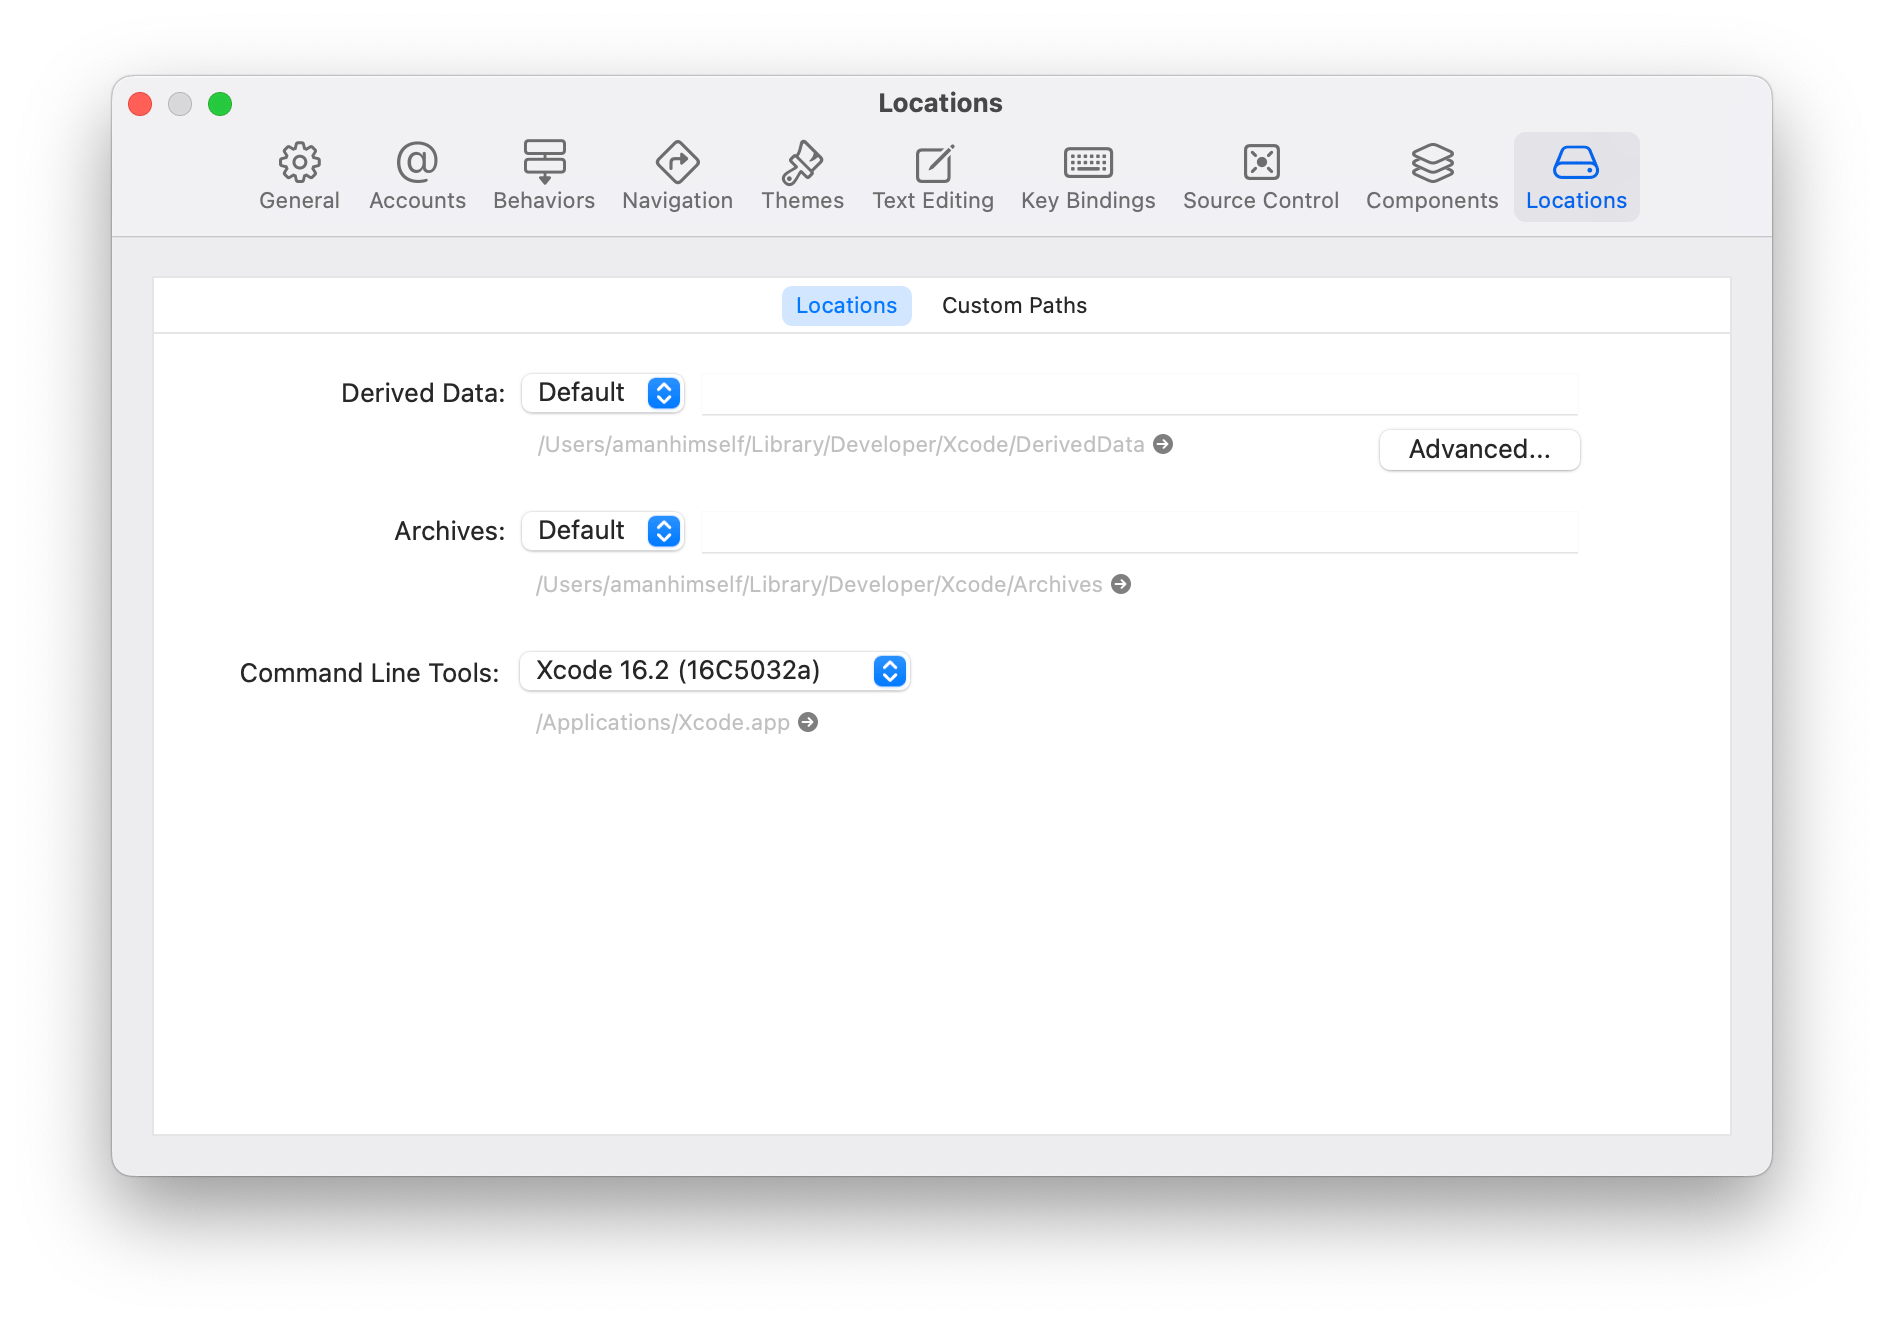
Step 3: Install Homebrew and CocoaPods
The final piece of the toolchain is CocoaPods. To understand its role, let's watch a brief explanation.
CocoaPods Tutorial - How to install and setup Cocoapods for Xcode
This video from the CodeWithChris channel provides a clear, high-level explanation of what CocoaPods is and why it's a standard part of the iOS development ecosystem.
Watch the introduction from the beginning until the overview. The key takeaway is that CocoaPods is a dependency manager for third-party native code, just like you use a package manager for JavaScript libraries.
As you just heard, CocoaPods is essential for managing native dependencies. While the video proceeds to show an installation method using sudo gem install, the modern and recommended approach—endorsed by the Capacitor documentation—is to use the Homebrew package manager. If you don't have Homebrew installed, it's an invaluable tool for any macOS developer.
-
Install Homebrew (if you don't have it):
Open your terminal and paste the command from the official Homebrew site (brew.sh), which is also provided in the Capacitor documentation we reviewed./bin/bash -c "$(curl -fsSL https://raw.githubusercontent.com/Homebrew/install/HEAD/install.sh)" -
Install CocoaPods:
Once Homebrew is ready, installing CocoaPods is a single command.brew install cocoapods -
Verify the Installation:
After the installation completes, confirm that thepodcommand is available.pod --versionThis should print the installed version number, for example,
1.15.2.
Verifying the Complete Toolchain
You've now installed all three components. A developer on DEV Community documented a common failure point when these steps are missed: running a Capacitor command and seeing zsh: command not found: pod. By following the steps above, you've preemptively solved this issue.
Cannot build iOS apps with Ionic/Capacitor and Vue.js - DEV Community
This article highlights the exact errors that occur when the iOS toolchain is incomplete.
Read the initial section where the author describes encountering the command not found: pod error. This is precisely what our setup process prevents.
The definitive test of your new setup is to let Capacitor interact with it. Navigate back to the root of your monorepo in the terminal and run the sync command again.
bunx cap sync
Pay close attention to the output. During the update phase for the ios platform, you should now see Capacitor successfully running pod install. This command reads the ios/App/Podfile, finds the native Capacitor plugins listed as dependencies (like CapacitorCordova, Capacitor, etc.), and installs them into your Xcode workspace. Seeing this complete without error is the final confirmation that your iOS toolchain is ready.
Conclusion
In this lesson, we have methodically assembled the complete iOS development environment on your machine. This was a critical, one-time setup that paves the way for all future iOS development in this course.
Our key takeaways are:
- Xcode is the central IDE for compiling and managing your native iOS app.
- Xcode Command Line Tools are required for Capacitor's CLI to interact with the iOS build system from your terminal.
- CocoaPods is the dependency manager for native iOS libraries, analogous to
bunfor your web project, and is used by Capacitor to link plugin code. - The setup is verified by ensuring
bunx cap synccan successfully executepod installwithin your iOS project.
With your development environment now fully configured, we are ready for the exciting part. In the next lesson, we will build and launch your application on the iOS Simulator, first using the Capacitor CLI and then directly from Xcode. This will be the first time you see your React SPA running inside a native mobile shell.
Can't find a good explanation? Sign up and we'll make it for you
Sign up