
Welcome back! In our previous lesson, we installed the @capacitor/push-notifications plugin and used bunx cap sync to integrate its native iOS and Android components into your project. You now have the plugin code in place, but the platforms themselves are not yet configured to handle push notifications.
Today, we will focus on the iOS platform. Our objective is to perform the necessary configuration steps within Xcode and your Apple Developer account to enable your app to receive push notifications. This involves enabling the correct capabilities for your app and creating the cryptographic credentials that allow your server to securely communicate with the Apple Push Notification service (APNs).
The Role of Apple Push Notification Service (APNs)
Before we begin, it's important to understand the system we are configuring. The Apple Push Notification service (APNs) is the centralized service provided by Apple that routes notifications from your server to your users' devices. To use APNs, your application must:
- Be explicitly configured to have the push notification entitlement.
- Provide a secure token to your server, which is then used to send notifications to that specific device.
- Your server must authenticate with APNs using a special key provided by Apple.
Our focus today is on the first and third points: configuring the app's identity and creating the key for server authentication.
Step 1: Enabling Capabilities in Xcode
First, we need to inform iOS that your application is designed to receive push notifications. This is done by adding a "capability" to your project in Xcode. A capability is a declaration that your app uses a specific system service, which may require special permissions or setup.
The following guide details the process. We will open the iOS project and modify its capabilities.
The Push Notifications Guide for Capacitor - Capawesome
This guide from Capawesome provides a clear walkthrough of the necessary Xcode configurations. We will focus on the section describing how to enable the required capabilities.
First, open your iOS project in Xcode by running bunx cap open ios from your monorepo root. In Xcode, select the App project in the left-hand file explorer, then select the App target. Navigate to the Signing & Capabilities tab. Follow the instructions in the guide under the heading Enable Push Notification capabilities. You will add two capabilities: Push Notifications: This is the primary capability that enables the app to receive notifications. Background Modes: Within this, you must check the Remote notifications box. This is crucial for allowing your app to process notifications that arrive when it is not running in the foreground.

By completing this step, you have configured your app binary with the correct entitlements. When you build and run the app, the operating system will now know that it is a valid target for remote notifications.
Step 2: Creating APNs Credentials in the Apple Developer Portal
Next, we need to establish a trusted relationship between the server that will send your push notifications (we'll use Firebase for this) and Apple's APNs. This is done by creating an APNs Authentication Key. This is a modern, token-based credential (.p8 file) that allows your server to authenticate with APNs. Unlike older certificate-based methods, a single key does not expire annually and can be used for all of your applications.
The process involves two sub-steps in your Apple Developer account: ensuring your App ID is configured for push, and then creating the key itself.
The Push Notifications Guide for Capacitor - Capawesome
The same guide also provides excellent instructions for creating APNs credentials.
You will need to be logged into your paid Apple Developer account to perform these steps. First, follow the steps in the section Register the App ID. This ensures that the unique identifier for your app is associated with the push notification service. The appId must exactly match the one you defined in your capacitor.config.ts file. Next, proceed to the section Create an APNs certificate or key. This will guide you through creating the .p8 authentication key.
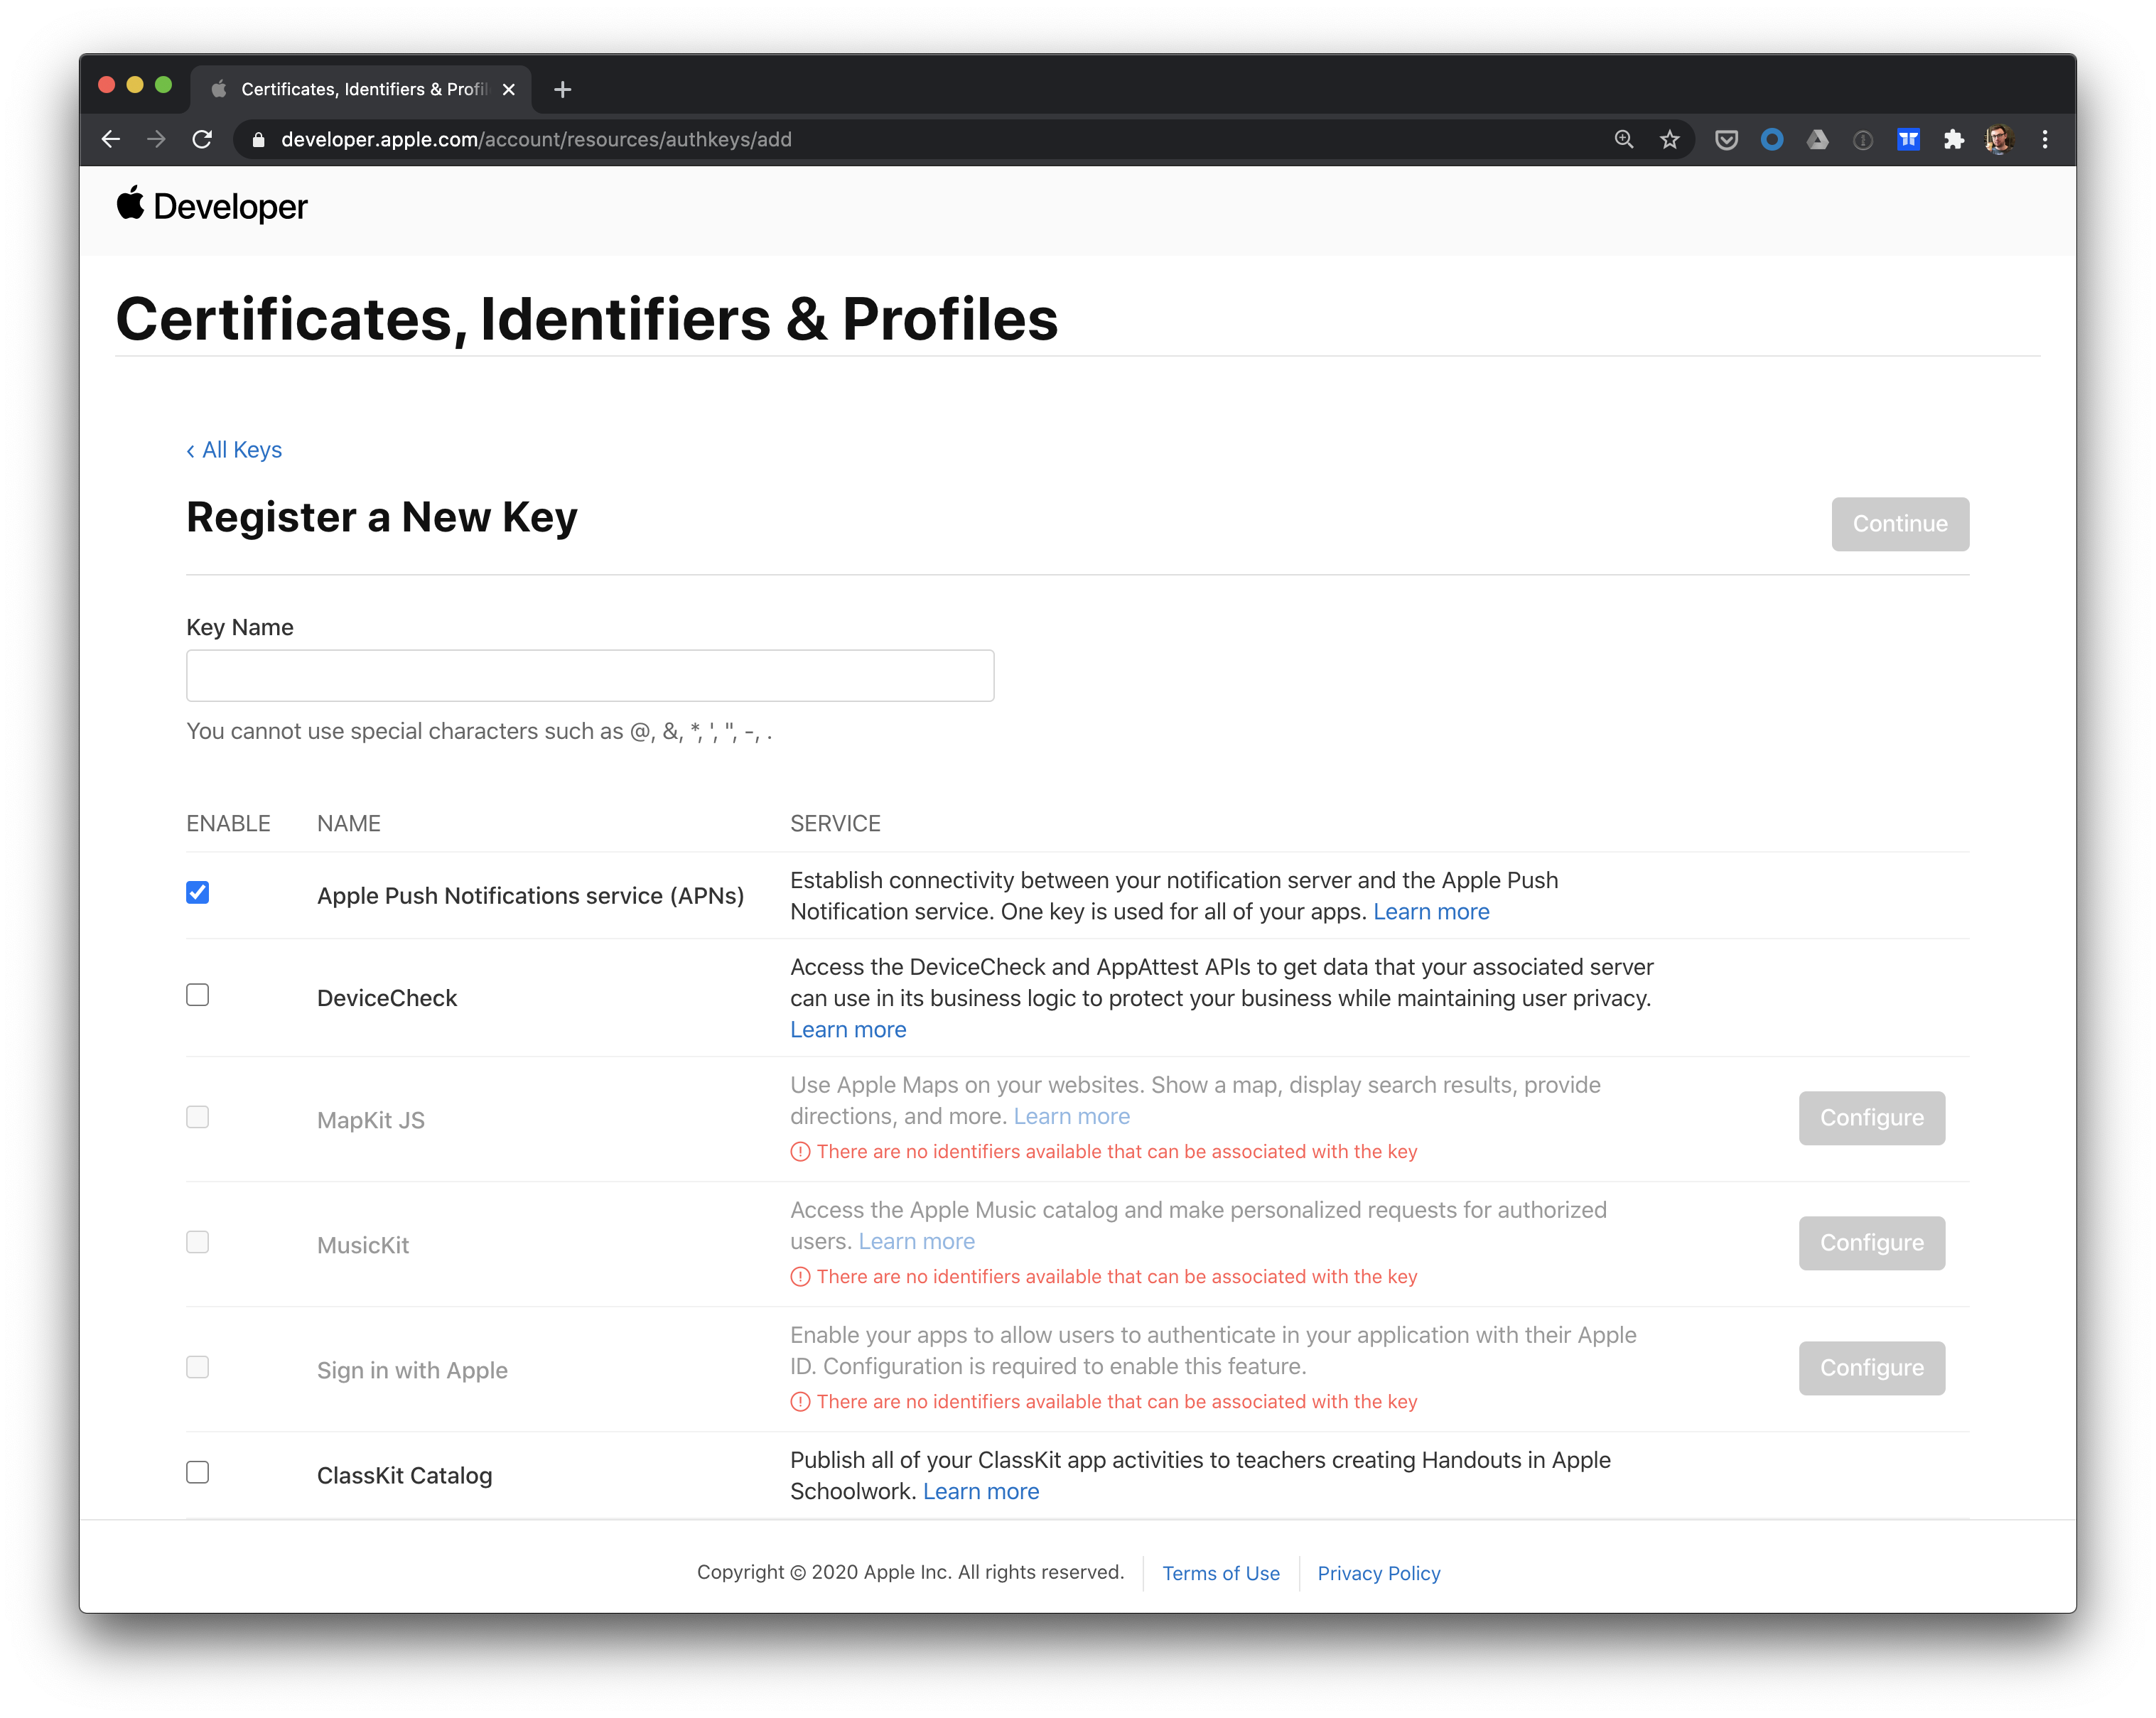
After creating the key, you will be prompted to download it. This is your only opportunity to download the .p8 file, so save it immediately and store it securely. You should also note the Key ID, which is displayed on the same page and is often part of the downloaded filename.
Step 3: Providing the APNs Key to Your Push Service
The final step is to upload this newly created APNs key to the push notification provider your server will use. This allows the provider (in our case, Firebase Cloud Messaging) to send notifications on your behalf. In the next lesson, we will set up Firebase for your Android app, but we can complete the iOS portion now.
The Push Notifications Guide for Capacitor - Capawesome
The guide continues by explaining how to upload your new APNs key to Firebase.
Read the final paragraph in the section you just reviewed, starting from After download. You will need three pieces of information to complete this step in the Firebase Console: The .p8 key file you just downloaded. Your Key ID from the Apple Developer portal. Your Team ID, which can be found under "Membership details" in your Apple Developer account. This action connects your server-side infrastructure with Apple's, authorizing it to send notifications to your app.
With the key uploaded to your push provider, the configuration loop for iOS is complete. Your app is entitled to receive notifications, and your server is authorized to send them via APNs.
Conclusion
In this lesson, you have completed the essential platform-specific configuration for enabling push notifications on iOS. You've navigated both the local development environment (Xcode) and the Apple Developer cloud infrastructure to establish all necessary permissions and credentials.
Here are the key takeaways:
- The Push Notifications and Background Modes (Remote notifications) capabilities must be enabled in Xcode to prepare your app to handle notifications.
- An App ID in the Apple Developer portal must be explicitly configured to use the push notification service.
- An APNs Authentication Key (
.p8) is the modern, secure credential used to authorize your server to send push notifications. This key, along with your Key ID and Team ID, must be provided to your push service provider (e.g., Firebase).
In our next lesson, we will shift our focus to Android. You will learn how to configure push notifications by creating a Firebase project, linking it to your Android app, and adding the necessary google-services.json configuration file. This will complete the setup for both platforms, paving the way for us to write the client-side code to handle incoming notifications.
Can't find a good explanation? Sign up and we'll make it for you
Sign up