
Hello! Welcome back to our JRPG development journey.
In the last lesson, we built a comprehensive AudioManager using the Web Audio API, adding a vital layer of immersion to our game with background music and sound effects. You learned how to manage audio playback, implement smooth fades, and handle browser autoplay policies—all essential for professional game development.
Today, we'll continue polishing our game, this time focusing on the visual side. This lesson addresses the learning outcome: Implement visual effects like screen fades, screen shake, and a basic particle system for spell effects. These effects are the cornerstone of creating a dynamic and responsive game world, providing visual feedback for everything from scene transitions to powerful magic attacks.
We'll approach this by creating a manager for visual effects, similar to how we handled audio, keeping our engine architecture clean and modular.
1. Screen Fades: Setting the Scene
Screen fades are one of the most common and important visual effects in JRPGs. They are used for:
- Transitioning between maps (e.g., entering a house).
- Starting or ending a cutscene or battle.
- Creating a dramatic pause or "fade to black" moment.
The core principle is simple: draw a rectangle that covers the entire screen and animate its opacity over time.
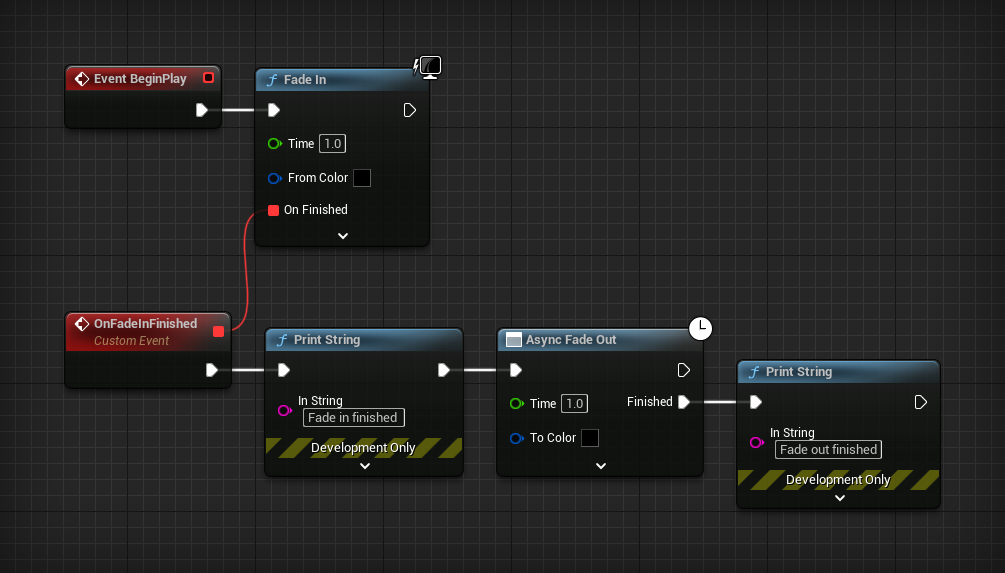
Your experience as a front-end developer gives you a great head start here. You've likely implemented similar effects using CSS opacity and transition properties. While CSS is not directly available on the canvas, the underlying logic is identical. We will manually animate the alpha value of a fill color within our game loop.
RPG Maker MZ Create-a-Mechanic: Fading Character Select Screen
To see this concept applied directly within RPG Maker, watch this short clip. The creator is using event commands, but the underlying principle of changing opacity over a set number of frames is exactly what we will implement in code.
Watch from 05:37 to 07:10. Observe how the effect is built by progressively changing the picture's opacity with short 'wait' commands in between. This step-by-step change is what we'll achieve smoothly using deltaTime.
Implementation in Canvas
We can manage this with a dedicated EffectsManager class. This manager will keep track of the current fade state and draw the overlay.
- State: The manager needs to know if it's fading in, fading out, or idle. It also needs a timer and duration.
- Update: In its
update(deltaTime)method, it will adjust the current opacity based on the elapsed time. - Draw: In its
draw(ctx)method, if a fade is active, it will draw afillStylewith the calculated alpha over the whole canvas.
Here is a basic implementation structure:
// In a new file, e.g., 'managers/EffectsManager.js'
class EffectsManager {
    constructor() {
        this.fadeEffect = {
            active: false,
            alpha: 0,
            duration: 1,
            timer: 0,
            direction: 1, // 1 for fade-in (to transparent), -1 for fade-out (to black)
            onComplete: null,
        };
    }

    // Call this from your main game object's update method
    update(deltaTime) {
        const fade = this.fadeEffect;
        if (!fade.active) return;

        fade.timer += deltaTime;
        const progress = Math.min(fade.timer / fade.duration, 1);

        if (fade.direction === 1) { // Fading IN (black to transparent)
            fade.alpha = 1 - progress;
        } else { // Fading OUT (transparent to black)
            fade.alpha = progress;
        }

        if (progress >= 1) {
            fade.active = false;
            if (fade.onComplete) {
                fade.onComplete();
            }
        }
    }

    // Call this from your main render method, after everything else
    draw(ctx) {
        const fade = this.fadeEffect;
        if (fade.alpha > 0) {
            ctx.fillStyle = `rgba(0, 0, 0, ${fade.alpha})`;
            ctx.fillRect(0, 0, ctx.canvas.width, ctx.canvas.height);
        }
    }

    // --- Public API ---

    fadeOut(duration = 1, onComplete = null) {
        this.fadeEffect = {
            active: true,
            alpha: 0,
            duration,
            timer: 0,
            direction: -1,
            onComplete,
        };
    }

    fadeIn(duration = 1, onComplete = null) {
        this.fadeEffect = {
            active: true,
            alpha: 1,
            duration,
            timer: 0,
            direction: 1,
            onComplete,
        };
    }
}
This manager gives you a simple API (effectsManager.fadeIn(), effectsManager.fadeOut()) that you can call from your scene manager or event system to trigger transitions. The onComplete callback is very useful for sequencing events, such as changing the map only after the screen has fully faded to black.
2. Screen Shake: Adding Impact
Screen shake is a cheap but incredibly effective way to make actions feel powerful. Hits, explosions, and environmental events like earthquakes all benefit from a subtle shake.
The implementation is surprisingly simple: for a short duration, apply a small, random offset to the camera's position just before rendering the scene.
Implementation
We can add this functionality to our EffectsManager as well.
- State: The manager needs to track the shake's remaining duration and its intensity (magnitude).
- Trigger: A method
shake(duration, magnitude)will initiate the effect. - Update: In
update(deltaTime), decrement the shake timer. While the timer is active, generate new random X and Y offsets each frame. - Application: In your main render function, retrieve these offsets from the manager and apply them to the canvas context using
ctx.translate()before drawing the game world.
Here's how to extend the EffectsManager:
// Add to EffectsManager constructor
this.shakeEffect = {
    active: false,
    duration: 0,
    magnitude: 0,
    x: 0,
    y: 0,
};

// Add to EffectsManager update(deltaTime) method
const shake = this.shakeEffect;
if (shake.active) {
    shake.duration -= deltaTime;
    if (shake.duration <= 0) {
        shake.active = false;
        shake.x = 0;
        shake.y = 0;
    } else {
        // Generate random offsets
        shake.x = (Math.random() - 0.5) * shake.magnitude;
        shake.y = (Math.random() - 0.5) * shake.magnitude;
    }
}

// Add a public method to trigger the shake
shake(duration, magnitude) {
    this.shakeEffect.active = true;
    this.shakeEffect.duration = duration;
    this.shakeEffect.magnitude = magnitude;
}

// In your main render loop
// ...
const shakeOffset = effectsManager.shakeEffect;
ctx.save();
ctx.translate(shakeOffset.x, shakeOffset.y);

// ... Draw your map, characters, etc. ...

ctx.restore();

// ... Draw UI, fade overlay, etc. (these should not shake)
// ...
By wrapping the world-drawing code in ctx.save() and ctx.restore(), you ensure that the shake offset doesn't affect UI elements that are drawn afterward.
3. Particle System: The Magic of Spells
Particle systems are the workhorse for most visual effects in games: fire, smoke, magic spells, explosions, and more. A particle system is an engine that manages the lifecycle of a large number of simple sprites called "particles".
Each particle has properties that change over its lifetime:
- Position & Velocity: Where it is and where it's going.
- Lifetime: How long it exists before disappearing.
- Color & Opacity: Can be used to make particles fade out over time.
- Size & Rotation: Can be used for effects like sparks that shrink or smoke that rotates.
The tool Effekseer, often used with RPG Maker, is a great example of a dedicated particle effect editor. Understanding its concepts will help us build our own simplified version.
How to Effekseer: The Basics - (RPGMaker MZ)
Please watch the following segments from the "How to Effekseer" tutorial. You don't need to use the software itself, but focus on the concepts and properties being manipulated. This will give you a strong visual and conceptual foundation for what we're about to build.
Watch the following three parts: Basics: Movement and Spawning (01:35 - 03:35): Pay attention to 'Position, Velocity, Acceleration' (PVA), 'Spawn Count', and 'Time to Live'. This is the core physics of a particle. Texture and Color (03:35 - 05:43): Note how textures are applied and how color can be randomized or changed over time. The 'additive' blend mode is key for glowing effects. Rotation and Scaling (05:43 - 07:31): See how particles can be made to rotate and change size over their lifetime.
Architecting a Particle System
Inspired by the concepts from the video, we can design a simple architecture with two main classes: Particle and ParticleEmitter.
Particle: A simple class or object to hold the state of one particle.ParticleEmitter: Manages a pool ofParticleobjects. It's responsible for spawning, updating, and drawing them according to a set of rules (its configuration).
// A simple data structure for a particle
class Particle {
    constructor() {
        this.x = 0;
        this.y = 0;
        this.velocityX = 0;
        this.velocityY = 0;
        this.life = 0;
        this.maxLife = 1;
        this.size = 10;
        this.color = 'white';
        // ... add other properties like startSize, endSize, rotation, etc.
    }
}

// The manager for our particles
class ParticleEmitter {
    constructor(config) {
        this.config = config; // e.g., spawn position, particle texture, velocity range, etc.
        this.particles = [];
    }

    // Creates a burst of new particles
    emit(count) {
        for (let i = 0; i < count; i++) {
            // Find an inactive particle to reuse, or create a new one
            let p = this.particles.find(p => p.life <= 0);
            if (!p) {
                p = new Particle();
                this.particles.push(p);
            }

            // Initialize particle based on config
            p.life = p.maxLife = 0.5 + Math.random() * 0.5; // Random lifetime
            p.x = this.config.x;
            p.y = this.config.y;

            const angle = Math.random() * 2 * Math.PI;
            const speed = 50 + Math.random() * 50; // Random speed
            p.velocityX = Math.cos(angle) * speed;
            p.velocityY = Math.sin(angle) * speed;

            p.size = 10 + Math.random() * 5;
            p.color = `rgba(255, 200, 50, 1)`; // A fiery yellow
        }
    }

    update(deltaTime) {
        for (const p of this.particles) {
            if (p.life > 0) {
                p.life -= deltaTime;
                p.x += p.velocityX * deltaTime;
                p.y += p.velocityY * deltaTime;

                // Example of fading out
                const lifePercent = p.life / p.maxLife;
                p.color = `rgba(255, 200, 50, ${lifePercent})`;
            }
        }
    }

    draw(ctx) {
        for (const p of this.particles) {
            if (p.life > 0) {
                ctx.fillStyle = p.color;
                // Additive blending creates a nice glow for fire/magic
                ctx.globalCompositeOperation = 'lighter';
                ctx.beginPath();
                ctx.arc(p.x, p.y, p.size, 0, 2 * Math.PI);
                ctx.fill();
            }
        }
        // IMPORTANT: Reset composite operation after drawing
        ctx.globalCompositeOperation = 'source-over';
    }
}
You can then add emitters to your EffectsManager, which would update and draw them each frame. When a spell is cast, you would simply call emitter.emit(50) to create an explosion of 50 particles.
Test your understanding!
How would you modify the ParticleEmitter's update method to simulate gravity pulling the particles downward?
Show answer
You would introduce an acceleration value (gravity) and apply it to the velocityY of each particle every frame.
// In update(deltaTime)
const gravity = 200; // pixels per second squared

// ... inside the loop ...
if (p.life > 0) {
    p.life -= deltaTime;

    // Apply gravity
    p.velocityY += gravity * deltaTime;

    p.x += p.velocityX * deltaTime;
    p.y += p.velocityY * deltaTime;
    //...
}
This is a direct application of basic physics, where velocity = initial_velocity + acceleration * time.
Conclusion
You've now explored three fundamental visual effects that will dramatically increase the polish and impact of your JRPG. By adding these to a dedicated EffectsManager, you maintain a clean architecture that's easy to extend.
Key Takeaways:
- Screen Fades are implemented by drawing a full-screen rectangle with an alpha value that is animated over time. They are essential for transitions.
- Screen Shake adds impact by applying small, random offsets to the canvas transform for a short duration.
- A Particle System is a powerful tool for creating complex effects like spells and explosions. It works by managing the lifecycle of many small sprites (
Particles) through anEmitter. - Properties like lifetime, velocity, color, and size are animated over time within the particle system's
updatemethod to create dynamic visuals. - Canvas
globalCompositeOperation = 'lighter'is excellent for creating glowing effects common in magic spells.
Preview of the next lesson:
We have now built a significant portion of our game engine's foundation, covering rendering, movement, audio, persistence, and now visual effects. With these powerful tools at our disposal, it's time to shift our focus from how to build systems to what to build with them. In the next lesson, we will begin our final capstone module by learning how to outline a short narrative arc and define the 'golden path' for a complete demo slice. This marks an exciting transition into game design and content creation.
Can't find a good explanation? Sign up and we'll make it for you
Sign up