
Welcome to the first step of your quantitative-research workflow. Over the coming lessons, the notebook will become your working laboratory: a place to document a question, run calculations, inspect results, and preserve the reasoning that connects them.
Today’s aim is deliberately practical. By the end, you will be able to run both Python code cells and Markdown/text cells, recognize the difference between code, output, and explanation, and create a small, readable notebook. This applies whether you use a local Jupyter Notebook installation or browser-based Google Colab.
A notebook is an interactive research document
A traditional Python program is usually a single file that you run all at once. A notebook is different: it is a document made of separate cells. You can write, run, revise, and rerun one piece at a time.
That design is particularly useful in quantitative work. A well-structured notebook might eventually contain:
- A Markdown heading describing the research question.
- Code that loads market data.
- Output showing the first few rows of that data.
- Markdown notes about possible data-quality issues.
- Code that calculates returns.
- A chart or table showing the result.
- A written conclusion, including limitations.
For now, focus on the three things visible in almost every notebook:
| Component | What it is | What it does |
|---|---|---|
| Code cell | A cell containing Python instructions | Sends instructions to Python when run |
| Output | The result displayed beneath a code cell | Shows what the code produced |
| Markdown cell | A cell containing explanatory text | Renders notes, headings, lists, and later equations |
The key distinction is this:
- Code tells the computer what to do.
- Output is evidence of what happened when the code ran.
- Markdown explains what you are doing, why you are doing it, and what the output means.
A notebook with code but no explanation is hard to audit. A notebook with explanation but no executable code cannot verify its claims. Quantitative research needs both.
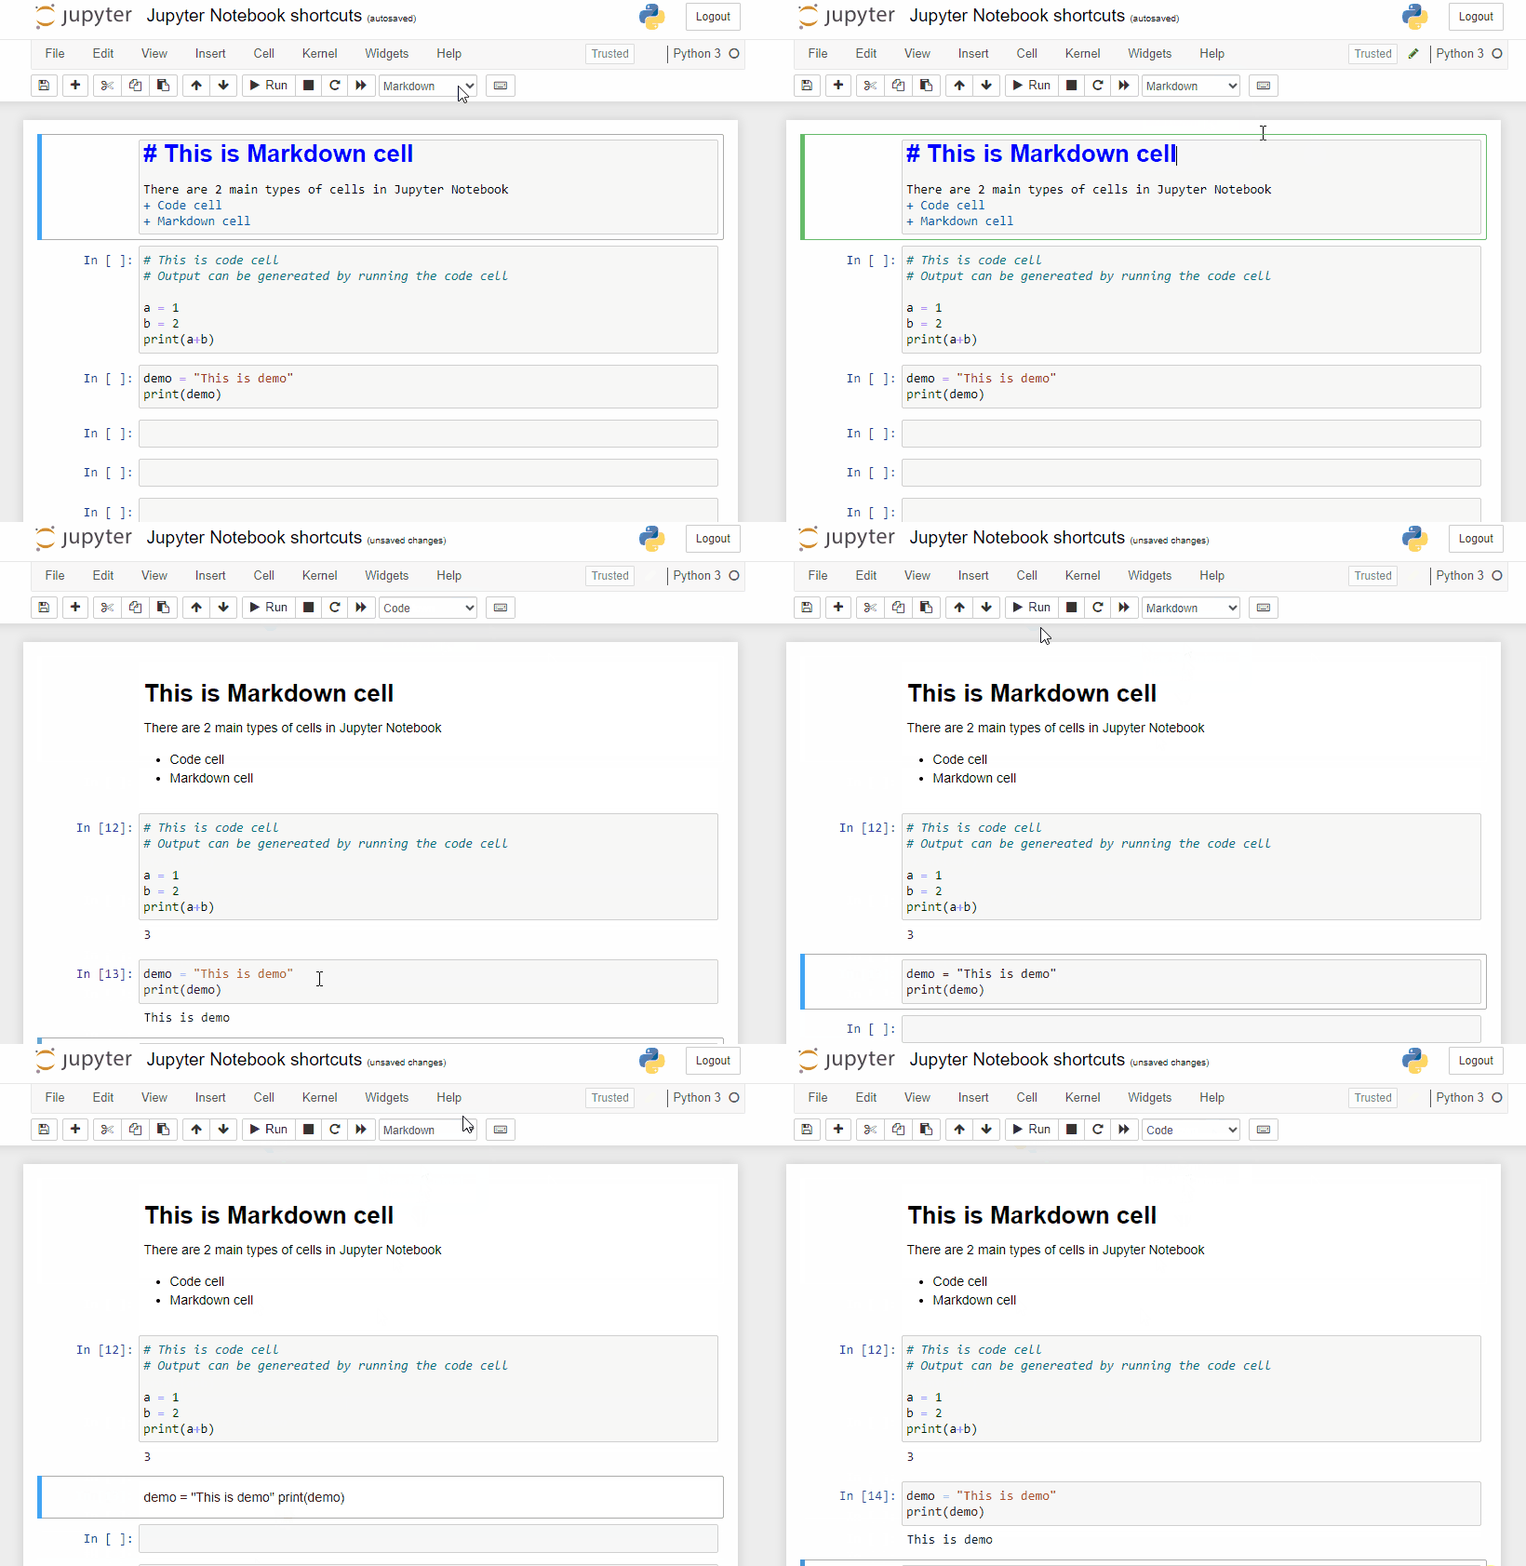
Running your first code cell
A code cell is the notebook’s calculator and instruction panel. In Jupyter, it typically begins with an indicator such as In [ ]:. In Colab, it has a play button on its left side.
Watch the short demonstration below before creating your own notebook.
Google Colab for Python Beginners - Visually Explained
In “Google Colab for Python Beginners - Visually Explained” by Visually Explained, watch how a new browser-based notebook is created, then how a code cell is run and its result appears.
Watch opening a notebook to identify the blank code cell. Then watch running code and notice the play button, the result beneath the cell, and the successful-execution indicator.
Create a notebook
Choose the environment you have available:
- Google Colab: Open Colab in your browser and create a new notebook. It runs Python in the browser environment without local installation.
- Jupyter Notebook: Open or create a notebook in your local Jupyter environment. The interface may look slightly different, but the cell concepts are the same.
Rename the file something clear, such as notebook_basics.ipynb. File names matter: later, you may have many research notebooks, and vague names such as “Untitled3” make work difficult to locate and reproduce.
Enter and run code
In a blank code cell, enter:
print("Notebook ready")
Run it using one of these methods:
- Click the triangular Run or Play button.
- Press Shift+Enter to run the active cell and move to the cell below.
You should see:
Notebook ready
The first box is code. The displayed words below it are output. Python did not “turn the code into text”; it executed the instruction print(...), and the notebook displayed the result.
Now replace the cell’s contents with:
4 + 6
Run it. The notebook should display:
10
This output is Python’s evaluated result. In notebooks, the final expression in a cell is often shown automatically. By contrast, print(...) explicitly requests displayed text.
For a research notebook, explicit print(...) statements can make intermediate results clearer, while a final expression is convenient for quick inspection. You will use both styles.
An important habit: output can become stale
Change 4 + 6 to:
4 + 7
Do not run it immediately. Notice that the old output, 10, can remain visible beneath the edited cell. The displayed output records the last execution, not necessarily the current text you see in the cell.
Run the cell again. The output should now be 11.
This is your first reproducibility habit:
When code changes, rerun it before trusting its output.
A table, chart, or performance number is only meaningful if it was generated by the code currently shown above it.
Markdown: the explanation beside the computation
A Markdown cell is for human readers. It is not Python, and it should not contain instructions you expect Python to execute.
In Jupyter, use the cell-type drop-down in the toolbar, which normally says Code, and select Markdown. In Colab, use + Text or insert a text cell from the menu.
Create a Markdown cell above your code cell and type:
# Notebook Basics

This notebook records my first Python calculations.

## First calculation

I checked that Python can evaluate a simple arithmetic expression.
Run the Markdown cell with Shift+Enter or the cell’s Run button. Instead of code output, you should see formatted text:
# Notebook Basicsbecomes a large title.## First calculationbecomes a smaller heading.- The ordinary sentences become explanatory paragraphs.
Markdown is a lightweight formatting language. For now, headings and ordinary text are enough. Later, Markdown will let you state hypotheses, document assumptions, present equations, and write a conclusion alongside a backtest.
Google Colab for Python Beginners - Visually Explained
Continue with “Google Colab for Python Beginners - Visually Explained” to see how a text cell provides notes and how Markdown source becomes formatted explanatory text.
Watch text cells. Focus on the difference between Markdown while it is being edited and the formatted explanation after the cell is rendered.
Markdown cells versus code comments
There is one easily confused third form of text: a code comment.
In a Python code cell, a line beginning with # is ignored by Python:
# This is a comment for the person reading the code.
4 + 7
When you run this cell, the comment does not become a heading or paragraph. It simply helps explain a nearby line of code.
Use each form for its proper role:
| Use this | When you need |
|---|---|
| Markdown cell | A section title, longer explanation, interpretation, assumption, or conclusion |
| Python comment | A short note tied closely to a specific line of code |
| Code cell | Python instructions that must be executed |
| Output | The computation’s displayed result |
For example, an eventual market-data notebook might use Markdown to say, “Prices are adjusted for stock splits,” while a short code comment might explain one specific cleaning step.
Build a tiny research-style notebook
Create the following three-cell notebook in order. This is not yet a finance model; it is the structure you will use when you begin one.
Cell 1: Markdown
# First Quant Research Notebook

This notebook tests that I can write explanations and execute Python code.
Run it and confirm that it renders as formatted text rather than appearing as literal lines beginning with #.
Cell 2: Markdown
## Calculation

The next cell evaluates a simple arithmetic expression.
Run it.
Cell 3: Code
print("Calculation result:")
8 * 5
Run it. You should see both a printed label and a displayed value:
Calculation result:
40
Read the notebook from top to bottom:
- The first Markdown cell explains the notebook’s purpose.
- The second Markdown cell explains what the upcoming computation is intended to do.
- The code cell performs the computation.
- The output supplies the result.
That top-to-bottom narrative is a basic standard for trustworthy research. A future reader—often your future self—should be able to identify the purpose of every important computation without guessing.
The official Jupyter documentation describes this as alternating descriptive rich text with executable code. It also confirms that Shift+Enter runs a cell, shows output when applicable, and moves to the next cell.
Introduction - Jupyter Notebook Documentation - Read the Docs
Read the relevant parts of Jupyter’s official documentation to consolidate the shared structure behind both local Jupyter notebooks and Colab notebooks.
In “Structure of a notebook document,” begin with the cell overview, paying attention to the three cell types and execution controls. Continue through the “Code cells” and “Markdown cells” subsections: read code output and then Markdown documentation. Finally, in “Keyboard shortcuts,” read the Shift Enter shortcut. Raw cells exist but are not needed in this course.
Reading the notebook’s visual signals
As you work, use the interface to answer three questions.
1. What kind of cell is this?
Look at the cell-type selector or its appearance:
- A code cell is editable Python source and commonly has a run control.
- A Markdown/text cell shows formatted prose when rendered; double-clicking it usually reveals the Markdown source.
If you place prose such as This notebook studies prices into a code cell and run it, Python will try to interpret it as code and usually raise an error. Conversely, placing 4 + 6 in a Markdown cell merely displays the characters; it does not calculate anything.
2. Has this code actually run?
A successful run generally produces an execution indicator, output, or both. In standard Jupyter, code cells may show execution counters such as In [1] and outputs such as Out[1]. These numbers reflect the order in which cells were run, which is not always the same as their visual order on the page.
At this stage, follow a simple discipline: work from the top of the notebook downward and rerun a cell after editing it.
3. What does the output belong to?
Output belongs to the code cell directly above it. It is not a general statement about the whole notebook. If you later move cells, revise code, or run cells out of order, visually inspect whether the output still matches the code that produced it.
Common early mistakes—and how to recover
Mistakes are normal in a notebook because it is designed for experimentation. The important skill is diagnosing what you are seeing.
“Nothing happened when I wrote Python.”
Writing code is not running code. Select the code cell and use Run or Shift+Enter.
“My sentence produced an error.”
You likely entered explanation in a code cell. Change that cell to Markdown/text, or create a Markdown cell.
“My calculation is shown as plain text.”
You likely entered code in a Markdown/text cell. Create or change to a code cell, then run it.
“The output does not match the code.”
You probably changed the cell after its last execution. Run it again. If the problem persists, make a fresh code cell and run the intended contents once.
“I accidentally ran the wrong cell.”
No damage is done to these simple examples. Click the intended cell and run it. Later, when cells store values and load data, execution order becomes more consequential; keeping notebooks organized from top to bottom will prevent many errors.
“I have a screen full of trial cells.”
Use Markdown headings to organize work, delete obvious experiments, and keep one clean version of the calculation you intend to retain. A notebook is both a workspace and a research record.
A short completion checklist
Before moving on, confirm that you can do each of the following without looking up the steps:
- Create a code cell.
- Run code with the play button or Shift+Enter.
- Identify the output produced beneath a code cell.
- Create a Markdown or text cell.
- Run a Markdown cell so its source becomes formatted explanation.
- Explain why a Markdown cell is preferable to a code comment for a notebook section heading.
- Rerun a cell after editing it.
You have now established the basic notebook pattern: explain, compute, inspect, and document. Code cells execute Python; their outputs report results; Markdown cells make the notebook intelligible and auditable.
In the next lesson, you will start writing Python values: numbers, text strings, and true-or-false Boolean values. Those values will let your notebook retain information from one calculation to the next.
Can't find a good explanation? Sign up and we'll make it for you
Sign up