
Hello! In our last lesson, we focused on the crucial first step of debugging: finding and interpreting error messages within a failed workflow. You learned how to use the Executions log and the "Debug in Editor" feature to diagnose problems.
Now, we move from manual diagnosis to automated response. As a developer, you know that a robust application doesn't just crash silently—it has a strategy for handling exceptions. This lesson brings that same principle to n8n. We will build a dedicated, centralized workflow whose sole purpose is to catch and process errors from your other workflows, forming a critical piece of your automation infrastructure.
Today, you will learn how to use the Error Trigger node to build a dedicated error-handling workflow. This will enable you to stop relying on manually checking execution logs and start building systems that can automatically notify you or take action when things go wrong.
1. The Concept of an Error Workflow
In n8n, a standard workflow fails, its execution stops, and it's marked as "Failed" in your logs. Without a proper setup, this failure can go unnoticed. An error workflow is a special workflow that automatically runs whenever another workflow linked to it fails.
The purpose is to provide a single, reusable place to define what happens upon failure. Instead of adding complex error-handling logic to every single workflow you build, you can point them all to a single, powerful error handler.
This is conceptually similar to setting up a global exception handler in an application, which intercepts uncaught exceptions to perform logging, send alerts, or attempt a graceful shutdown.
Error Trigger node documentation
The official n8n documentation provides a concise introduction to the Error Trigger node and the concept of an error workflow. This will give you a quick, foundational understanding.
Read the brief introduction under the main heading to understand the node's purpose and how it relates to a failed workflow.
2. Building and Linking Your Error Workflow
Creating and connecting an error workflow involves two distinct steps:
- Build the error workflow: This new workflow must start with the
Error Triggernode. - Configure the primary workflow: In the settings of the workflow you want to monitor, you must specify your newly created error workflow.
The following video provides a clear, step-by-step demonstration of this entire process.
One n8n Workflow for Unlimited Error Handling (Step-by-Step)
Watch this demonstration from Nate Herk to see exactly how to create a new error workflow and link it from a primary workflow's settings.
Watch from 00:39 to 01:44. Pay close attention to the two key actions: creating the new workflow that starts with an 'Error Trigger' and then navigating to the primary workflow's settings to select it as the 'Error workflow'.
To summarize the key steps from the video and documentation:
- Create a new, blank workflow.
- Add the
Error Triggernode as the very first node. - Give this workflow a descriptive name (e.g., "Global Error Handler") and save it. You don't need to activate it.
- Open the primary workflow you want to monitor.
- Click the three dots in the top-right corner and go to Settings.
- In the Error workflow dropdown, select the error handler workflow you just created.
- Save the settings.
Now, any unhandled error that causes the primary workflow to fail will trigger your error workflow.
3. Understanding the Error Data Payload
When the Error Trigger runs, it receives a JSON object containing detailed information about the failure. As a developer, understanding this data structure is key to building useful error handlers.
Error Trigger node documentation
The official documentation provides the exact schema for the data received by the Error Trigger. This is your reference for what fields are available to you.
Review the 'Error data' section. You don't need to memorize it, but familiarize yourself with the main objects (execution, workflow) and the key properties available within them.
The most important pieces of information you'll typically use are:
workflow.name: The name of the workflow that failed.workflow.id: The ID of the workflow that failed.execution.url: A direct link to the failed execution's log in the n8n UI. This is incredibly useful for notifications.execution.error.message: The specific error message from the node that failed.execution.lastNodeExecuted: The name of the node that caused the failure.
With this data, you can construct highly informative alerts.
4. Practical Example: Building an Error Notification Workflow
Let's build a practical error workflow. The most common use case is to send a notification to a tool like Slack, Discord, or email, so you're immediately aware of any issues.
The video below demonstrates building a simple error workflow that sends a formatted message to a Slack channel.
n8n Beginner Course (7/9) - Error handling
This clip from the official n8n channel shows how to take the data from an Error Trigger and use it to construct a helpful Slack notification.
Watch from 07:52 to 10:42. Observe how expressions are used to pull data from the Error Trigger (e.g., workflow name, execution URL) and insert it into the Slack message text. You can adapt this same logic for an Email or any other notification node.
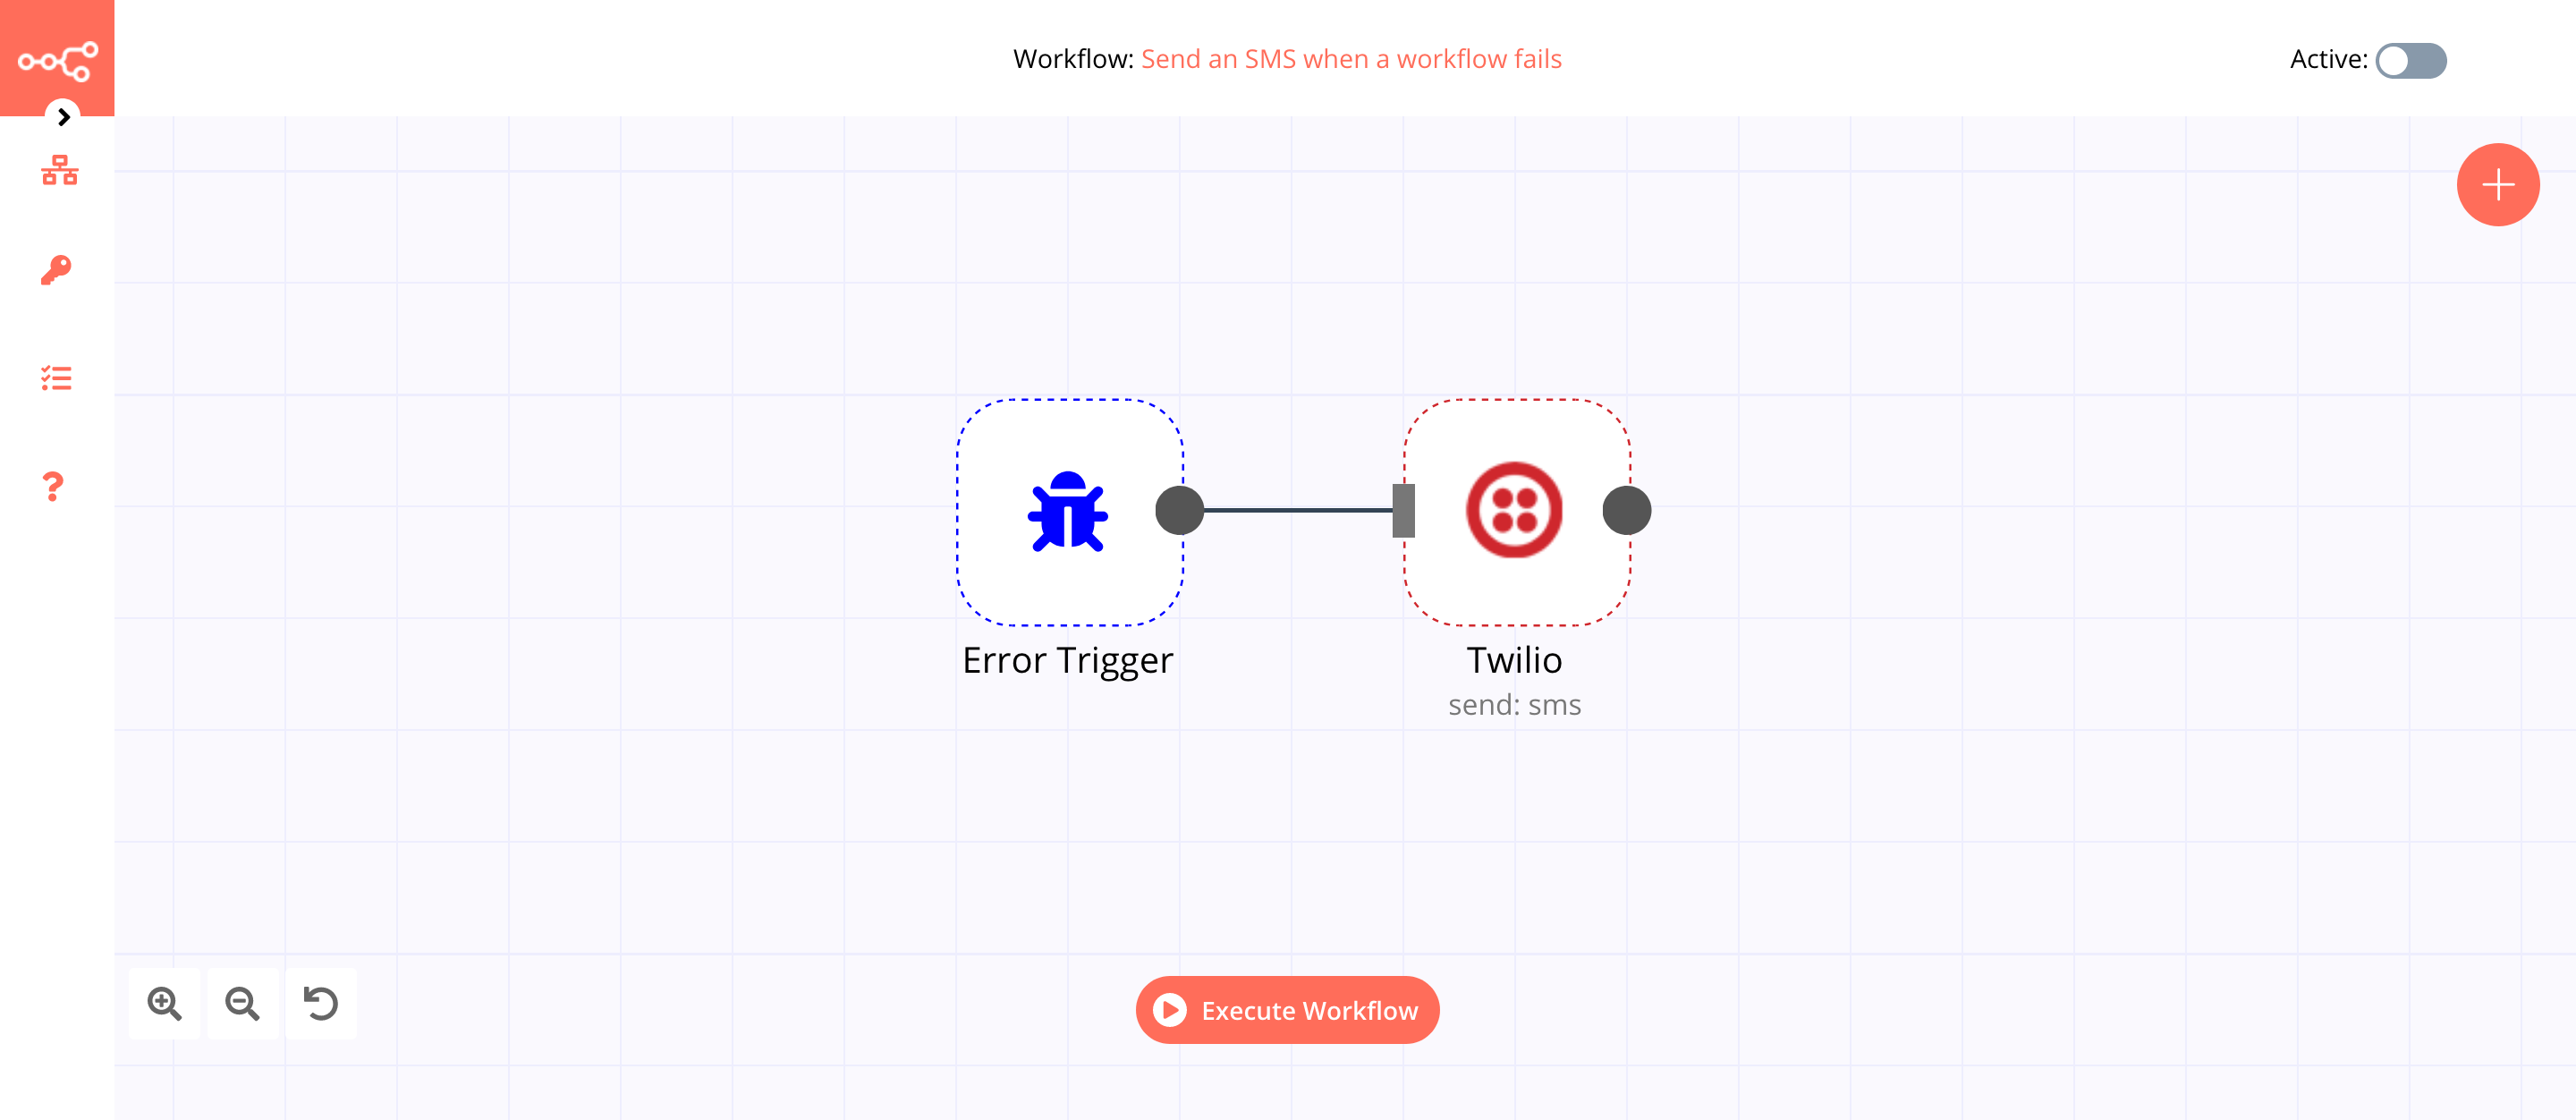
Here is a visual example of a simple error workflow that sends an SMS notification using Twilio:
Your Turn: Build a Basic Error Handler
- Create a new workflow and name it "My Error Handler".
- Add an Error Trigger node.
- Add a Set node after the trigger. Configure it to create a new field called
errorMessage. Use an expression to create a formatted string like:Workflow '{{ $json.workflow.name }}' failed. Error: {{ $json.execution.error.message }} View execution: {{ $json.execution.url }} - Add a notification node of your choice (e.g., Slack, Send Email, Discord). Configure it to send the
errorMessagefield from the Set node. If you don't have credentials set up, you can simply end the workflow with the Set node for now. - Save the workflow.
- Open any existing workflow you have, go to its Settings, and set "My Error Handler" as its Error workflow.
- Now, you need to test it. You cannot test an error workflow by pressing "Execute Workflow" on the error workflow itself. You must cause the primary, activated workflow to fail. Intentionally break something in your primary workflow (e.g., disconnect a required node input) and trigger it.
- Go to the Executions tab for "My Error Handler". You should see a new, successful execution containing the details of the failure.
Test your understanding!
You are looking at the JSON output of an Error Trigger node. Write the n8n expression you would use to retrieve the name of the node that failed.
Show answer
The expression would be: {{ $json.execution.lastNodeExecuted }}
Conclusion
You have now implemented one of the most important patterns for building production-ready automations. By centralizing your error handling, you create a robust and maintainable system that actively informs you about problems, rather than failing silently.
Key Takeaways:
- An Error Workflow is a dedicated workflow that starts with an
Error Triggernode. - It is linked from a primary workflow via the Settings > Error workflow option.
- The
Error Triggerreceives a rich JSON object with details about the failed workflow, including its name, the error message, and a URL to the execution log. - The most common application is to build a notification system that alerts you to failures, using the data from the trigger to create a helpful message.
- Error workflows only run when a linked, activated workflow fails; they cannot be triggered by manual test executions.
In our next lesson, we will build upon this foundation. Now that you know how to catch an error, we'll explore more sophisticated strategies for what to do next. We will discuss how to configure your primary workflow and error workflow to achieve "graceful failures," moving beyond simple notifications to more advanced recovery and logging patterns.