
Hello! Welcome to the first lesson of Module 2.
In our last module, we built the core of our game engine. We have a game loop, an asset manager, and most recently, a sprite animation system that brought our hero character to life. Right now, that character is animating in a void. It's time to build the world they will inhabit.
This lesson kicks off our "World Navigation and Interaction" module. The learning outcome is to design a multi-layered tile map data structure (ground, collision, objects, overhead). This is the architectural blueprint for every town, dungeon, and field in your JRPG. Your experience in front-end development, especially in structuring data with JSON and thinking about layered UIs, will be very applicable here. We are essentially designing the "DOM" for our game world.
What is a Tile Map, and Why Use Layers?
At its core, a tile map is a grid. We build a large game world by piecing together small, reusable images called "tiles," much like laying floor tiles in a room. This is incredibly efficient for both memory and performance, a technique used in classic JRPGs for decades.
However, a simple, flat grid isn't enough to create a believable world. We need depth and complexity. We achieve this with layers. Think of layers in a graphics program like Photoshop, or more analogously, the stacking of elements in HTML with z-index. By separating our map into different layers, we can control what gets drawn when, creating the illusion of depth and enabling complex interactions.
To start, let's get a visual and conceptual understanding of layers from an artist's and a game developer's perspective.
How to Make Pixel Art Tilesets
The video 'How to Make Pixel Art Tilesets' by Apox Fox offers a great perspective on why layers are a fundamental concept in creating game worlds. It shows how artists think about separating elements for both visual and gameplay purposes.
Please watch the section on introducing layers for tile maps, starting about six minutes into the video. Pay attention to the distinction between the 'ground layer' (which has colliders) and 'background layers' used for decoration. This separation of visual and logical purpose is the core idea we will be implementing.
As the video explains, layers serve distinct purposes:
- A ground layer for the floor the player walks on.
- Decorative layers for environmental details.
- A logical separation for things the player can interact with versus things they cannot.
Now, let's see how a modern game engine like Godot puts this concept into practice.
How to Use the New TileMap in Godot 4
This video on Godot's TileMap system demonstrates how these conceptual layers are represented in a real-world tool. It provides a concrete example of the kind of functionality our data structure needs to support.
First, around two minutes in, watch TileMap Layers. This shows how different layers (ground, objects, overhead) are used to create depth. Then, just past the three-minute mark, watch the section on Physics and Data. This highlights a critical point: some layers aren't for visuals but for data, like collision information or custom properties (e.g., what sound footsteps should make).
From Concept to Data Structure
We've established the why. Now for the how. How do we represent this layered grid in a way our JavaScript engine can understand? The answer lies in creating a clear, data-driven structure, which we'll store in a JSON file.
A fantastic overview of this topic is provided by MDN, a resource you're likely very familiar with.
Tiles and tilemaps overview - Game development | MDN
The MDN article 'Tiles and tilemaps overview' formally defines the components of a tilemap data structure. It bridges the gap between the visual concept and the data representation we need to build.
Please read the sections 'The tilemap data structure' and 'Layers'. Under the first heading, review the map object properties. Then, in the 'Layers' section, read about map layers. These sections outline the essential properties of a map object and explain how multiple visual grids can be layered to create richer worlds and effects like characters walking behind objects.
Synthesizing these ideas, we can design the JSON structure for our maps. This file will be the single source of truth for what a map looks like, where its boundaries are, and how it behaves.
Here is a proposed structure for a town.json file:
{
  "tileWidth": 32,
  "tileHeight": 32,
  "mapWidth": 30,
  "mapHeight": 20,
  "tilesetSrc": "/images/tilesets/outside.png",
  "layers": [
    {
      "name": "Ground",
      "data": [ 1, 1, 2, ... ]
    },
    {
      "name": "Objects",
      "data": [ 0, 0, 105, ... ]
    },
    {
      "name": "Overhead",
      "data": [ 0, 0, 0, ... ]
    },
    {
      "name": "Collision",
      "visible": false,
      "data": [ 0, 0, 1, ... ]
    }
  ]
}
Let's break this down:
- Metadata (
tileWidth,tileHeight, etc.): Basic information the engine needs to know how to interpret the map data.tilesetSrcpoints to the image atlas for this map. layers: This is the heart of our structure. It's an array of layer objects. The order of this array is critical, as it defines the rendering order: the first layer is drawn first (at the bottom), and subsequent layers are drawn on top.layer.name: A human-readable identifier.layer.data: An array of numbers. Each number is an index that corresponds to a specific tile in our tileset image. A value of0(or another designated number) typically means "empty" or "transparent." This array represents the entire map grid, flattened into a one-dimensional array. We can find the tile for any (x, y) coordinate with the formulaindex = y * mapWidth + x.layer.visible: A boolean flag. Notice theCollisionlayer hasvisible: false. This layer contains pure game logic and is never drawn to the screen.
The Four Essential Layers for a JRPG
For a classic JRPG, we can standardize on four key layers.
-
Ground Layer: This is the base of the map. It consists of grass, dirt paths, stone floors, etc. It's the first thing drawn and has no transparency.
-
Objects Layer: This layer sits on top of the ground. It contains items that the player is at the same visual depth as and can often interact with. Examples include chests, signs, flowers, and short fences. The player character will be rendered after this layer.
-
Overhead Layer: This layer is drawn on top of the player. This is what creates the illusion of depth, allowing the player to walk behind things. Treetops, building roofs, and the top of door frames belong here.
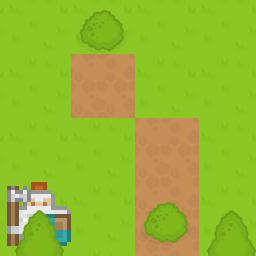
This screenshot from the MDN article perfectly illustrates layering. The knight (our player) is drawn after the tree trunk (Objects layer) but before the tree leaves (Overhead layer). -
Collision Layer: This is our primary logic layer. It's a grid that simply tells the engine where the player can and cannot move. We might use
0for walkable tiles and1for solid tiles (walls, water, etc.). This layer is never rendered but is constantly checked by our movement logic.
This article provides a code-level perspective on structuring this data. While it uses C#, the concepts directly translate to JavaScript objects.
Data Structures For Tile Based Games - Jonathan Yu
The article 'Data Structures For Tile Based Games' by Jonathan Yu provides a concrete implementation strategy. It shows how to structure the 'Tile' and 'Board' (our map) objects.
Read the sections 'The Tile' and 'The Board'. The key insight here is representing the map as a 2D array (our 'Board') of 'Tile' objects. The author's refined Tile class uses a dictionary (which in JavaScript would be an object) to manage layers, but for our JSON-based approach, separating layers into distinct arrays ({ "layers": [ {...}, {...} ] }) is more common and often easier to manage with map editors like Tiled.
The rendering process will follow this simple sequence, which is directly analogous to CSS z-index:
- Draw Ground layer.
- Draw Objects layer.
- Draw Player and NPCs.
- Draw Overhead layer.
Test your understanding!
Imagine you're creating a small 3x2 map (3 tiles wide, 2 tiles high). You want to create a vertical wall on the far right. The map should have a grass floor and the wall should be impassable.
Your tileset has:
- Grass at index
1. - Wall at index
50.
How would you structure the data arrays for the Ground and Collision layers? Remember that the data array is flattened ([row1_col1, row1_col2, row1_col3, row2_col1, ... ]).
Show answer
Here's how you would define the data for the layers:
Ground Layer:
This layer defines the visuals of the floor. You want grass everywhere."data": [ 1, 1, 1, 1, 1, 1 ]
Objects Layer:
The wall is a solid object, so its visual representation goes here. We'll assume the two grass tiles to the left are empty (0)."data": [ 0, 0, 50, 0, 0, 50 ]
Collision Layer:
This layer defines walkability. We'll use 0 for walkable and 1 for blocked."data": [ 0, 0, 1, 0, 0, 1 ]
Notice how the visual representation of the wall is on the Objects layer, while its logical property (being solid) is on the Collision layer. This separation is key to a flexible engine.
Conclusion
In this lesson, we designed the fundamental data structure for all the worlds in our game. This is a huge step forward. By defining our maps in a structured, data-driven way, we make them easy to create, edit, and load into our engine.
Here are your key takeaways:
- Maps are Grids of Data: We represent our game world as a grid, where each cell contains information about what's there.
- Layers Create Depth and Logic: A multi-layered structure is essential. We separate concerns into different layers:
Groundfor flooring,Objectsfor interactive items,Overheadfor depth, andCollisionfor game logic. - Data is Stored Declaratively: We will use JSON to define our maps. This makes our engine data-driven and separates the "what" (the map layout) from the "how" (the rendering code).
- Rendering Order is Key: The order of layers in our data file dictates the drawing order, creating effects like characters walking behind trees.
Preview of the next lesson:
We have the blueprint. Next, we need a contractor. In the upcoming lesson, we will implement a tile map renderer with a camera viewport that only draws the visible portion of the map. We will write the code that reads the JSON file we designed today and brings our static world to life on the screen.
Can't find a good explanation? Sign up and we'll make it for you
Sign up