
Hello! Welcome to the first lesson of Module 3.
In our last lesson, we brought your game world to life by adding NPCs with their own simple AI. You now have a map where the player and other characters can move around, creating a dynamic environment. However, our game is currently "stuck" in this single map exploration mode. A real JRPG seamlessly transitions between exploring a town, engaging in a battle, navigating menus, and watching cutscenes.
This lesson focuses on the architectural foundation that makes this possible. We will address the learning outcome: Design a scene manager architecture to handle transitions between game states (e.g., map, menu, battle). This is a critical step in building the skeleton of your game, upon which all other systems will be built.
By the end of this lesson, you will have designed a robust system for managing the overall flow of your game, inspired by patterns used in professional game development.
1. The Problem: Managing Game Modes
As a front-end developer, you're familiar with managing application states. You might show a loading spinner, then display data, or switch to an edit form. You wouldn't put the logic for all these views into one massive if/else block; you'd use components, routing, and state management libraries.
Game development faces the exact same challenge, but the "views" are entire game modes, which we often call scenes or states:
- A
TitleScreenScene - A
MapScene - A
BattleScene - A
MenuScene - A
ShopScene
Trying to manage these with simple boolean flags (isInBattle, isMenuOpen, etc.) quickly leads to what is often called "spaghetti code"—a tangled mess that is hard to debug and even harder to extend.
An introduction to finite state machines and the state pattern for game development
To see a great illustration of this problem, let's watch the beginning of the video 'An introduction to finite state machines and the state pattern' from The Shaggy Dev. It clearly shows how quickly conditional logic can get out of hand when managing a character's state, a problem that's magnified when managing the entire game's state.
Watch the section 'The Problem with Complex Game Logic' from 00:52 to 02:35. Notice how each new feature adds another layer of conditional checks, making the code fragile and complex.
The solution, as in many software architecture problems, is to create a formal system for managing state. In game development, this is most commonly achieved with a State Machine.
2. The State Pattern: An Architectural Blueprint
You've already implemented a very simple state machine for our NPCs (switching between WAITING and MOVING). We're now going to elevate that concept to manage the entire game. The architectural pattern we will use is the State Pattern.
The core idea is to encapsulate the behavior of each game mode into its own object. Our main game loop doesn't need to know if we're in a battle or on the map; it simply tells the current state to update itself and draw itself.
This architecture consists of two main components:
- A Scene Manager (the "context") that holds the current scene and orchestrates transitions.
- A Scene Interface (the "state") that defines a common contract for all scenes, ensuring the Scene Manager can work with any scene without knowing its specific details.
This is a classic example of abstraction that will be very familiar from your software engineering experience.
How to Build a JRPG: A Primer for Game Developers - Code
The article 'How to Build a JRPG: A Primer for Game Developers' provides an excellent, high-level overview of this exact architecture. It's written specifically in the context of JRPGs.
Please read from the 'Architecture' section down to the end of the 'Handling Complexity With a State Machine' subsection. Focus on two key ideas: the concept of distinct game 'modes' and the pseudocode for the StateMachine class and the IState interface. This is the blueprint for our design.
Let's break down the design proposed in that article.
The Scene Interface
Every scene in our game must perform a few key actions. We can define these in a base class or an interface that all scenes will implement.
enter(params): Called once when the scene becomes active. This is where you'd initialize the scene, load necessary assets, create characters, etc. Theparamsallow you to pass data during the transition (e.g., which map to load).exit(): Called once when the scene is left. This is for cleanup, like stopping music or releasing memory.update(deltaTime): Called every frame by the game loop. Contains the scene's core logic (e.g., handling input, moving characters).draw(context): Called every frame afterupdate. Contains all rendering logic for the scene.
The Scene Manager
The SceneManager is the conductor of our orchestra. Its job is simple but crucial:
- It keeps track of the
currentScene. - In the main game loop, it calls
currentScene.update()andcurrentScene.draw(). - It provides a method, let's call it
changeScene(sceneName, params), to transition between scenes. This method would:- Call
currentScene.exit(). - Find the new scene by its
sceneName. - Set it as the
currentScene. - Call the new
currentScene.enter(params).
- Call
This design cleanly separates the what (the logic inside each scene) from the how (the transition logic in the Scene Manager).
3. An Improvement: The State Stack
The changeScene model works well, but it has a limitation. Imagine this flow:
- You are on the
MapSceneat coordinates (50, 32). - You press a button to open the
MenuScene. - You close the menu.
If we use changeScene("MapScene"), we would create a new instance of the map, losing our position. We want to resume the previous scene exactly where we left off.
This is where a State Stack comes in. Instead of just replacing the current state, we can push new states on top of a stack.
push(sceneName, params): Pauses the current scene and pushes a new one onto the stack. The new scene becomes active.pop(): Exits and removes the top scene from the stack, resuming the one underneath it.
This model is perfect for JRPGs:
- Map -> Menu:
push("MenuScene"). The map is paused underneath. - Menu -> Map:
pop(). The menu is destroyed, and the map resumes. - Map -> Battle:
push("BattleScene"). The map is paused. - Battle -> Map:
pop(). The battle is destroyed, and the map resumes with the player standing on the same tile.
How to Build a JRPG: A Primer for Game Developers - Code
The same Tutsplus article continues by explaining this very improvement.
Now read the section 'Making Game Logic Easier With a State Stack'. The pseudocode here is a bit simplified, but the core concept of Push and Pop is the key takeaway.
The stack-based approach also lets you decide if underlying scenes should be rendered. When the menu is open, you might want to render the paused map behind it (perhaps with a dark overlay or blur effect). When a battle starts, you typically want a full-screen transition, so you would only render the top-most scene. Our Scene Manager's draw method can be designed to handle this flexibility.
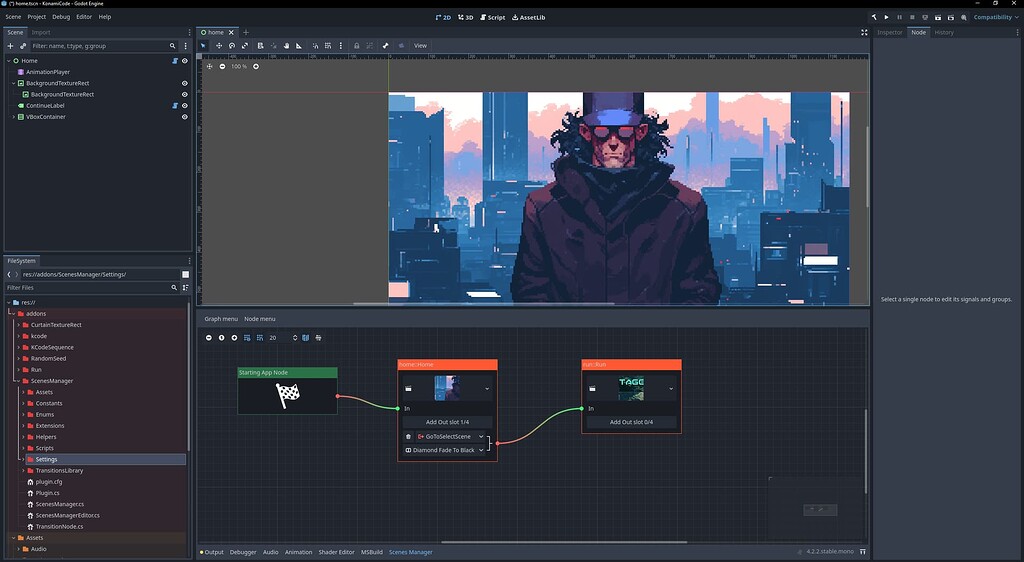
4. Advanced Architecture: Persistent Core Systems
One final piece of the puzzle. Where does the SceneManager itself live? What about other global systems like the AudioManager or SaveManager that need to persist across all scenes?
A common and robust solution is to use a multi-scene architecture.
- You have a single, persistent Core Scene that is loaded when the game starts and is never unloaded.
- This
CoreScenecontains all your global managers: theSceneManager,AudioManager,InputManager, etc. - The
SceneManagerthen loads and unloads the other game scenes (MainMenuScene,MapScene, etc.) additively.
This ensures your core systems are always available and their state persists, while the game-specific scenes can come and go as needed.
The BEST Unity Multi-Scene Architecture (With a Custom Scene Controller)
This concept is used widely in modern game engines. To see a professional take on it, we'll watch a clip from 'The BEST Unity Multi-Scene Architecture' by The Code Otter. While the implementation is in Unity, the architectural concept of a persistent core scene is universal and directly applicable to our JavaScript engine.
Watch the sections 'Core Idea of Multi-Scene Architecture' (01:16 - 02:41) and 'Scene Controller Architecture and Implementation' (03:47 - 07:49). Don't worry about the Unity-specific code. Focus on the diagrams and concepts: the idea of a persistent 'core scene' holding managers, and how other scenes are loaded on top. Notice how he designs a 'transition plan' object, a clean way to define complex transitions.
Test your understanding!
Using the state stack architecture, describe the sequence of push and pop calls for the following user journey:
- Starts game, landing on the
MapScene. - Opens the main menu.
- From the main menu, selects "Equipment".
- Goes back from "Equipment" to the main menu.
- Closes the main menu and returns to the map.
Show answer
- Game starts:
sceneManager.push("MapScene")- Stack: [
MapScene]
- Stack: [
- Opens menu:
sceneManager.push("MenuScene")- Stack: [
MapScene,MenuScene]
- Stack: [
- Selects equipment:
sceneManager.push("EquipmentScene")- Stack: [
MapScene,MenuScene,EquipmentScene]
- Stack: [
- Goes back:
sceneManager.pop()- Stack: [
MapScene,MenuScene]
- Stack: [
- Closes menu:
sceneManager.pop()- Stack: [
MapScene]
- Stack: [
Conclusion
In this lesson, we've focused purely on high-level design, which is the essential first step to building a complex system. By planning our architecture now, we'll save ourselves countless headaches during implementation.
Your key takeaways on scene manager design are:
- The State Pattern: Encapsulate each game mode (map, menu, battle) into its own
Sceneobject to keep code organized and decoupled. - The Scene Interface: Define a standard contract (
enter,exit,update,draw) that allSceneobjects must follow, allowing the manager to control them without knowing their internal details. - The State Stack: Use a stack (
push,pop) instead of a simplechangemethod to handle nested states like menus and to easily resume a previous state, which is crucial for JRPGs. - Persistent Core: House global systems like the
SceneManageritself in a persistent 'core' layer that is always active, while game scenes are loaded and unloaded on top of it.
You've now designed a clean, scalable, and professional architecture for managing your game's flow.
Preview of the next lesson:
With the blueprint complete, it's time to build. In our next lesson, "Implement the scene manager to transition between the map, a main menu, and back," we will translate these architectural designs into concrete JavaScript code and get our first scene transition working.
Can't find a good explanation? Sign up and we'll make it for you
Sign up