
Setting Up Your Telegram Bot Webhook
In the previous lesson, we re-architected your bot from a long-polling script into a proper web service using Bun's built-in HTTP server. Your bot is now listening for incoming HTTP requests, but there's a crucial missing link: your server is running on localhost, invisible to Telegram's servers on the public internet.
This lesson will bridge that gap. You will learn how to register your bot's webhook with the Telegram Bot API, effectively telling Telegram where to send updates. We'll start by generating a temporary public URL for your local server using a standard development tool. Then, you'll write a small utility script to programmatically manage your webhook registration, a practice you'll find essential as you move towards automated deployment.
By the end of this lesson, you will have a fully functional webhook setup, with updates from Telegram being pushed directly to your bot running locally on your machine.
The Public URL Problem and ngrok
As we established, for a webhook to function, Telegram's servers must be able to send a POST request to your bot. An address like http://localhost:3000 is only accessible on your own machine. We need a publicly accessible URL that forwards traffic to your local server.
While in a final production setup this URL would be provided by a cloud hosting platform (like my-bot.fly.dev), for development and testing, we can use a tunneling service. A popular and straightforward tool for this is ngrok.
ngrok creates a secure tunnel from a public endpoint on the internet to a service running on your local machine. When you run it, ngrok gives you a unique, temporary https URL. Any request sent to this URL is forwarded directly to your local server.
If you don't have ngrok installed, you can download it from its official website. Once installed, you can expose your bot's server (which we configured to run on port 3000) with a simple command:
ngrok http 3000
The Supabase team provides a clear, quick demonstration of using ngrok to get a public URL for a locally running function.
Building a Telegram Bot with Edge Functions
This video from the Supabase channel demonstrates setting up a Telegram bot with a webhook, and uses ngrok for local development.
Watch the segment from this timestamp to see how ngrok is started and how it provides a public URL that tunnels to a local port.
After running the command, your terminal will display a session status screen with a "Forwarding" URL that looks something like https://random-string.ngrok-free.app. This is the public URL we will give to Telegram.
Subscribing to Updates with setWebhook
Now that you have a public URL, you need to inform Telegram about it. This registration process is done by calling the setWebhook method in the Telegram Bot API. This is a one-time setup call you make to configure the bot.
The following diagram shows where this setWebhook call fits into the overall process. It's the initial configuration step performed by the administrator before the bot starts receiving updates.
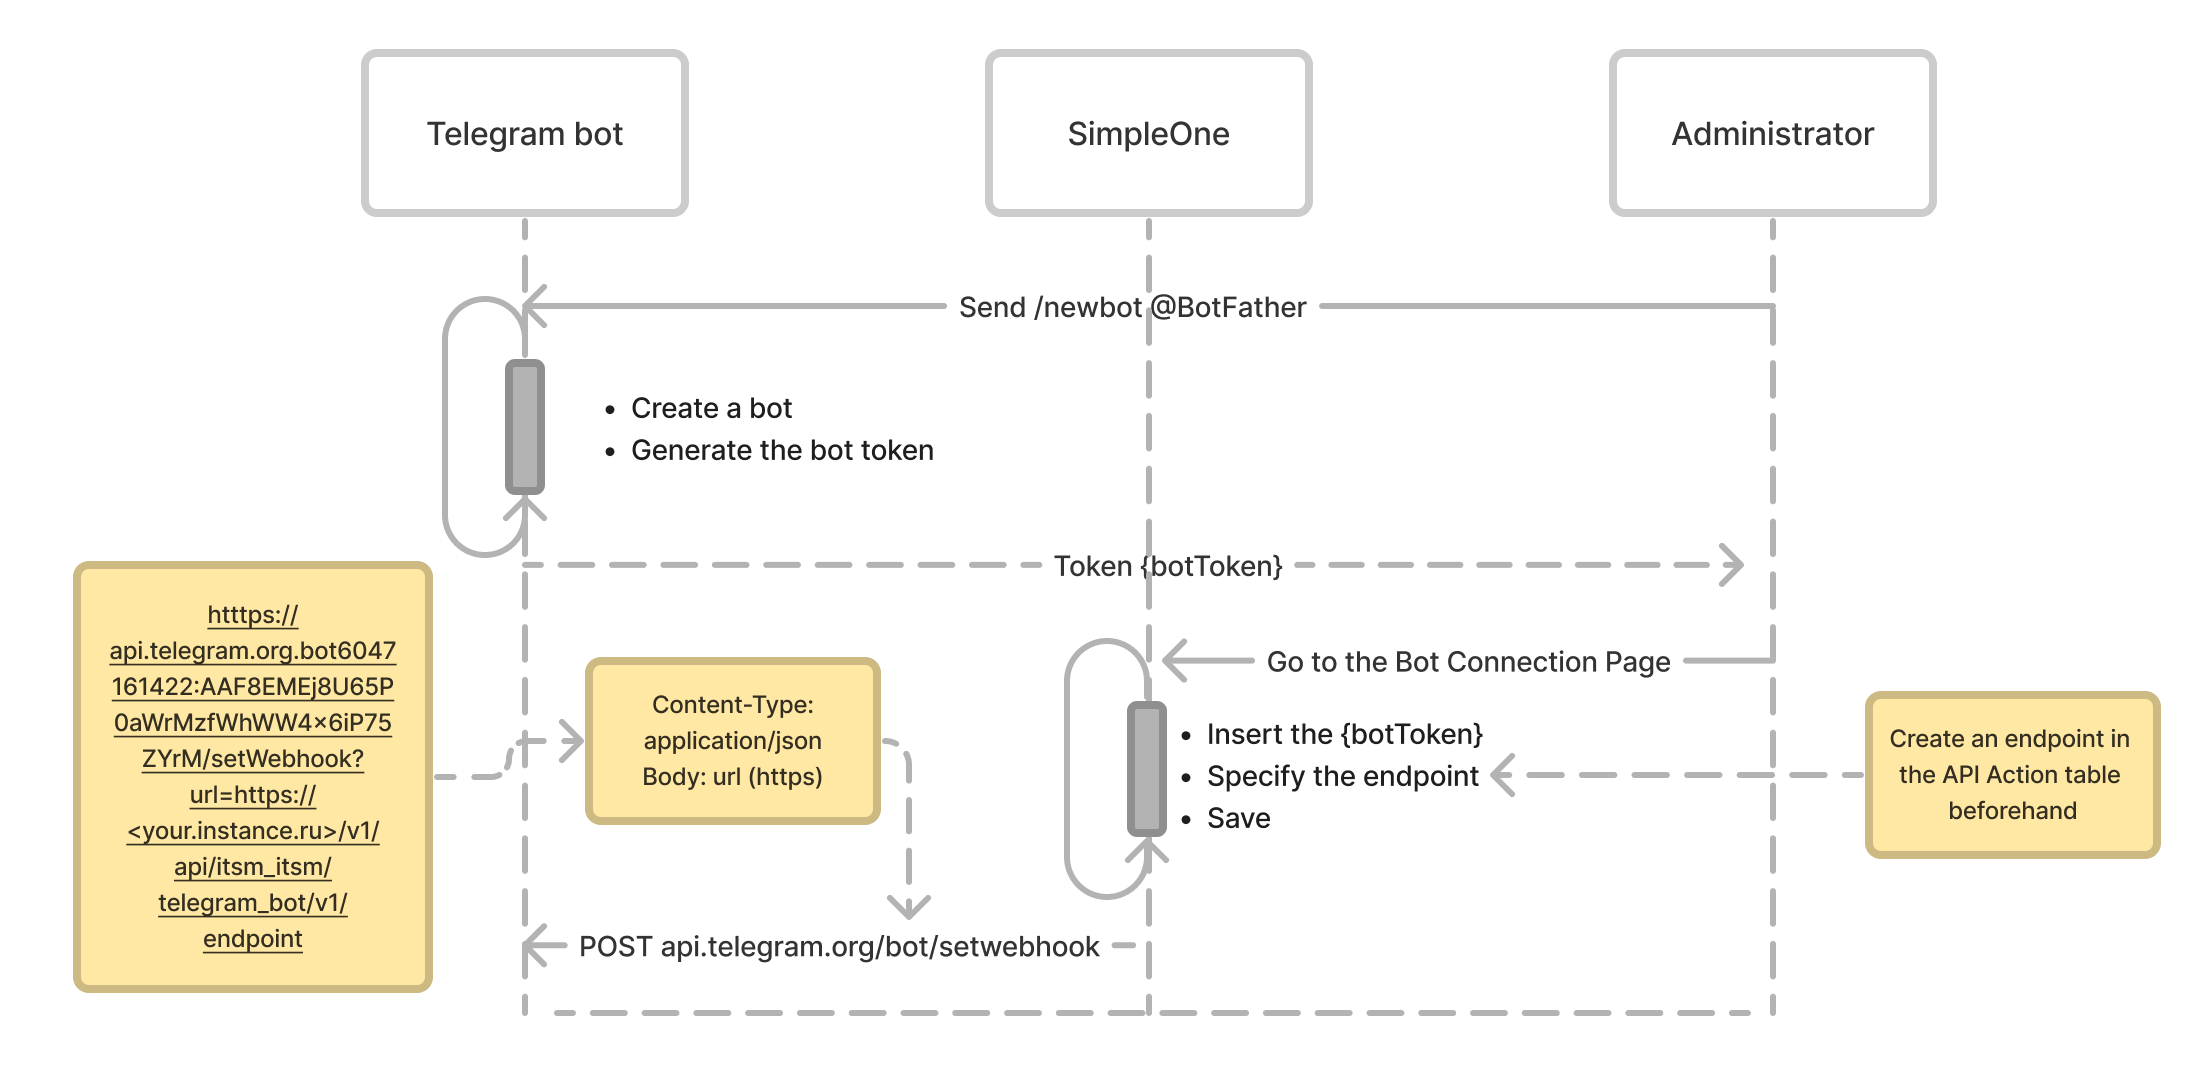
You can make this API call in a few ways. A common method for a quick, one-off test is using a command-line tool like curl. The official Telegram documentation provides an example.
Marvin's Marvellous Guide to All Things Webhook
The official Telegram API documentation explains the setWebhook method and how to call it.
In the section titled "How do I set a webhook for either type?", review the curl example. Note how it's a simple curl command with a -F flag to send form data containing the url parameter. Also, observe the example for clearing the webhook by providing an empty URL.
While curl is effective, a more robust and repeatable approach for a project like ours is to create a dedicated script to manage the webhook. This keeps your configuration logic within your project codebase. The grammY library makes this exceptionally easy with the bot.api object, which provides methods that map directly to the Bot API.
Creating a Webhook Management Script
We will create a simple command-line script using Bun to set, view, and delete your webhook configuration. This utility will be invaluable for both development and future deployment automation.
Let's look at the grammY documentation for the relevant API methods.
1.38.0 • npm-grammy • tessl • Registry • Tessl
This documentation page outlines the programmatic methods for managing webhooks in grammY.
Focus on the section Webhook Setup and Management. You will see three key functions: bot.api.setWebhook(): Registers your URL with Telegram. bot.api.getWebhookInfo(): Fetches the current webhook configuration. bot.api.deleteWebhook(): Removes the webhook, switching the bot back to being ready for long polling.
Now, let's implement this. Create a new file in your project: src/webhook.ts. This script will parse command-line arguments to perform the desired action.
src/webhook.ts
import { bot } from "./bot";
import "dotenv/config"; // Ensure .env is loaded

// Bun's process.argv contains the command-line arguments
const command = process.argv[2]; // e.g., 'set', 'delete', 'info'

async function setupWebhook() {
  const url = process.argv[3];
  if (!url) {
    console.error("Please provide a URL for the webhook.");
    process.exit(1);
  }

  try {
    await bot.api.setWebhook(url);
    console.log("Webhook set successfully to:", url);
    await getWebhookInfo();
  } catch (error) {
    console.error("Failed to set webhook:", error);
  }
}

async function deleteWebhook() {
  try {
    const result = await bot.api.deleteWebhook();
    if (result) {
      console.log("Webhook deleted successfully.");
    } else {
        console.error("Failed to delete webhook.");
    }
  } catch (error) {
    console.error("Error deleting webhook:", error);
  }
}

async function getWebhookInfo() {
  try {
    const info = await bot.api.getWebhookInfo();
    console.log("Current webhook info:", info);
  } catch (error) {
    console.error("Failed to get webhook info:", error);
  }
}

// Simple command router
switch (command) {
  case "set":
    setupWebhook();
    break;
  case "delete":
    deleteWebhook();
    break;
  case "info":
    getWebhookInfo();
    break;
  default:
    console.log("Usage: bun src/webhook.ts [set <url> | delete | info]");
    break;
}
Note that we need to import dotenv/config if we run this script directly and it isn't automatically loaded by Bun in that context. This ensures process.env.TELEGRAM_BOT_TOKEN is available for the bot instance.
Bringing It All Together
You now have all the necessary components: the bot server from the last lesson, ngrok for a public URL, and a script to communicate with Telegram. Let's walk through the end-to-end process.
You will need three separate terminal windows for this.
-
Terminal 1: Start Your Bot Server
Run the server we created in the previous lesson. It will start listening on port 3000.bun start # Expected output: Bot server listening on port 3000... -
Terminal 2: Start ngrok
Expose your local port 3000 to the internet.ngrok http 3000ngrokwill display a "Forwarding" URL (e.g.,https://1a2b-3c4d-5e6f.ngrok-free.app). Copy this HTTPS URL. -
Terminal 3: Register the Webhook
Use your new script to tell Telegram about yourngrokURL.# Replace <YOUR_NGROK_URL> with the URL you copied bun src/webhook.ts set <YOUR_NGROK_URL> # Expected output: # Webhook set successfully to: <YOUR_NGROK_URL> # Current webhook info: { url: '<YOUR_NGROK_URL>', has_custom_certificate: false, ... }
That's it! Your webhook is now live. Go to your Telegram app and send a message to your bot. The request will travel from Telegram's servers, through the ngrok tunnel, to your local Bun.serve instance. The server will pass the update to grammY, and your bot will reply. You should see the reply appear in your chat almost instantly.
Important: When you're done developing, it's good practice to clean up the webhook. This stops Telegram from sending requests to a dead ngrok URL, which can lead to your bot being temporarily limited.
# In Terminal 3:
bun src/webhook.ts delete

# Expected output:
# Webhook deleted successfully.
You can then safely stop the ngrok process and your bot server.
Conclusion
In this lesson, you successfully configured your bot to receive updates via a webhook. You solved the "public URL problem" for local development using ngrok and created a reusable script to programmatically manage your webhook settings with the Telegram Bot API. Your bot is now fully functional in a "push" based architecture.
Key Takeaways:
- A webhook requires a publicly accessible HTTPS URL.
- Tools like
ngrokare essential for testing webhook-based applications locally by tunneling traffic to your machine. - The
bot.api.setWebhook(url)method is used to register your endpoint with Telegram. - The
bot.api.getWebhookInfo()andbot.api.deleteWebhook()methods are used to verify and remove the configuration. - Managing webhook settings via a script is a robust and repeatable practice.
Our current setup works, but it has a security vulnerability: anyone who discovers your webhook URL can send fake updates to your bot. In the next lesson, we will address this by securing your webhook endpoint with a secret token.
Can't find a good explanation? Sign up and we'll make it for you
Sign up