Welcome to the next step in your journey to mastering smart contract development. In our last session, you successfully wrote scripts to deploy and upgrade a contract on a local development network. We saw how the OpenZeppelin Upgrades Plugins abstract away the complexity of the transparent proxy pattern, but we have yet to see this process in a live environment.
Today, we will take those scripts and apply them to a public Ethereum testnet. This lesson is all about bridging the final gap between local development and a live deployment. You will perform a complete upgrade cycle on the Sepolia testnet, and most importantly, you will use a block explorer to verify firsthand that the contract's state is preserved across the upgrade. This hands-on experience is crucial for understanding the real-world lifecycle of a decentralized application.
1. Configuring Your Project for a Testnet
To deploy to a public network, your Hardhat project needs two key pieces of information:
- A Network Endpoint (RPC URL): A gateway to communicate with the blockchain network.
- A Private Key: The key for an account that will sign transactions and pay for gas. This account must have test ETH.
We will add a configuration for the Sepolia testnet to your hardhat.config.js file. For security, we will store the RPC URL and private key in a separate .env file, a standard practice you might recognize from managing credentials in other data-centric environments.
First, install the dotenv package to load these environment variables:npm install dotenv --save-dev
Next, create a file named .env in your project's root directory. Add your details to it. You can get a Sepolia RPC URL from services like Alchemy or Infura, or use a public one. You will also need your account's private key from MetaMask.
.env file
SEPOLIA_RPC_URL="YOUR_SEPOLIA_RPC_URL"
PRIVATE_KEY="YOUR_METAMASK_PRIVATE_KEY"
Warning: Never commit your .env file to a public repository. Your private key gives full control over your account.
Now, let's update hardhat.config.js to use these variables.
Securely deploy and upgrade a smart contract
This OpenZeppelin documentation, while focused on their Defender product, provides an excellent, up-to-date example of a Hardhat configuration for the Sepolia testnet. We will adapt its structure for our project.
Find the code block for the hardhat.config.ts file. Use this as a reference to update your own hardhat.config.js. You will need to add the require("dotenv").config(); line at the top and include the sepolia network configuration. Your final file should look something like this:
javascript
require("@nomicfoundation/hardhat-toolbox");
require("@openzeppelin/hardhat-upgrades");
require("dotenv").config();
/** @type import('hardhat/config').HardhatUserConfig */
module.exports = {
solidity: "0.8.20",
networks: {
sepolia: {
url: process.env.SEPOLIA_RPC_URL || "",
accounts:
process.env.PRIVATE_KEY !== undefined ? [process.env.PRIVATE_KEY] : [],
},
},
};
Your project is now ready for testnet deployment.
2. Deploying V1 to Sepolia
Using the deploy.js script from our previous lesson, we can now deploy our first contract version to Sepolia. The command is the same, but we add the --network flag to specify our new configuration.
Run the following command in your terminal:npx hardhat run scripts/deploy.js --network sepolia
This command will compile your contracts and send transactions to the Sepolia network. You will see output similar to this:Deploying Box...Box (proxy) deployed to: 0x...
This process deploys three contracts: the Box implementation, a ProxyAdmin, and the main TransparentUpgradeableProxy. The address you see in the output is the proxy's address. This is the stable address your users will interact with. Copy this address; you will need it for the next steps.
3. Verifying State on a Block Explorer
Now for the crucial part: verifying that our contract works as expected on-chain. We will use the Sepolia Etherscan block explorer.
The following video provides a fantastic walkthrough of interacting with a proxy contract on Etherscan. While it uses the old Ropsten testnet, the process on Sepolia Etherscan is identical.
How Can You Update Your Smart Contracts : Open Zeppelin Upgradeable Contracts
This video from EatTheBlocks clearly demonstrates how to verify and interact with an upgradeable contract on a block explorer.
First, watch how the presenter deploys the contract and finds the three resulting transactions on Etherscan, from "we'll log the address". Next, and most importantly, watch the section from "we're using the storage inside the proxy contract". This will guide you through: Navigating to your proxy contract's address on Etherscan. Going to the Contract tab and clicking "More Options" -> "Is this a proxy?". Verifying the proxy by clicking the "Verify" button. Etherscan will then recognize its proxy nature. Navigating to the new "Read as Proxy" tab to interact with the contract's state.
Follow the steps shown in the video for your own deployed proxy address. On the "Read as Proxy" tab, find the retrieve function and click "Query". You should see the value 42, which was set by the initialize function during deployment.
This confirms that the initial state is correctly stored within the proxy contract.

4. Performing the Upgrade
Now we will deploy BoxV2 and instruct the proxy to use its logic instead.
- Open your
scripts/upgrade.jsfile from the previous lesson. - Replace the placeholder
PROXY_ADDRESSwith the actual address of the proxy contract you just deployed to Sepolia. - Run the upgrade script:
npx hardhat run scripts/upgrade.js --network sepolia
This command performs two main actions on-chain:
- It deploys the new
BoxV2.solimplementation contract. - It sends a transaction to the
ProxyAdmincontract, telling it to update the implementation address stored in the proxy.
5. Verifying the Upgrade and Preserved State
This is the moment that demonstrates the power of upgradeable contracts.
Return to your proxy contract's page on Sepolia Etherscan. The address has not changed.
-
Verify State Preservation: Go to the "Read as Proxy" tab and query the
retrievefunction again. The value is still 42. Even though we swapped out the underlying logic contract, the state stored in the proxy remains untouched. -
Verify New Functionality: Now, navigate to the "Write as Proxy" tab. You may need to re-verify the proxy with Etherscan to see the new functions. You should now see the
incrementfunction, which only exists inBoxV2.
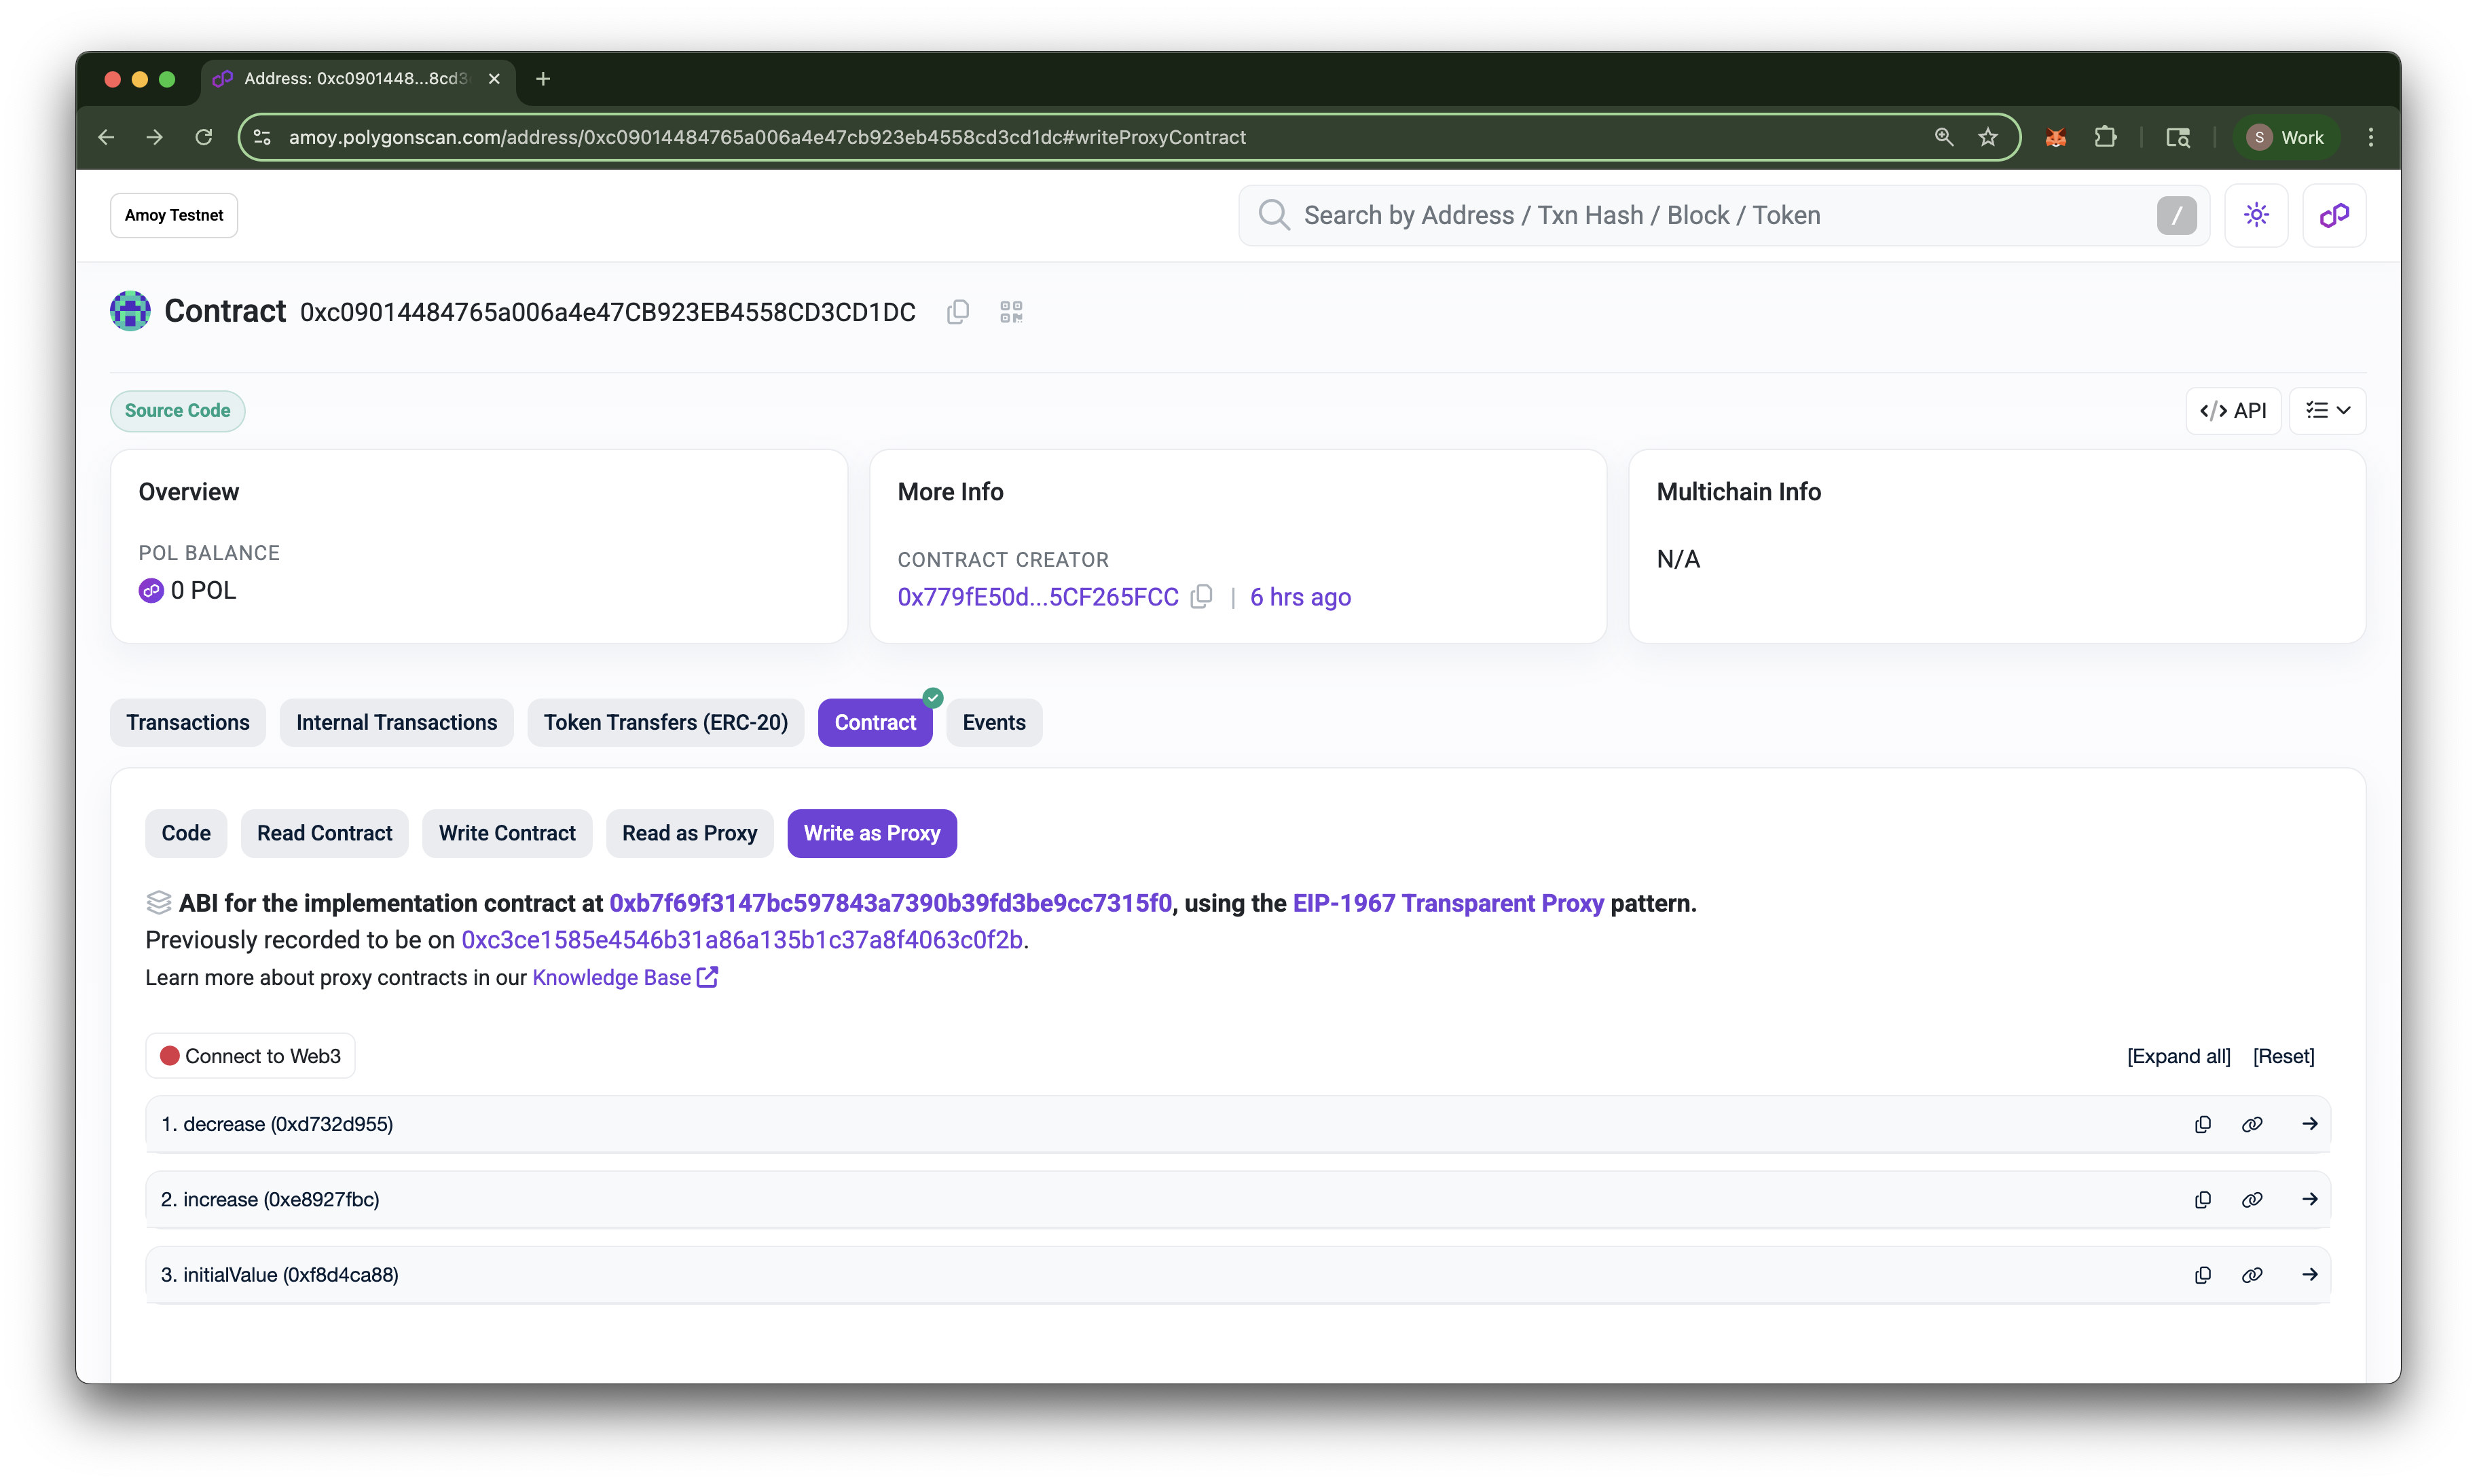
Click "Connect to Web3" to connect your MetaMask wallet. Then, execute the increment function by clicking "Write". Confirm the transaction in MetaMask.
After the transaction is confirmed, go back to the "Read as Proxy" tab and query the retrieve function one last time. The value will now be 43.
You have successfully performed a live contract upgrade, verified that the state was preserved, and confirmed that the new logic is active and can modify that state.
Conclusion
In this lesson, you have moved from local simulations to a live testnet environment, a critical step in becoming a proficient blockchain developer. You have seen tangible proof of how the proxy pattern allows for logic changes while maintaining a contract's state and address.
Key Takeaways:
- Hardhat can be configured with RPC URLs and private keys (using
.envfor security) to deploy to any EVM network. - Block explorers like Etherscan are essential tools for verifying contract state and interactions.
- Etherscan's "Read/Write as Proxy" feature allows you to interact with an upgradeable contract's state and functions through its ABI.
- A successful upgrade preserves the existing state while seamlessly introducing new functionality.
The ability to upgrade a contract comes with great power and great responsibility. The private key you used to run the upgrade script is, in this simple setup, an all-powerful "admin key." In our next lesson, we will delve into the security considerations and trade-offs of this model, exploring the risks of centralized admin control and best practices for managing it.