
Setting Up a Python Project Development Environment
Hello, and welcome to the first lesson. This first module establishes a reliable Python development workflow: isolated dependencies, clean code formatting, debugging, and small maintainable programs. These habits matter immediately for AI applications, where a project often depends on many libraries and needs to behave the same way on your laptop, a teammate’s machine, and later in deployment.
Today you will create a small Python project in VS Code with four essentials:
- A virtual environment for project-specific packages.
- A dependency file that records what the project needs.
- The Black formatter to keep code consistently styled.
- The VS Code debugger to pause a running program and inspect a defect.
The goal is not to memorize every command. The goal is to understand what each part protects you from and leave with a working starter project you can reuse.
The mental model: one project, one controlled workspace
In Java, a project’s Maven or Gradle build file declares dependencies and keeps builds repeatable. Python has several ways to manage this; for this course, we will begin with a simple and widely used combination:
| Project item | Purpose |
|---|---|
.venv/ | A local, isolated Python installation and its installed packages |
requirements.txt | A versioned list of packages needed to recreate the environment |
.vscode/settings.json | Project-specific VS Code behavior, such as formatting on save |
main.py | Your application code |
A virtual environment is not a Docker container and is not a full operating-system sandbox. It is simply an isolated directory that ensures package installations for one project do not accidentally alter another project.
For example, an early AI prototype might need one version of an LLM SDK, while a later service might need a newer version. Installing both globally can create hard-to-explain failures. With one virtual environment per project, each project controls its own packages.
Getting Started with Python in VS Code (Official Video)
Watch Getting Started with Python in VS Code from the Visual Studio Code channel for a quick visual orientation to the interpreter, the Python extension, and virtual environments.
Watch the extension setup to distinguish the Python interpreter from the VS Code Python extension. Then watch environment creation, focusing on the Command Palette workflow and the fact that VS Code selects the project environment after creating it.
Before proceeding, make sure you have:
- Python 3 installed.
- VS Code installed.
- The Python extension installed in VS Code. This normally also installs Pylance and the Python Debugger extension.
Open the VS Code integrated terminal with Terminal > New Terminal, then verify Python:
python --version
On macOS or Linux, if python is not found, try:
python3 --version
On Windows, py --version is also common. Use the command that successfully reports a Python 3 version; the examples below use python.
12. Virtual Environments and Packages
Read the relevant parts of Python’s official tutorial to reinforce why environments are isolated and how dependency files make a project reproducible.
In Section 12.1, read the version conflict problem. Then read Section 12.2, “Creating Virtual Environments,” through the activation and deactivation examples. In Section 12.3, “Managing Packages with pip,” find the discussion beginning with the requirements convention and continue through the example that installs packages from requirements.txt.
A useful rule for this course is:
Install packages only inside the active project environment, and record project dependencies in a file.
Build the project workspace
Create an empty folder somewhere you can find easily, such as ai-python-starter. Open that folder in VS Code using File > Open Folder. The folder, not an individual file, is your project workspace.
1. Create .venv
The least error-prone approach in VS Code is:
- Open the Command Palette with Ctrl+Shift+P on Windows/Linux or Cmd+Shift+P on macOS.
- Choose Python: Create Environment.
- Choose Venv.
- Choose the Python 3 interpreter you verified earlier.
- Wait for the
.venvfolder to appear. - Run Python: Select Interpreter and ensure the selected interpreter includes
.venv.
VS Code will usually activate the selected environment automatically in a new integrated terminal. Close any terminal that was already open, then create a fresh one.
Run this command:
python -c "import sys; print(sys.executable)"
The output should contain .venv. It will look broadly like one of these:
.../ai-python-starter/.venv/bin/python
or:
...\ai-python-starter\.venv\Scripts\python.exe
That is more reliable than trusting the terminal prompt alone.
If you prefer the terminal approach, use one command sequence for your operating system.
Windows PowerShell
py -m venv .venv
.\.venv\Scripts\Activate.ps1
Windows Command Prompt
py -m venv .venv
.\.venv\Scripts\activate.bat
macOS or Linux
python3 -m venv .venv
source .venv/bin/activate
When you are finished working for the day, you can leave the environment with:
deactivate
You do not need to deactivate it before closing VS Code.
2. Add a small Python program
Create a file named main.py in the project root. Paste in this intentionally imperfect program:
question = "How do I add citations to an agent answer?"
word_count = len(question.split())
limit = "6"  # Intentional defect: this is text, not a number.

if word_count > limit:
    print("Use a larger-context workflow.")
else:
    print("Use the standard workflow.")
This is a tiny version of a realistic AI-engineering decision: a system might select a workflow based on input size. The logic is simple, but it contains a type mistake that we will find with the debugger later.
3. Install and use a formatter
A formatter changes the appearance of code to follow a consistent style. It does not change the program’s intended behavior and does not replace tests or debugging.
We will use Black, a common Python formatter. With your .venv selected and active, run:
python -m pip install --upgrade pip
python -m pip install black
Use python -m pip rather than just pip. This makes the relationship explicit: you are running the pip associated with the Python interpreter you selected. It prevents a common beginner problem where the package is installed into one Python installation but the code runs with another.
Format the file from the terminal:
python -m black main.py
Then configure VS Code so formatting happens automatically:
- Open the Extensions view.
- Install Black Formatter.
- Open the Command Palette and choose Preferences: Open Workspace Settings (JSON).
- Add this configuration:
{
  "[python]": {
    "editor.defaultFormatter": "ms-python.black-formatter",
    "editor.formatOnSave": true
  }
}
Save main.py. Black should format spacing and layout automatically.
Your project folder now has a .vscode/settings.json file. This is useful because anyone opening the repository receives the same formatting behavior.
4. Create the dependency file
Now capture the installed packages and exact versions:
python -m pip freeze > requirements.txt
Open requirements.txt. You should see black and any packages that Black itself requires. The exact contents can differ by operating system and date, which is normal.
To recreate this environment on another machine, the workflow is:
python -m venv .venv
Activate the environment, then run:
python -m pip install -r requirements.txt
The key distinction is:
.venv/is a local generated directory. Do not commit it to Git.requirements.txtis a small text file that documents the packages. Do commit it to Git.
Create a file named .gitignore in the project root:
.venv/
__pycache__/
__pycache__/ contains generated Python bytecode. Like .venv/, it can be recreated and does not belong in source control.
At the end of this section, your project should look like this:
ai-python-starter/
├── .venv/
├── .vscode/
│   └── settings.json
├── .gitignore
├── main.py
└── requirements.txt
Use the debugger to inspect a real defect
Run the program normally first:
python main.py
It should fail with a TypeError. Read the final line of the error message, but do not try to solve it only by guessing. Instead, pause the program immediately before the failing comparison and inspect the values.
In main.py, click in the left gutter beside this line:
if word_count > limit:
A red dot appears. That is a breakpoint: an instruction to pause execution at a specific source-code line.
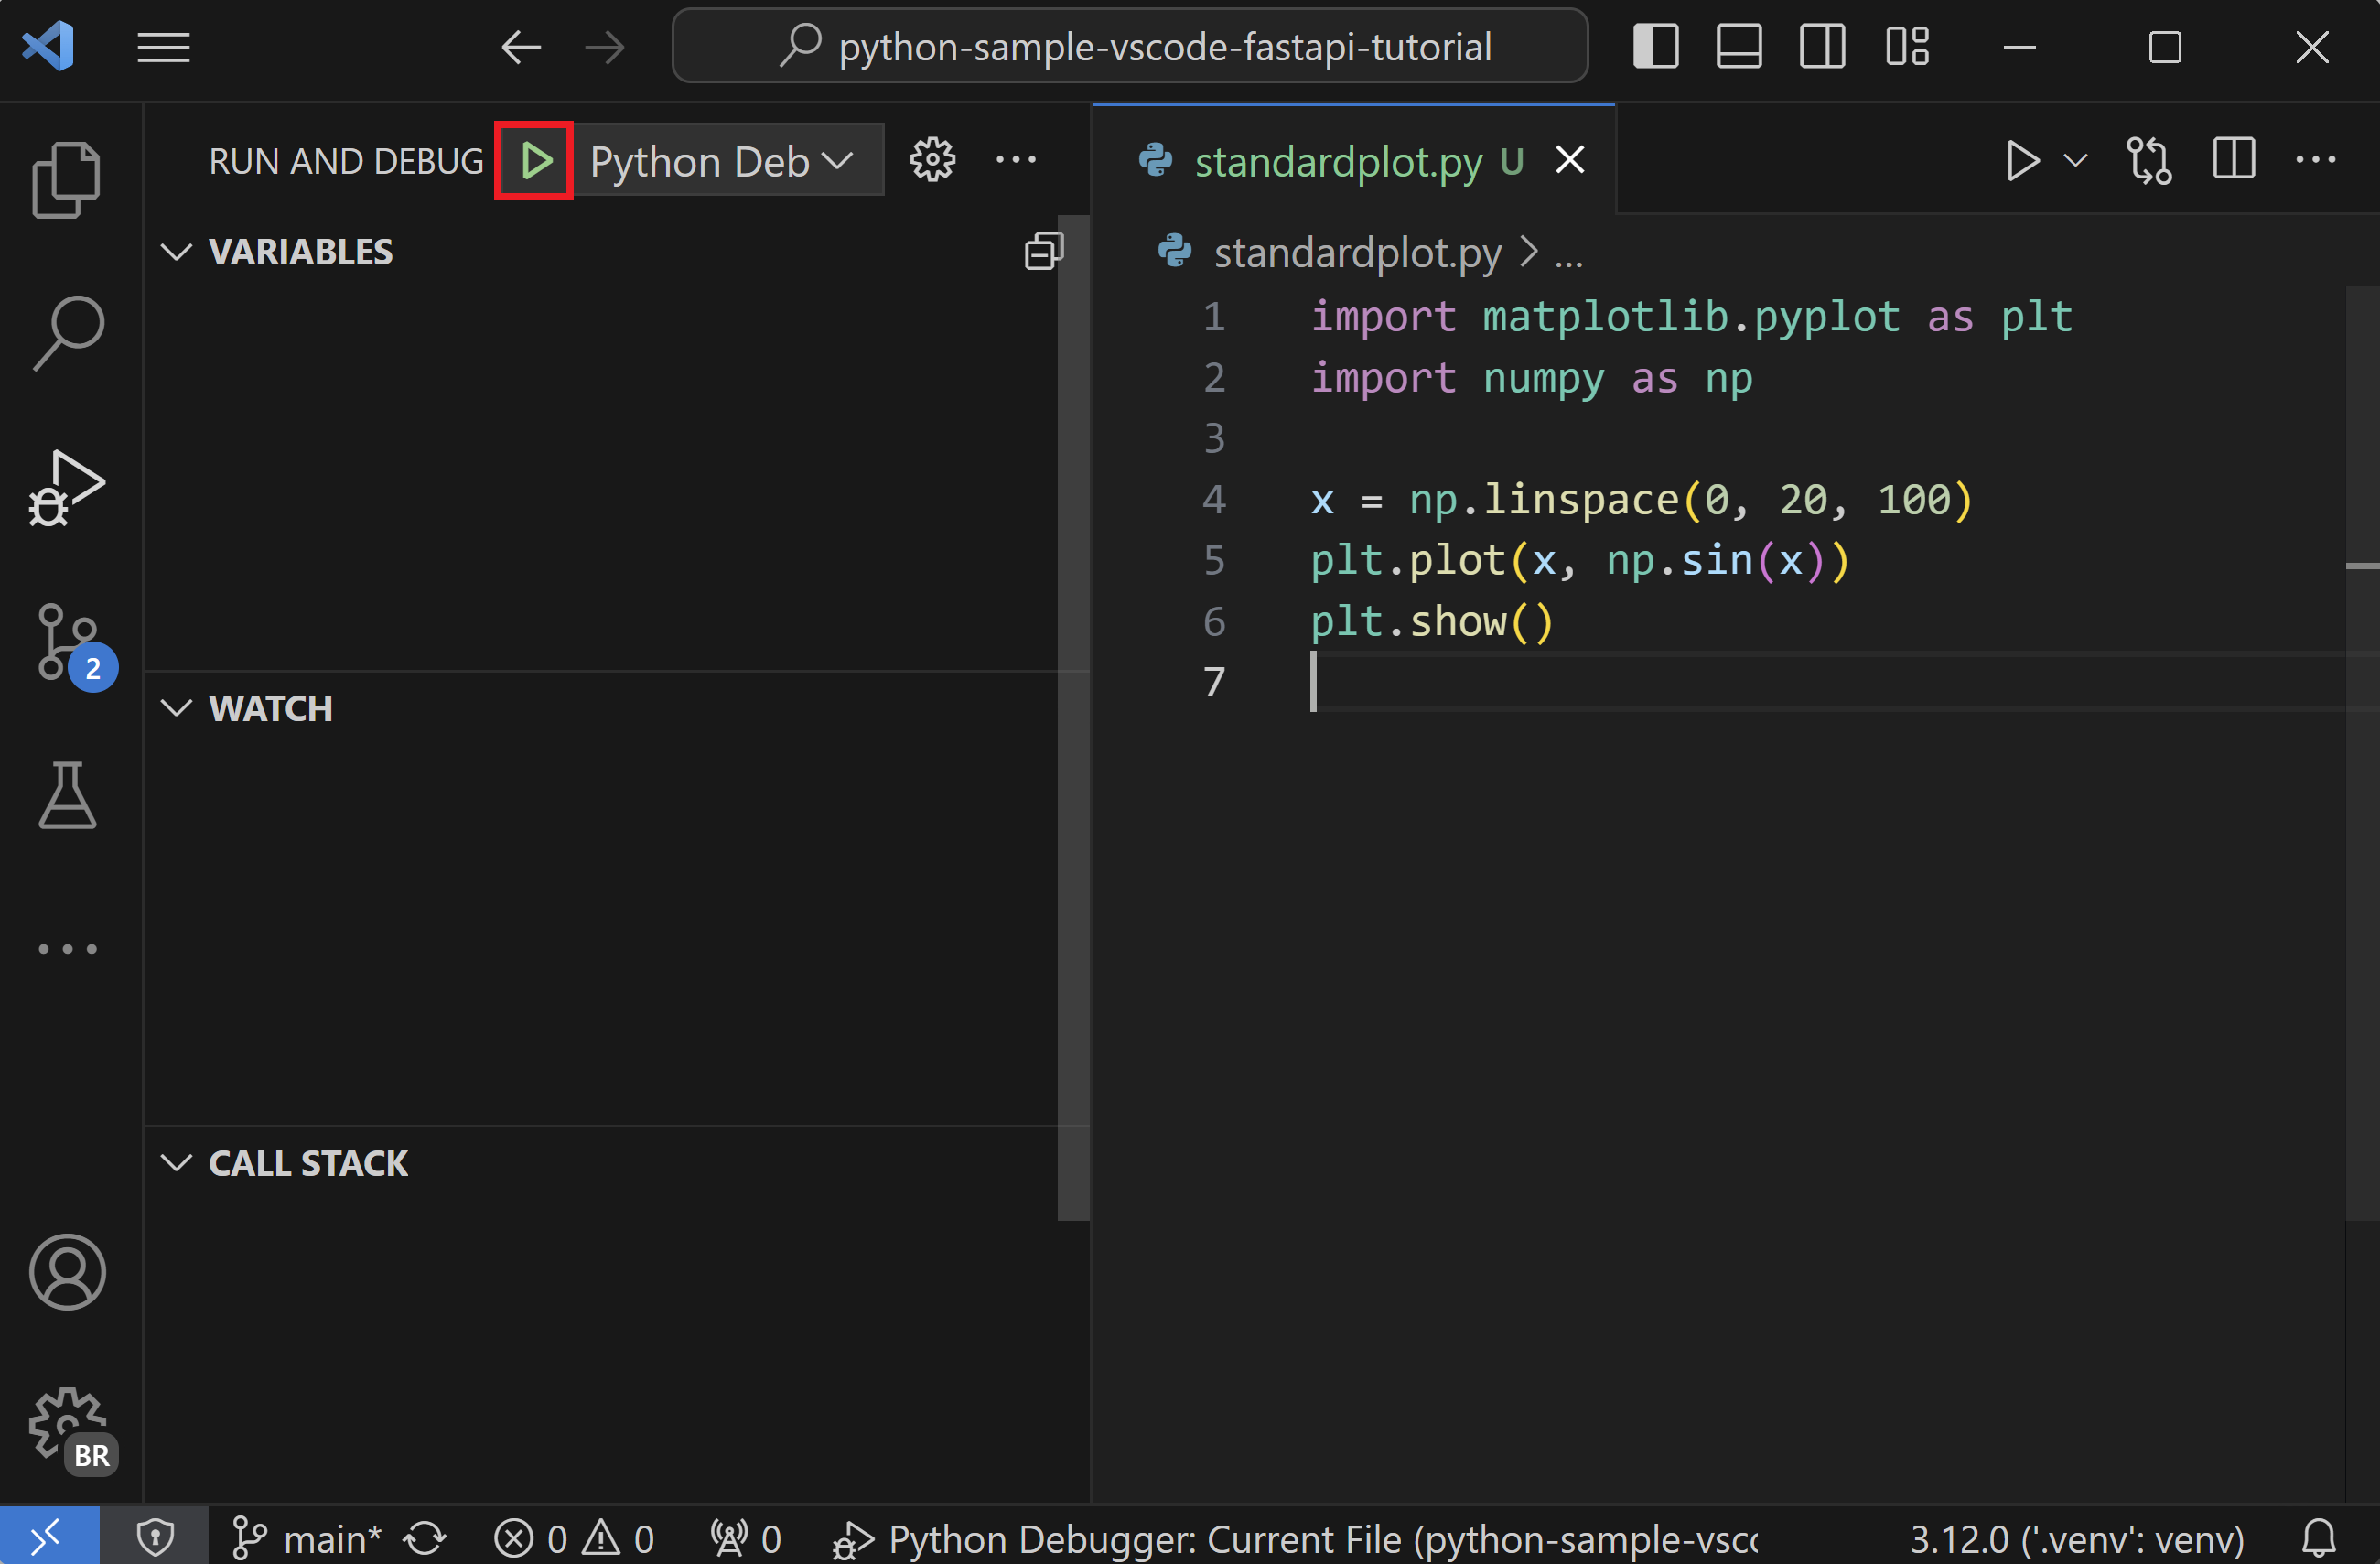
Start the debugger using one of these options:
- Press F5.
- Select Run > Start Debugging.
- Open the Run and Debug view and select the green play button.
If VS Code asks for a configuration, choose Python File. This runs the currently open file using the interpreter selected for the workspace. You do not need a custom launch.json file yet.
Getting Started with Python in VS Code
Read the official VS Code debugger walkthrough. Its example is different from ours, but the breakpoint, variable inspection, and stepping controls work the same way.
In the “Configure and run the debugger” section, read setting a breakpoint. Then read the paused state, followed by the debug controls. Focus on Variables, Step Over, Continue, and Stop; ignore the optional Debug Console exploration for now.
When execution pauses at the breakpoint, look in the Variables panel:
word_countis an integer, such as9.limitis the string"6".
The quotes are the clue. The program is attempting to compare a number with text. Python refuses because the comparison has no clear meaning.
Change the faulty line to:
limit = 6
Stop debugging, save the file, and start debugging again. This time:
- The program stops at the breakpoint.
- The Variables panel shows both
word_countandlimitas numbers. - Press F10 for Step Over to execute the comparison.
- Press F5 for Continue to let the program finish.
You should see:
Use a larger-context workflow.
This is the basic debugging loop:
- Reproduce the failure.
- Place a breakpoint near the suspicious logic.
- Inspect values and their types at runtime.
- Form a specific explanation for the failure.
- Change the code.
- Re-run to verify the fix.
A formatter would have made the code look consistent, but it would not have changed "6" into 6. Formatting and debugging solve different problems.
Completion check
Before ending the lesson, verify your environment rather than assuming it is correct:
python -m black --check main.py
python main.py
python -m pip show black
python -c "import sys; print(sys.executable)"
You want to confirm all of the following:
- Black reports that
main.pywould be left unchanged. - The program runs successfully.
- Black is installed.
- The Python executable path includes
.venv.
If an import or package command fails, first check the selected interpreter in the VS Code status bar. In nearly all early Python setup issues, VS Code or the terminal is using a different interpreter than expected.
Key takeaways
You now have a reusable Python project foundation:
- A virtual environment isolates each project’s packages.
python -m piphelps ensure packages are installed into the intended interpreter.requirements.txtlets another machine recreate the project dependencies.- Black makes formatting automatic and consistent, but it does not find logic errors.
- The VS Code debugger lets you stop execution and inspect actual runtime values instead of relying on guesses.
.venv/and generated cache files stay out of source control; source files, settings, and dependency files are committed.
In the next lesson, you will start writing idiomatic Python functions with conditionals, loops, and exception handling. The workspace you created today will be the place where you build and run those programs.
Can't find a good explanation? Sign up and we'll make it for you
Sign up