
Hello! Welcome to the fourth lesson in our module on n8n's core concepts.
In our last few lessons, we've explored the three main types of triggers: Schedule, Webhook, and Manual. You've learned how to start workflows based on time, external events, and direct manual intervention for testing. So far, we've mostly operated in a "development mode," building and testing our logic on the canvas.
Now, it's time to bridge the gap between building and deploying. This lesson tackles a fundamental concept that governs whether your workflows are simply saved drafts or live, running automations: the difference between active and inactive workflow states. Understanding this distinction is crucial for safely developing your workflows and successfully putting them into production.
1. The Two Execution Modes: Development vs. Production
In n8n, every workflow exists in one of two states: Inactive or Active. This is not just a label; it defines how the workflow can be executed. Think of it as the difference between code on your local machine and code deployed to a live server.
-
Inactive State (Development Mode): This is the default state for any new workflow. It's your sandbox. In this mode, the workflow will not run automatically. Its Schedule Triggers won't fire, and its Webhook Triggers won't listen for incoming requests. The only way to run an inactive workflow is by manually clicking Execute Workflow on the canvas, which is precisely what you need when you're building and debugging.
-
Active State (Production Mode): When you "activate" or "publish" a workflow, you are deploying it. In this state, its triggers become live. A Schedule Trigger will run at its specified interval, and a Webhook Trigger will start listening for HTTP requests at its production URL.
This official n8n documentation provides a concise summary of these two modes.
To start, please read this brief section from the n8n documentation titled 'Executions'. It formally defines the 'Manual' and 'Production' execution modes and explicitly links them to the Inactive and Active states.
Read the short section under the heading 'Execution modes'. This will give you the formal definition we'll build on.
2. Activating Your Workflow: Going Live
Switching a workflow from inactive to active is a deliberate action. In the n8n interface, this is typically done via a toggle switch.
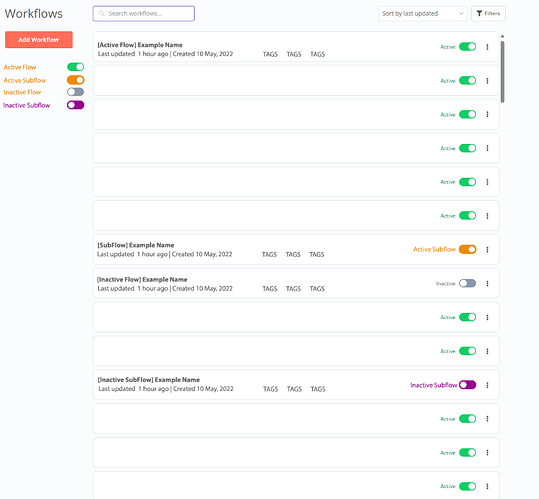
Once you've built and tested your logic, you flip this switch to "publish" it. Let's see exactly how this works and what its immediate effect is on a trigger.
n8n Beginner Course (5/9) - Core workflow concepts
The following clip from the official 'n8n Beginner Course' provides a perfect demonstration. You'll see a workflow being built with a Schedule Trigger and then activated to make it operational.
Watch from 01:00 to 03:15. Pay close attention to two key moments: The explanation that a workflow must be activated for its trigger to work (except when testing). The practical demonstration where a Schedule Trigger is configured, and then the workflow is activated, resulting in a confirmation message that it will now run on schedule.
As the video shows, you can test the steps of a workflow that has a Schedule Trigger, but the automated, time-based execution only begins once the workflow is active. The same principle applies to Webhook Triggers; their production URLs are only live and listening for requests when the workflow is active.
Test your understanding!
You have created a workflow that uses a Webhook Trigger. You've tested it thoroughly using the "Listen for Test Event" button and are confident the logic is correct. You then click the "Save" button and close the workflow editor. A few minutes later, your external service sends a POST request to the webhook's production URL.
Will your workflow run? Why or why not?
Show answer
No, the workflow will not run.
Saving a workflow does not activate it. You must explicitly toggle the workflow to the Active state. Since the workflow was left in the default inactive state, the Webhook Trigger's production URL is not listening for requests.
3. The Active State and Inter-Workflow Communication
The importance of the active state goes beyond just enabling triggers. It's the foundation for all production-level operations, including monitoring, logging, and even communication between workflows. A classic example of this is a dedicated error-handling workflow.
Imagine you have a complex, active workflow that processes customer orders. If it fails, you don't want it to just stop silently. Instead, you want it to trigger another workflow that logs the error and sends you a Slack notification.
For this to work, several conditions related to the active state must be met:
- The main workflow (processing orders) must be active so it can run and potentially fail.
- The error-handling workflow must also be active so its
Error Triggeris listening for failure events. - The main workflow's execution must result in a true "error" (a red, failed state), not just an unexpected outcome (a green, successful state).
This next video, while focused on error handling (a topic we'll cover in Module 6), contains excellent clips that perfectly illustrate the critical role of the active state.
One n8n Workflow for Unlimited Error Handling (Step-by-Step)
This video from Nate Herk demonstrates an error-handling setup. We'll watch a few specific clips that highlight why the active state is non-negotiable for this kind of production pattern.
Please watch the following segments: 00:32 - 00:45: The creator explicitly states that for one workflow to trigger an error workflow, it has to be active. Notice this is the very first thing he does. 01:11 - 03:03: Watch how an active workflow is intentionally broken. Observe its execution status turns red ('error'), and this immediately triggers the separate, active error-logging workflow. 06:56 - 08:11: This is a crucial, nuanced point. The creator shows an example where a node fails but the workflow execution itself remains green. Notice his conclusion: this did not trigger the error workflow. This demonstrates that only a genuine, workflow-halting error in an active workflow will trigger the Error Trigger.
This example reinforces the core idea: the "active" state is what connects your workflow to the n8n production engine, enabling it to run automatically, log its final status (success or failure), and interact with other parts of the n8n ecosystem.
Conclusion
You now understand the critical distinction between building a workflow and deploying it. The active/inactive toggle is the gatekeeper that separates your development sandbox from your live production environment.
Key Takeaways:
- Inactive State: The default for development. Workflows can only be run manually from the editor. Automatic triggers (Schedule, Webhook, etc.) will not fire.
- Active State: The "live" or "production" mode. Activating a workflow enables its automatic triggers to run as configured.
- Activation is a Deliberate Step: You must explicitly activate a workflow to deploy it. Simply saving it is not enough.
- Production Functionality: The active state is a prerequisite for production-level features like automated trigger execution and inter-workflow communication, such as error handling.
In our previous lessons, we learned how data enters a workflow through triggers. In this lesson, we learned how to "turn on" those triggers. Now, we need to get better at working with the data itself. In the next lesson, we will dive into the Expression Editor, the primary tool you'll use to access, combine, and manipulate data from previous nodes.